In our last session, you became acquainted with the fundamental layout of the Godot editor, learning the roles of the Scene, FileSystem, and Inspector panels. Now, we'll put that knowledge into action. Today's goal is to create your very first scene, populate it with building blocks called nodes, and understand how they are organized. This process is the heart of building anything in Godot, from your game's hero to the world they explore.
By the end of this lesson, you will be able to construct a simple scene, add nodes to it, and grasp the essential concept of the parent-child hierarchy that governs how all game objects are structured.
What are Scenes and Nodes?
Before we start building, let's clarify the two most important terms in Godot: Nodes and Scenes. Think of nodes as individual ingredients, each with a specific purpose—one might display an image, another might play a sound, and a third could detect collisions. A scene is the final recipe, a collection of nodes organized together to create a complete, functional object, like a player character or an interactive treasure chest.
The official Godot documentation provides an excellent explanation of these core concepts.
Nodes and Scenes — Godot Engine (stable) documentation in English
This reading will give you a solid conceptual foundation for what we are about to build. It explains what nodes are and how they are combined into scenes.
Please read the first two main sections of the page. Start with the introduction to nodes and scenes. Focus on understanding that nodes are building blocks and that a scene is a tree of nodes.
Creating Your First Scene
With the concepts clear, let's get practical. An empty Godot project is a blank canvas. The first step in creating anything is to make a new scene. When you start with an empty project, the Scene dock gives you options to create a "root node" for your new scene. The root node is the top-level container for everything else you will add.
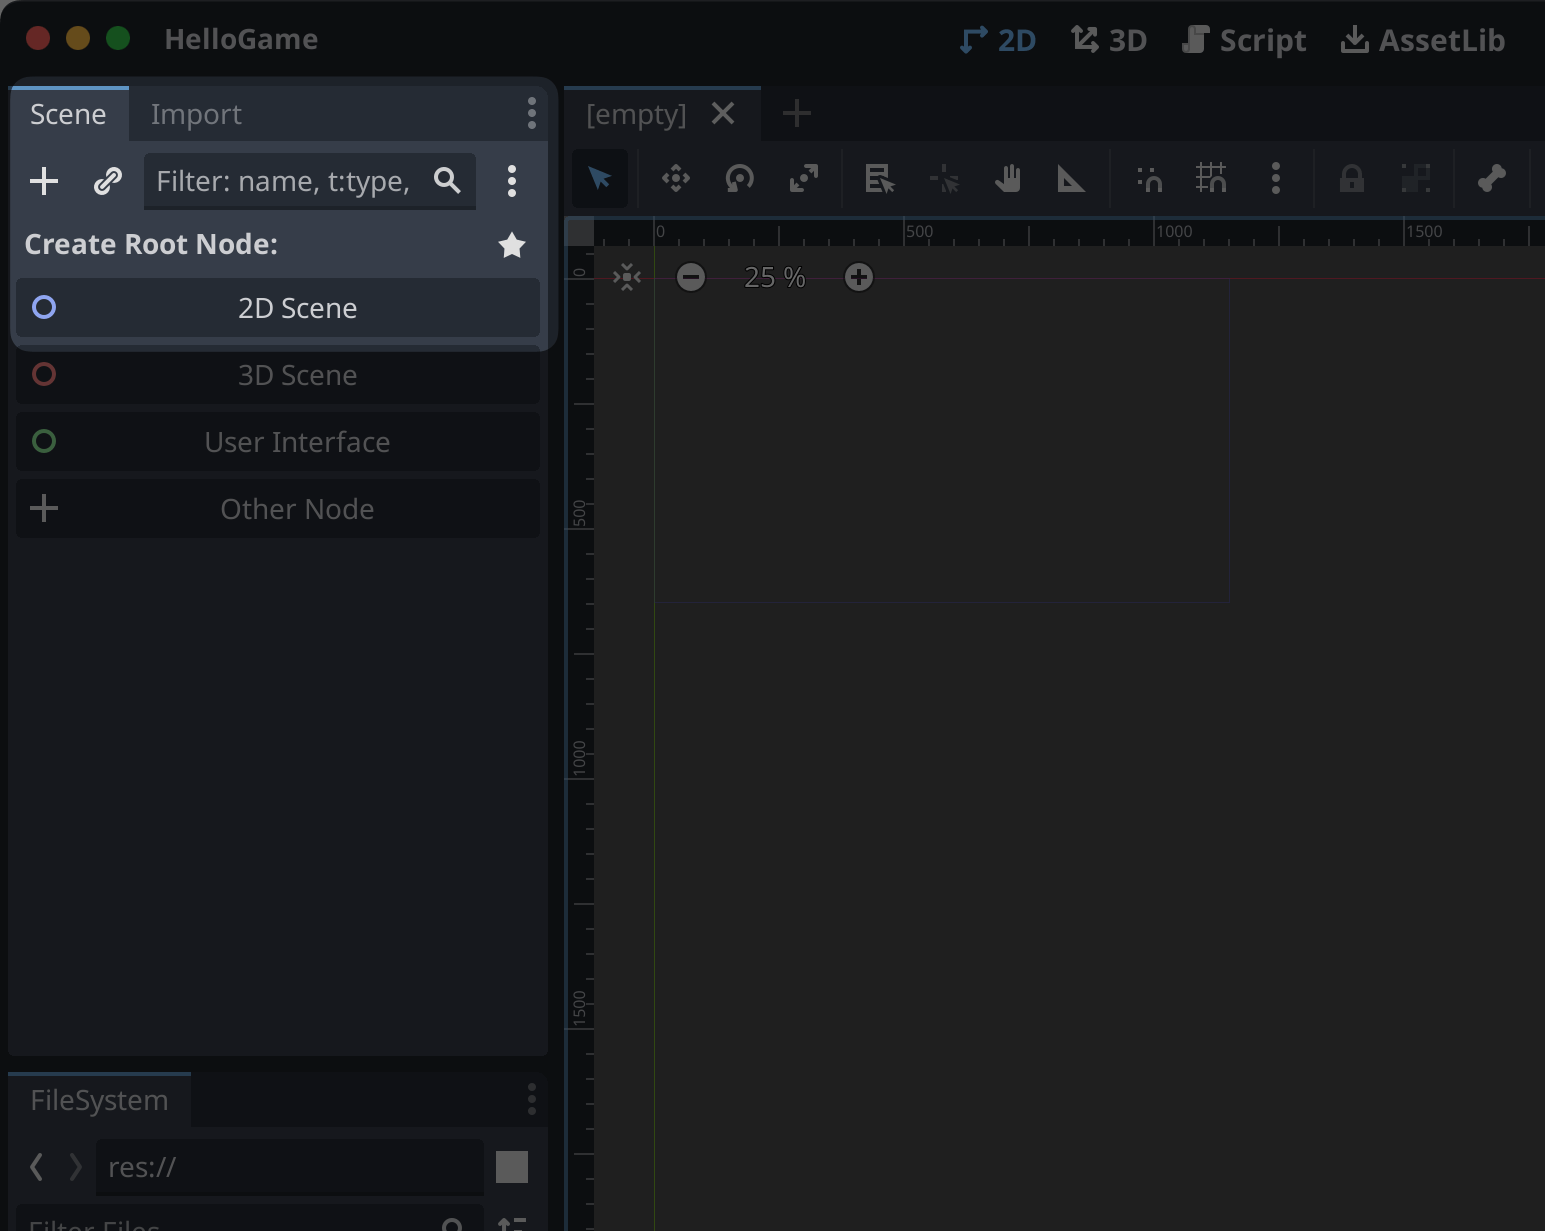
We are going to create a scene that displays the classic "Hello World" message. This is a tradition for beginners in programming and a great way to see an immediate result. This exercise will walk you through creating a scene, adding a node, changing its properties in the Inspector, and running the scene to see it live.
The following reading from the official documentation provides a perfect, step-by-step guide. Follow its instructions within your own Godot project.
Nodes and Scenes — Godot Engine (stable) documentation in English
This guide will walk you through the entire process of creating, saving, and running a simple scene. It's a hands-on exercise that ties together everything from the last lesson and this one.
Start at the section titled Creating your first scene. Follow all the steps to add a Label node, change its text property to "Hello World", move it, and then save and run the scene. Don't worry about the final part on "Setting the main scene" for now; we'll cover that later.
After completing those steps, you will have successfully created, modified, and run a scene with a single node. You've made something appear in your game window!
The Parent-Child Hierarchy
Your "Hello World" scene has only one node. However, nearly every object in your game will be composed of many nodes working together. To keep them organized, Godot uses a parent-child hierarchy.
When you add a node to another node, the new node becomes a "child," and the original becomes its "parent." This creates a tree-like structure in the Scene dock.

Why is this so important?
- Organization: It groups all the components of an object together. The
Playerscene contains everything that makes the player work. - Transformation: Child nodes inherit the position, rotation, and scale of their parent. If you move the
Playerparent node, its child sprite, collision shape, and camera all move with it automatically. This is incredibly powerful and saves a huge amount of work.
Let's demonstrate this in your project.
- Make sure your
label.tscnscene is open. - Select the
Labelnode in the Scene dock. - Click the
+button at the top of the Scene dock (the "Add Child Node" button). - In the "Create New Node" dialog, search for
Node(the most basic type) and click "Create".
You will now see the new Node appear indented underneath your Label node. You have just created your first parent-child relationship! The Label is the parent, and the new Node is its child. While this specific combination doesn't do anything visually, you have just performed the fundamental action for building complex game objects.
Conclusion
In this lesson, we transitioned from theory to practice. You took your knowledge of the Godot editor and used it to build, save, and run your very first scene.
Here are the key takeaways:
- Scenes are reusable blueprints for game objects, composed of nodes.
- Nodes are the specialized building blocks that provide functionality.
- Every scene has a root node, which is the top-level parent.
- Nodes are organized in a parent-child hierarchy, which allows you to group components and have them move together as a single unit.
You've now mastered a critical piece of the Godot workflow. In the next lesson, we will focus on one of the most important nodes for any 2D game: the Sprite2D. You'll learn how to add it to a scene and configure it to display an image, taking the first visual step towards creating your player character.