Welcome back! In our last lesson, you successfully installed the Meta Pixel base code using Google Tag Manager, enabling your website to send PageView events to Meta. This was a fantastic first step in connecting your hotel's website to your advertising platform.
Today, we will build upon that foundation to fulfill the learning outcome: Configure standard and custom events for the Meta Pixel to align with GA4 events.
Simply knowing which pages users visit is not enough. To truly optimize your ad campaigns, you need to understand the specific, valuable actions they take—like viewing a room, starting the booking process, or completing a reservation. We will configure your Meta Pixel to track these crucial actions, using the very same GA4 event data layer you've already set up. This creates a consistent and powerful "single source of truth" for your analytics.
By the end of this 60-minute lesson, you will have a robust Meta event tracking system that measures the full guest journey, ready to inform your ad optimization and audience-building strategies.
1. Standard vs. Custom Events: What Should You Track?
Meta allows you to track two types of events. Understanding the difference is key to building a smart tracking strategy.
- Standard Events: These are predefined actions that Meta's system recognizes, such as
Purchase,Lead, orViewContent. Because Meta understands these events across all advertisers, they are essential for campaign optimization, conversion reporting, and unlocking features like value-based optimization. - Custom Events: These are events you name and define yourself to track actions unique to your business. For a hotel, this could be something like
used_amenity_filterorviewed_photo_gallery. While valuable for creating niche audiences, you cannot use custom events as your primary optimization goal in a conversion campaign.
For our purposes, we will focus on implementing the most critical standard events for a hotel, mapping them directly from your existing GA4 setup.
Meta Pixel Tracking using Google Tag Manager & GA4 ...
To solidify your understanding, please read this brief section from an excellent guide by Digital Microenterprise. It clearly explains the purpose of each event type.
Read the section titled 'Understanding Meta Pixel Events: Standard vs Custom'. Focus on the 'Why Use Standard Events?' and 'Why Use Custom Events?' parts to grasp their strategic differences.
2. A Crucial Refactor: Separating Code and Events with Tag Sequencing
In the last lesson, our PageView tag contained both the Pixel initialization code and the PageView event tracking command. This works fine for a single tag, but it becomes problematic when we add more events.
Any new event tag we create (e.g., for a booking) will also need the base Pixel code to have loaded first. Because GTM fires tags asynchronously, we can't guarantee the order. The solution is to refactor our setup:
- Create a "Base Code" Tag: This tag will only contain the Pixel initialization code. It won't track any events itself.
- Update the
PageViewTag: This tag will now only track thePageViewevent. - Use Tag Sequencing: We'll configure all our event tags (including
PageView) to fire only after the Base Code tag has successfully executed.
This ensures the Pixel is always ready before we try to send it any event data, making our tracking far more reliable.
[Complete Training] Meta Facebook Pixel Tracking with Google Tag Manager
The concept of separating the base code and using tag sequencing is a fundamental best practice in GTM. This video from MeasureSchool provides a masterclass on how and why to do this.
Watch from 00:15:40 to 00:22:51. Pay close attention to these key steps: Splitting the code: See how he removes the fbq('track', 'PageView') line from the main tag, leaving only the initialization part. Creating a separate PageView tag: Notice how he creates a new tag just for the PageView event. Configuring Tag Sequencing: This is the most important part. Understand how he sets the base pixel as a 'setup tag' that must fire before the event tag. Setting Firing Options: Observe the 'Once per page' setting on the base tag, which prevents it from firing unnecessarily multiple times. Please follow these steps to refactor your own GTM setup now. You will have two tags: Meta - Base Code and Meta - PageView.
Test your understanding!
After refactoring, your new Meta - Base Code tag has no trigger. How does it fire?
Show answer
The Meta - Base Code tag doesn't need its own trigger because it's fired by the Tag Sequencing setting within other tags. When the Meta - PageView tag (which has an 'All Pages' trigger) is about to fire, GTM first checks its sequencing settings, sees that the Meta - Base Code tag is its 'setup tag', and fires it first. The 'Once per page' setting ensures it only runs once, even if multiple event tags call it on the same page.
3. Aligning Hotel Events: From GA4 to Meta
Now for the core of our task. We will create Meta event tags that listen for the GA4 custom events you've already configured. This ensures perfect alignment between your analytics and advertising platforms.
For a hotel, the key e-commerce journey maps like this:
| GA4 Event Name | Meta Standard Event | User Action |
|---|---|---|
view_item |
ViewContent |
User views a specific room detail page. |
begin_checkout |
InitiateCheckout |
User starts the booking process. |
purchase |
Purchase |
User completes a booking. |
generate_lead |
Lead |
User submits an event/wedding inquiry. |
To implement this, we'll follow a pattern for each event:
- Create a Trigger: A "Custom Event" trigger in GTM that listens for the GA4 event name (e.g.,
purchase). - Create a Tag: A "Facebook Pixel" tag that fires the corresponding Meta event (e.g.,
Purchase). - Pass Dynamic Data: We'll use GTM variables to pass crucial data like the booking value, currency, and room type to Meta.
- Set Tag Sequencing: Ensure our
Meta - Base Codetag fires before this new event tag.
4. Passing Dynamic Data and Preparing for the Future
Tracking that a booking happened is good; tracking that a $1,250 booking happened is powerful. This is how you calculate Return on Ad Spend (ROAS).
To do this, we need to pull dynamic values from the GA4 data layer. Furthermore, to prepare for our next lesson on the Conversions API (CAPI), we need to add a unique Event ID to every event. This allows Meta to deduplicate events sent from both the browser and a server, preventing double-counting.
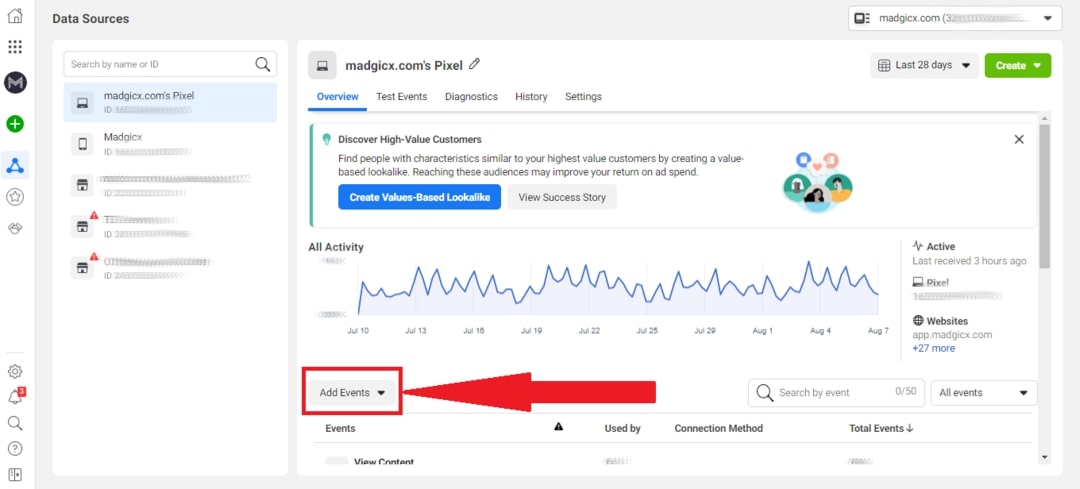
The following resource provides a comprehensive guide to creating the necessary variables and tags.
Meta Pixel Tracking using Google Tag Manager & GA4 ...
This guide is your primary recipe for the rest of the lesson. It details how to set up the variables and tags needed to connect your GA4 data layer to your Meta Pixel.
Follow these sections step-by-step in your GTM container: Step 3: Creating the Unique event_id Variable (in Section 0): This is critical. Install the 'Unique Event ID' template from stape.io and create the {{Event ID}} variable. This future-proofs your setup. Step 4 & 5: Creating Data Layer and Custom JavaScript Variables (in Sections 0 & 1): You will create variables to read the GA4 ecommerce data (DLV - ecommerce.value, etc.) and transform it into the format Meta needs (CJS - GA4 Items to Meta content_ids). This is the magic that aligns the two platforms. Part 2: Purchase Conversion & Other E-commerce Event Tracking (in Section 3): Follow the 'Trigger Setup' and 'Tag Setup' instructions for view_item -> ViewContent and purchase -> Purchase. Use the variable mapping tables provided. Part 3: Lead Conversion Tracking (in Section 4): Read this section to understand how you would track a generate_lead event (like a wedding inquiry form) as a Meta Lead event. Important: For every new Meta tag you create, remember to go to 'Advanced Settings' > 'Tag Sequencing' and set your Meta - Base Code tag as the setup tag.
A Note on Booking Engine Data Layers:
The guide above assumes a standard GA4 e-commerce data layer. Your specific hotel booking engine might use slightly different variable names. For example, the RoomRaccoon booking engine, as detailed in their support article (LINK), uses eventModel.value instead of ecommerce.value.
Always use GTM's Preview mode to inspect the "Data Layer" tab after an event (like a test booking) to see the exact variable names your system uses. You can then adjust your Data Layer Variables in GTM accordingly.
5. Verification: Trust, but Verify
An incorrect setup is worse than no setup at all. You must now thoroughly test your work using the three-tool verification process:
- GTM Preview Mode: Confirms your triggers fire and your tags are populated with the correct variable data.
- Meta Pixel Helper: The Chrome extension that confirms the data is correctly sent from your browser.
- Meta Events Manager (Test Events): The ultimate source of truth. It confirms what data Meta's servers actually received.
Meta Pixel Tracking using Google Tag Manager & GA4 ...
Now, let's ensure everything is working perfectly. The final part of the Digital Microenterprise guide provides an exceptionally detailed walkthrough of the verification process.
Read the section 'Verification and Debugging: Making Sure Everything Works'. Follow the steps to test your ViewContent and Purchase events. For the Purchase event, it is absolutely critical that the value, currency, and event_id you see in all three tools match perfectly.
Once you've verified that all events are firing correctly with the right dynamic data, you can Submit and Publish your GTM container.
Conclusion
Excellent work! This was a technically demanding lesson, but you have now built a sophisticated and reliable conversion tracking system for your Meta ads. By aligning your Meta events with your GA4 data layer, you've created a consistent measurement framework that will be the bedrock of your paid advertising strategy.
Key Takeaways:
- Standard Events like
PurchaseandViewContentare crucial for ad optimization. - Tag Sequencing is a fundamental GTM practice to ensure the Meta base code always loads before any event tag.
- You can map your existing GA4 data layer events directly to Meta events, creating a single source of truth.
- Passing dynamic value and currency is essential for measuring ROAS.
- Implementing a unique
event_idis a critical best practice that prepares your setup for server-side tracking.
What's Next?
You've now mastered client-side (browser) tracking with the Meta Pixel. However, with increasing browser privacy features and ad blockers, relying solely on the browser can lead to data loss.
In our next lesson, Explain the role of the Meta Conversions API (CAPI) and how it complements the Pixel for robust tracking, we will explore how sending events directly from your server to Meta's server creates a more durable and complete data picture. The event_id you implemented today is the key that will unlock this powerful capability.