Welcome back! In our last lesson, you built a sophisticated GA4 event tracking system within Google Tag Manager, enabling you to measure the entire guest booking journey on your website. This demonstrated the power of GTM as a central hub for your analytics tools.
Today, we're going to expand on that power. This lesson directly addresses the learning outcome: Set up the Meta Pixel using Google Tag Manager. Since you already have experience with Meta ads, you'll know how crucial the Pixel is for measuring campaign success. We're going to install it the modern, efficient way—using the GTM container you've already put in place. This means no more editing website code. By the end of this lesson, you will have the foundational Meta Pixel firing on your website, ready to track user activity for your advertising campaigns.
1. What is the Meta Pixel and Why Use GTM?
The Meta Pixel is a small piece of code that you place on your website. It acts as a bridge between your hotel's website and your Meta Ads account. When a user takes an action on your site (like viewing a room), the Pixel "fires" and sends that information to Meta. This data is invaluable for:
- Tracking Conversions: See how many bookings or leads your ads are directly generating.
- Optimizing Ad Delivery: Meta's algorithm can learn what kind of user is most likely to book a room and show your ads to more people like them.
- Building Custom Audiences: Create remarketing lists of people who visited your "Special Offers" page but didn't book, or target users who viewed a specific room type.
You already have GTM installed, so using it to manage the Pixel is the logical next step. It keeps all your tracking scripts (GA4, Meta, and others in the future) in one organized dashboard, which you can update and test without needing a developer.
Meta Facebook Pixel Conversion Tracking with Google Tag Manager | Lesson 5 GTM for Beginners
To start, watch this brief introduction from MeasureSchool. It nicely summarizes why the Pixel is so important for paid advertising and sets the stage for installing it with GTM.
Watch the first minute of the video (00:00 - 01:02). This will reinforce the strategic importance of what we're about to implement.
2. Creating Your Meta Pixel in Meta Events Manager
Before we can add the Pixel to GTM, we need to create it within your Meta Business account and get its unique ID. Meta now calls a Pixel a "Data Set," but the concept is the same.
The process involves navigating to the Events Manager, connecting a new "Web" data source, and giving your Pixel a name. The most important output of this step is the Data Set ID (or Pixel ID), which is a long string of numbers. This ID is how GTM will know which Meta account to send data to.
The Easiest Facebook Ads Pixel Tutorial (With GTM) | 2025 Step-by-Step Tutorial
The following video by Ivan Mana provides a clear, up-to-date walkthrough of creating a Pixel and finding the ID.
Watch from 00:50 to 01:50. Follow the steps to create a new Data Set. When you're done, copy the 'Data set ID' and keep it handy for the next step. You can ignore the parts about assigning people and assets for now if you are the only user.
Once you have your ID, you can close the setup windows in Meta. We won't be using any of their manual or partner integration installation options, as we'll be doing everything through GTM.
3. Installing the Base Pixel Tag in GTM
The "base pixel" is the fundamental installation. Its job is to fire a PageView event on every single page of your website. This tells Meta whenever a user views any page, forming the foundation for all other tracking.
We will use GTM's "Community Template Gallery" to install the pixel. This is the modern, recommended method because it uses a pre-built, standardized tag template, making the setup process much simpler and less error-prone than manually copying code.
Follow these steps in your Google Tag Manager container:
- Navigate to Tags and click New.
- Name your tag something clear, like
Meta - Base Pixel - PageView. - Click on Tag Configuration.
- Instead of choosing a built-in tag, click on Discover more tag types in the community template gallery.
- In the search bar, type
Facebook Pixeland choose the template by facebookincubator. - Click Add to workspace and confirm any permissions.
- In the tag configuration screen that appears, paste your Meta Pixel ID (the Data Set ID from the previous step) into the corresponding field.
- Leave the "Standard" event name as
PageView. This is exactly what we want for the base pixel. - Now, click on the Triggering section below.
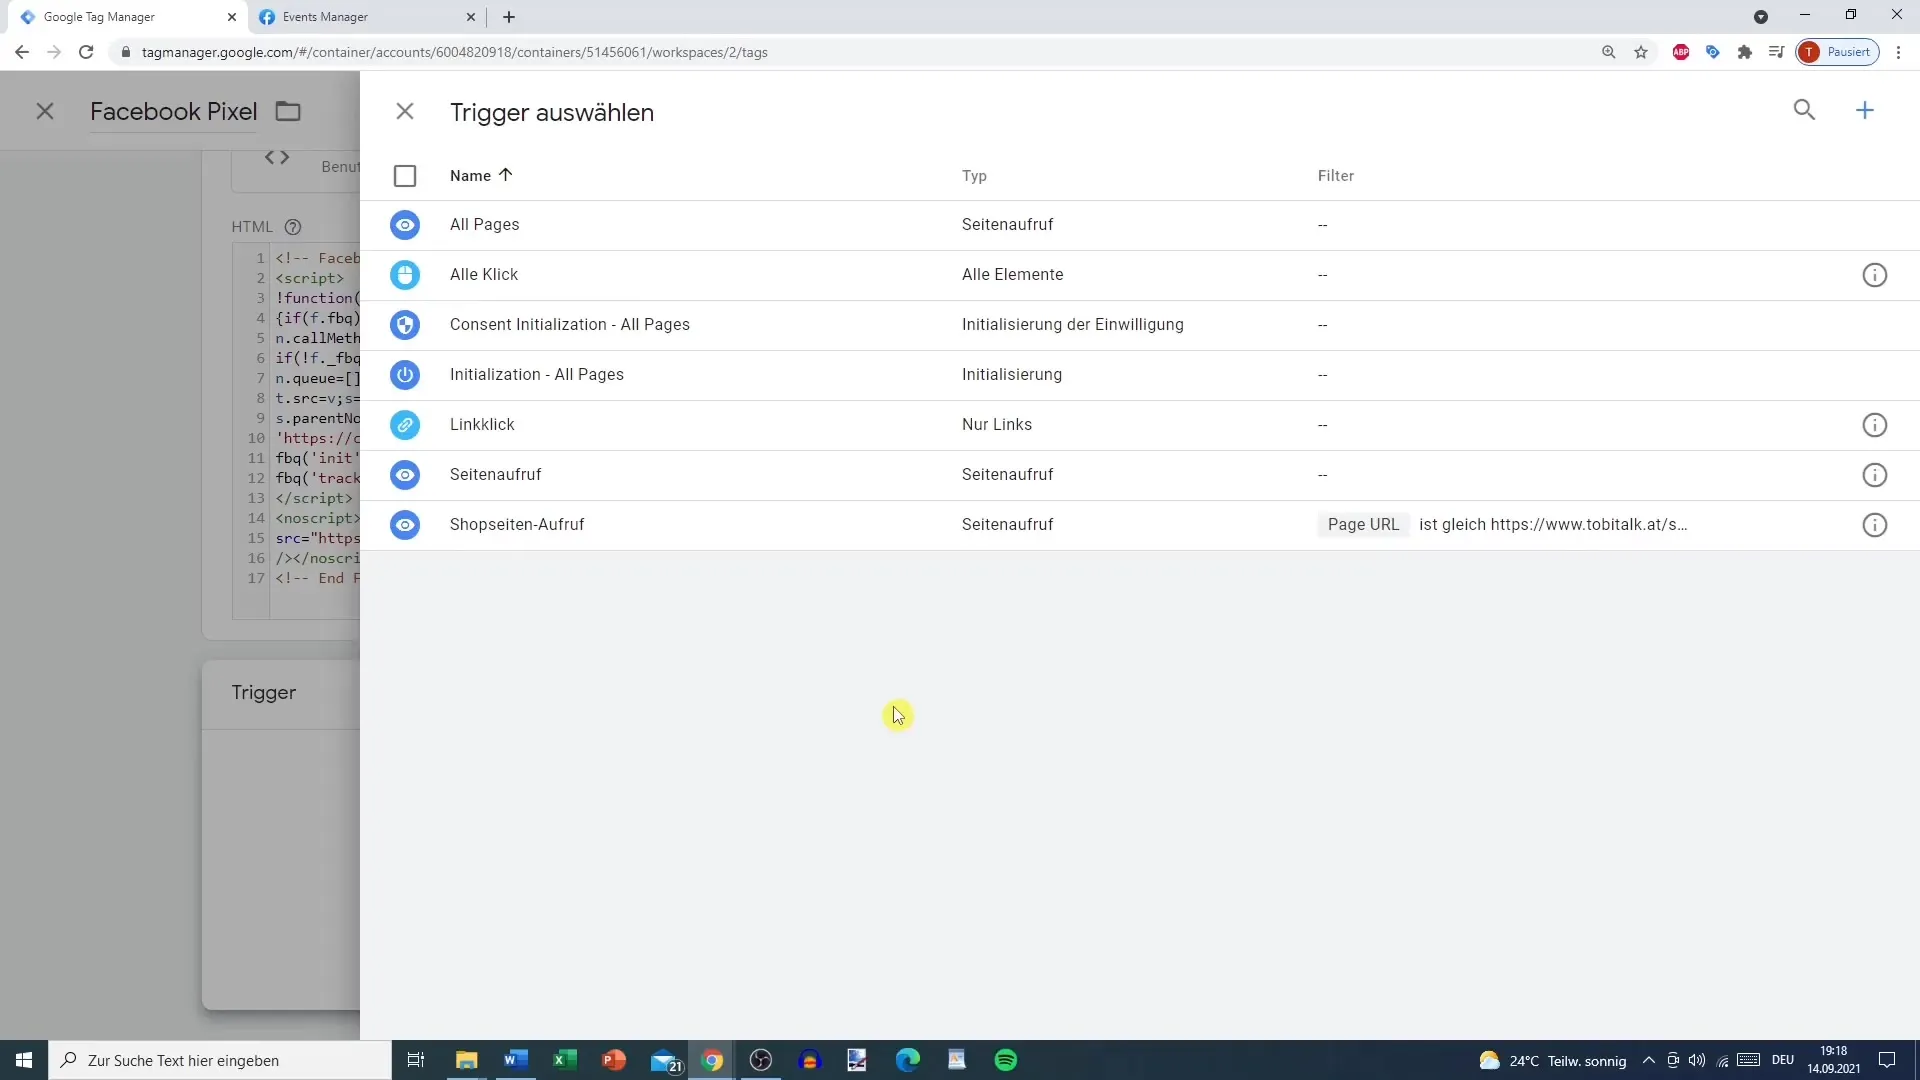
*You need to tell GTM when to fire your new Meta Pixel tag. For the base pixel, we want it to fire on every page.*
10. Select the All Pages trigger. This is a default trigger available in all GTM containers.
11. Click Save.
That's it! You have now configured the Meta Pixel tag and told it to fire on every page view.
Test your understanding!
A colleague suggests you should have installed the Meta Pixel by creating a "Custom HTML" tag in GTM and pasting the entire code block from Meta. While this would work, why is using the Community Template Gallery method generally better?
Show answer
Using the template from the Community Template Gallery is better for a few key reasons:
- Simplicity & Accuracy: It reduces the risk of copy-paste errors in the code. You only need to input the Pixel ID.
- Maintenance: The template is maintained by the community (in this case, Meta's team). If Meta updates its Pixel requirements, the template will likely be updated, simplifying future maintenance.
- Security: Templates in the gallery are vetted by Google to prevent malicious code from being easily distributed.
- Standardization: It provides a standardized interface for setting up events, which will be helpful in our next lesson.
4. Verification: Test, Test, and Test Again
A tracking tag is only useful if it works correctly. Before publishing your GTM container, you must verify that the new Meta Pixel tag is firing as expected. We will use the same GTM Preview mode as in our previous lessons, along with a new tool: the Meta Pixel Helper.
Meta Facebook Pixel Conversion Tracking with Google Tag Manager | Lesson 5 GTM for Beginners
This video from MeasureSchool clearly demonstrates the verification process using GTM's Preview mode and the essential Meta Pixel Helper browser extension.
Watch from 02:53 to 04:11. First, make sure to install the 'Meta Pixel Helper' extension for Chrome. Then, follow the video's steps: open GTM Preview mode, navigate to your site, and check both the Tag Assistant window and the Pixel Helper icon to confirm the 'PageView' event has fired.
To summarize the verification workflow:
- Install Meta Pixel Helper: Find it on the Chrome Web Store.
- Enable Preview Mode: Click the "Preview" button in GTM.
- Navigate Your Site: Your website will open in a new tab with the GTM debugger connected.
- Check Tag Assistant: In the debugger window, you should see your
Meta - Base Pixel - PageViewtag in the "Tags Fired" section. - Check Pixel Helper: On your website tab, the Meta Pixel Helper extension icon should light up blue with a small green number on it. Clicking it should show a
PageViewevent was detected successfully. - (Optional) Check Meta Events Manager: Inside your Meta Events Manager, go to the "Test Events" tab. You should see the
PageViewevents arriving from your browser activity.
Once you have confirmed the tag is firing correctly on multiple pages, you can go back to GTM, click the Submit button, and Publish your changes to make the Pixel live for all your website visitors.
Conclusion
Congratulations! You have successfully leveraged Google Tag Manager to deploy a foundational piece of your digital marketing toolkit. This lesson demonstrates the real power of a tag management system: adding a completely new tracking tool to your site without touching a single line of code.
Key Takeaways:
- The Meta Pixel is critical for tracking ad conversions, optimizing campaigns, and building remarketing audiences.
- Using GTM's Community Template Gallery is the modern, recommended way to install the Meta Pixel.
- The base pixel setup involves creating a tag that fires a
PageViewevent on the All Pages trigger. - Always verify your setup using GTM Preview Mode and the Meta Pixel Helper extension before publishing.
What's Next?
We've taught Meta that users are visiting your pages. In our next lesson, Configure standard and custom events for the Meta Pixel, we will teach it what they are doing. We will create new tags to track specific, valuable actions like viewing a room, starting the checkout process, and completing a booking. This will align your Meta tracking with the GA4 events you've already built, creating a powerful and consistent measurement strategy across platforms.