Recommended resources
The freely available resources this lesson will direct you to.
Welcome back. You’ve been building the expense-tracker project with Maven and inspecting its dependencies. The next step is to preserve the project’s source and build configuration as a useful history. In this lesson, you’ll initialize a local Git repository, decide which files belong in it, and make commits that each describe one coherent change.
You do not need a GitHub account for this work. Git can record commits on your machine; publishing and synchronizing them comes later.
What Git records—and what it does not
A Maven project contains files you edit, such as pom.xml and Java source files, alongside files Maven generates, such as those under target/. Git should preserve the first group so you can inspect and revisit your work. Generated output can normally be rebuilt and should stay out of the project history.
Git distinguishes three places. Your working directory contains the files you are editing. The staging area, also called the index, holds the versions you have selected for the next commit. The repository, stored in a hidden .git directory, holds the commits you have made.
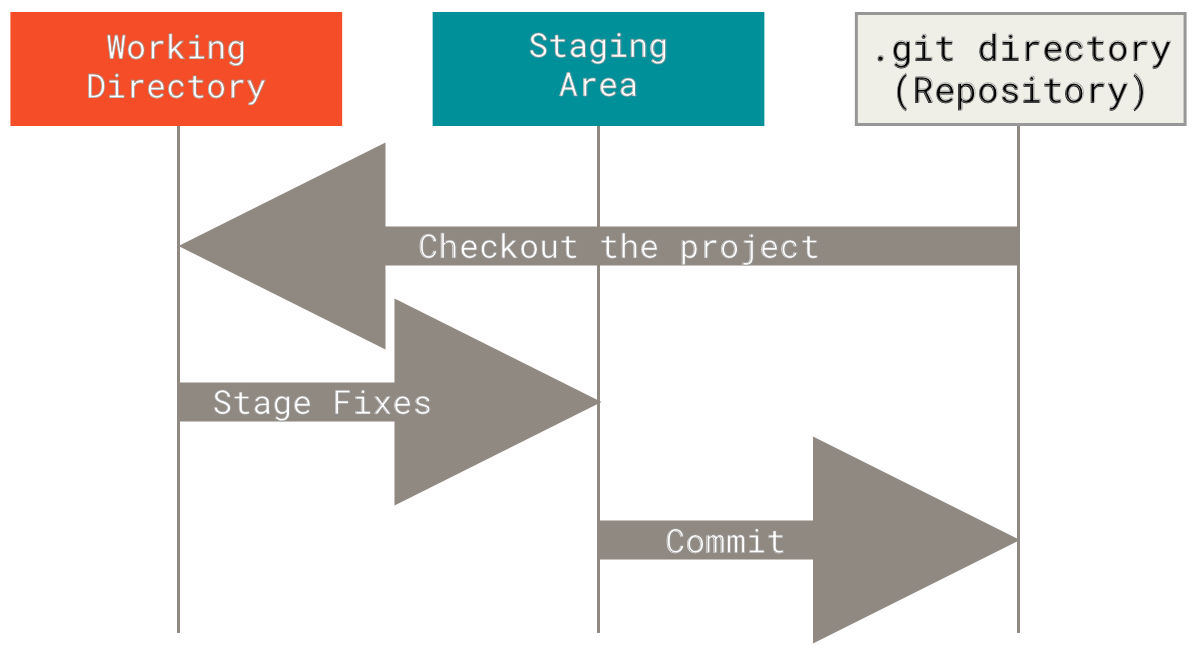
The distinction matters because git add does not commit a file. It stages its contents as they stood when you ran the command. If you edit that file again afterward, the newer edit remains unstaged until you add it again. A commit records the staged snapshot, not every change currently visible in your editor.
Watch the initialization and workflow portions of Git Tutorial for Beginners: Learn Git in 1 Hour by Programming with Mosh. The demonstration uses a small sample project; apply the same ideas to your Maven project.
Git Tutorial for Beginners: Learn Git in 1 Hour
Watch how the tutorial initializes a directory and then uses the staging area to prepare a commit.
Watch repository setup to see what git init creates. The presenter briefly deletes .git to demonstrate its importance; do not do that in your project. Then watch the core workflow, focusing on why the staged version of a file can differ from the version you are currently editing.
Initialize the Maven project safely
Open a terminal in the directory containing your project’s pom.xml. First check that Git is available and whether this directory already belongs to a repository:
git --version
git status
If git status says this is not a Git repository, initialize one here:
git init
git status
If git status already shows a branch and file changes, do not initialize again. Use the existing repository. If you are unsure which directory is the repository root, git rev-parse --show-toplevel will show it.
After git init, the project has a .git directory, but its existing files have not been committed automatically. git status tells you which files are untracked, modified, or staged. Make a habit of checking it before and after staging: it is your most direct answer to “What would my next commit contain?”
Before the first commit, create a .gitignore file beside pom.xml with this line:
/target/
The rule keeps Maven’s generated target directory out of Git. The .gitignore file itself does belong in Git so that the project’s tracking rules travel with its source. Review any other untracked files before adding them; do not commit credentials, personal configuration, or build output merely because Git lists them. Ignore rules do not automatically stop tracking a file that has already been committed.
The tutorial shows this distinction between generated files and source files:
Git Tutorial for Beginners: Learn Git in 1 Hour
Continue the same tutorial for its introduction to .gitignore, a useful safeguard before your Maven project's first commit.
Watch ignoring files. Focus on creating an ignore rule for an untracked directory and noticing that .gitignore remains available to stage. Stop before the discussion of removing files that were already tracked.
Make an initial, reviewable commit
Now select the files that constitute the project’s starting point. The following commands stage pom.xml and .gitignore; run the src command only if your project has a src directory:
git add pom.xml .gitignore
git add src
git status
If your project has other necessary source or build files, review and add them by name. Avoid starting with git add .: although convenient, it can stage files you have not yet inspected.
Read the “Changes to be committed” and “Untracked files” parts of git status separately. The first lists what you selected for this commit; the second may show files still requiring a decision. To inspect the selected changes, use:
git diff --staged --stat
git diff --staged
The --stat view summarizes affected files; the full diff shows their contents and changed lines. For a large initial project, the full diff may be long, but check at least that no generated output or sensitive file slipped in. When the staged set represents the Maven project’s starting point, save it:
git commit -m "Add initial Maven project"
git status
git log -1 --oneline
git commit -m supplies a short description of the snapshot. The final two commands confirm your current status and display the new commit. If Git refuses to commit because no author identity is configured, set user.name and user.email to your chosen commit-attribution values, then retry. You can set them for this repository with git config --local; bear in mind that commit attribution may become visible if you publish the history later.
Watch how the tutorial stages files, observes their status, and commits them:
Git Tutorial for Beginners: Learn Git in 1 Hour
Continue the tutorial to connect the commands you just used with what Git records.
Watch adding and status, especially the example where a file changes after it was staged. Then watch commits and messages. Focus on its recommendation that one commit represent one logical piece of work—not an arbitrary number of edited files.
Use the staging area to separate two changes
A useful history makes it possible to understand why the project changed. Suppose you make two unrelated improvements: add a brief project overview, and ignore generated log files. They deserve separate commits even if you make both edits in the same working session.
Create or update README.md with a short description and the test command you already know. For example:
# Expense tracker

A Java project built with Maven. Run tests with `mvn test`.
Also add this rule on a new line in .gitignore:
*.log
At this point, stage only the documentation change:
git add README.md
git status
git diff --staged
git diff
In git status, README.md should appear under changes to be committed, while .gitignore should remain under changes not staged for commit. git diff --staged shows the selected documentation change. Plain git diff shows the unstaged ignore-rule change. If you edit README.md again after staging it, check status and run git add README.md again if that latest edit should be included.
This short portion of the tutorial contrasts the two diff views:
Git Tutorial for Beginners: Learn Git in 1 Hour
Use the same tutorial to see how to inspect what is staged separately from what remains in your working directory.
Watch staged changes for git diff --staged. Then watch unstaged changes for plain git diff. Relate the two views to your README.md and .gitignore edits.
Commit the documentation, then check what remains:
git commit -m "Document project overview and test command"
git status
The .gitignore edit should still be pending: committing the README did not sweep unrelated working-directory changes into the snapshot. Review and commit that change separately:
git add .gitignore
git diff --staged
git commit -m "Ignore generated log files"
git status
git log --oneline -3
If git status reports a clean working tree, all intended changes have been recorded. The three recent log entries should each have a distinct purpose: establishing the Maven project, documenting it, and ignoring logs. That is what focused commits through the staging area look like in practice.
Key takeaways
git init makes a local repository; it does not automatically commit your project. Use .gitignore to keep untracked generated files such as target/ out of history. Use git status to distinguish staged from unstaged work, git diff --staged to review the next snapshot, and git commit to record it. By staging related changes together—and leaving unrelated ones for another commit—you create a history that another developer can follow.
Next, you’ll build on this local history by developing a change on a branch and merging it into the main line of work.