Recommended resources
The freely available resources this lesson will direct you to.
Welcome back! In our last lesson, you successfully established a connection between your app and your new cloud database. Think of it like laying a telephone line to a house—the connection is there, but no calls have been made yet. Today, we're going to pick up the phone and start talking.
This lesson is all about the two most fundamental database operations: creating new data and reading it back. This is the core loop that transforms a static webpage into a dynamic application. You'll learn the specific functions your AI coding assistant will use to save information (like a user's post or a to-do item) and then display that information back to the user. By the end, you'll have completed the round trip, making your app's data truly interactive.
Before we dive in, let's briefly recall the core difference between the two platforms. Supabase uses a relational model (like a spreadsheet with rows and columns), while Firebase uses a document model (like a collection of flexible files).
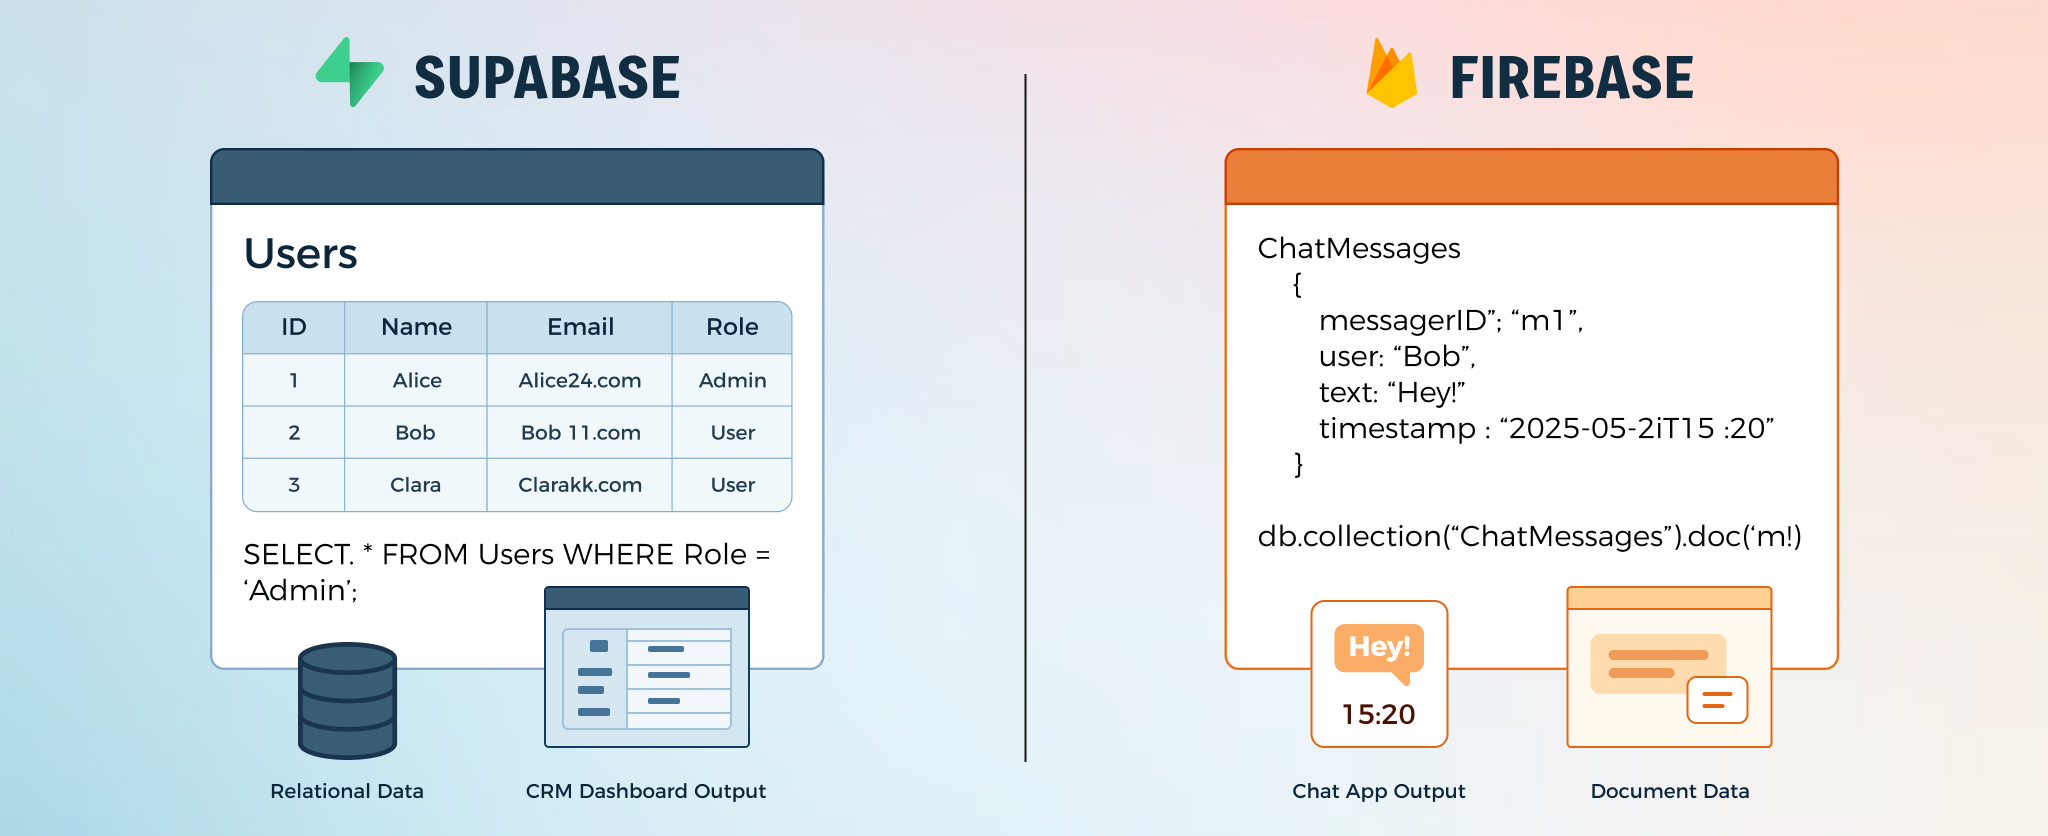
This structural difference influences how we write the code to create and read data. Let's get started by choosing the path for the database you set up.
Path 1: Create and Read with Firebase (Firestore)
If you chose Firebase, you're working with collections of documents. Think of a collection like a folder (e.g., posts) and a document as a file within that folder containing the data for a single post.
Visualizing the Process
Before we write code, let's see what we're aiming for. The following video provides an excellent conceptual overview. It demonstrates a user entering data into a web app and then shows that same data appearing in the Firebase database console. This is the magic we're about to implement.
Stop Building Websites — Build REAL Web Apps with Google AI + Firebase
This video from Profit Studio explains why we store user data and then shows the process of adding data to an app and verifying it in Firebase.
First, watch the section from this point to understand why we need to save data beyond just authentication. Then, skip ahead and watch from this segment to see the "create and read" loop in action—data is entered in the app and immediately visible in the Firebase console.
Creating Records with addDoc
When your AI assistant generates code to save something new to Firestore, you will almost always see the addDoc function. This is the primary command for creating a new document with a unique, automatically generated ID.
Let's imagine you're building a simple to-do app. The user types a task into an input field and clicks "Submit". The code behind that button needs to take the text and save it. Here’s how it's done.
How to Use Cloud Firestore in a React App
This freeCodeCamp article provides clear, commented code examples for adding and reading data in a React application using Firestore.
Please read the section titled Add Data to Firestore. Pay close attention to the addTodo function.
Let's break down the key line of code from that article:
await addDoc(collection(db, "todos"), {
  todo: todo,
});
await addDoc(...): This is the main instruction. It tells Firebase, "Please add a document." Theawaitkeyword means your code will wait for Firebase to confirm it's done before moving on.collection(db, "todos"): This part specifies the destination. It says, "Look in my database (db) for the collection namedtodos." If this collection doesn't exist, Firebase will create it for you.{ todo: todo }: This is the payload—the actual data you want to save. It's a JavaScript object. In this case, it's creating a document with one field namedtodoand setting its value to the content of yourtodovariable.
When you see this pattern, you'll know your app is saving a new piece of information.
Reading Records with getDocs
Now that you've saved data, you need to retrieve it to show it on the screen. For this, your AI assistant will use the getDocs function, which fetches all documents in a collection.
How to Use Cloud Firestore in a React App
Now, let's look at the other half of the loop in the same article.
Read the section titled Read Data. Focus on the fetchPost function.
The core of reading data is this line:
await getDocs(collection(db, "todos"));
This is the "ask." It requests all documents from the todos collection. The data doesn't come back in a simple, clean list, however. It arrives as a special querySnapshot object.
The next few lines in the example are crucial for turning that response into something usable for your UI:
const newData = querySnapshot.docs
  .map((doc) => ({...doc.data(), id:doc.id }));
This is a very common pattern that LLMs generate, so let's demystify it:
querySnapshot.docs: This accesses the list of individual documents from the response..map(...): This is a standard JavaScript function to loop over each document in the list.{...doc.data(), id:doc.id }: For each document, this does two things:doc.data(): Gets the main data object (e.g.,{ todo: "My first task" }).id: doc.id: Gets the unique ID of the document.{...}: It combines them into a new, clean object like{ todo: "My first task", id: "aBcDeFg123" }.
The result (newData) is a simple array of objects, perfect for storing in your app's state and rendering on the screen.
Path 2: Create and Read with Supabase
If you chose Supabase, you're working with tables, rows, and columns, much like a traditional spreadsheet. When you interact with your data, you'll be "inserting a row" or "selecting rows."
Visualizing the Process
Let's see what this looks like in practice. The following video builds a complete mini-application, but we'll focus on the parts that show data being added via a form and then fetched to populate a table.
Next js 15 with Supabase Full CRUD Tutorial | Ultimate Beginner to Pro Guide! 💡
This tutorial from Online Web Tutor is a deep dive into building a Next.js app with Supabase. We'll use it to see the core 'create' and 'read' actions.
First, watch the demonstration from the beginning to the end of the demo to see the final goal: a form that adds students to a table. Then, jump to the section on form submission from this timestamp. This is the heart of the "Create" operation. Finally, watch how the data is fetched and displayed from this part. This covers the "Read" operation.
Creating Records with insert
When your AI assistant needs to save new data to Supabase, it will generate a line of code using the .insert() method. This is the command for adding a new row to a specific table.
Let's say you have a form for adding a new student to a students table. When the user clicks "Submit," you'll execute a function that looks like this.
The Supabase documentation itself provides the cleanest examples. While we won't be using raw SQL, the logic of insert is the same.
In the documentation, find the section with the SQL snippet. You don't need to read the SQL itself, but look at the insert into command. This is the database-level action that the JavaScript code below will trigger.
Now, here's what that looks like in the JavaScript code your app will use, as seen in the video tutorial:
await supabase.from("students").insert([
  { name: 'John Doe', email: 'john@example.com' }
]);
Let's break this down:
await supabase: We're starting a command using our initialized Supabase client..from("students"): This is the first crucial step. It tells Supabase, "I want to work with the table namedstudents.".insert([ ... ]): This is the action. It says, "I want to insert new rows."[{ name: '...', email: '...' }]: This is the payload. It's an array of JavaScript objects. Each object represents a row, and the object's keys (name,email) must match the column names in yourstudentstable.
Reading Records with select
Once data is in your table, you need to get it back to display it. For this, your AI assistant will use the .select() method, which fetches rows from a table.
The Supabase documentation gives a perfect, concise example of how to read data.
Find the section titled Query Supabase data. The code block for app/instruments/page.tsx contains the exact pattern we need.
The key line for reading data is elegantly simple:
const { data: instruments } = await supabase.from("instruments").select();
await supabase.from("instruments"): Just like before, we start by specifying the table we want to work with..select(): This is the action, telling Supabase, "Get me the data." By default, with no arguments,select()(orselect('*')) means "select all columns from all rows."const { data: instruments }: Supabase's library returns an object containing thedata(and potentially anerror). This syntax is a convenient way to extract thedataarray and immediately rename it to a more descriptive variable,instruments.
The instruments variable now holds a clean array of objects, with each object representing a row from your table. This is ready to be stored in your app's state and rendered on the screen.
Conclusion
You've just demystified the two most fundamental actions in any data-driven application. Whether you're using Firebase or Supabase, the core pattern is the same: you use a specific function from the SDK to either send data to the database or request data from it.
Key Takeaways:
- Creating Data: To add new information, you call an "insert" or "add" function, passing a JavaScript object that represents the data you want to save.
- Firebase:
addDoc(collection(db, "collectionName"), { your_data }) - Supabase:
supabase.from("tableName").insert([{ your_data }])
- Firebase:
- Reading Data: To fetch information, you call a "get" or "select" function, specifying the collection or table you want to read from.
- Firebase:
getDocs(collection(db, "collectionName")) - Supabase:
supabase.from("tableName").select()
- Firebase:
- Data Handling: The data you get back often needs to be looped over (
.map()) to transform it into a simple array that your app's UI can easily display.
Now that you can create and read data, your app has a memory. In the next lesson, we'll complete the core set of operations by learning how to update existing records and delete them.