Recommended resources
The freely available resources this lesson will direct you to.
Welcome to the next step in our journey with Git. In our last session, you successfully initialized your first repository with git init. This told Git, "Start watching this folder." Right now, Git is like a security camera that's turned on and pointed at your project, but it hasn't recorded anything yet. You've made changes—or will make them—but Git doesn't save them automatically.
This lesson focuses on the crucial step that comes between making an edit and permanently saving it. We'll explore one of the most powerful and initially confusing concepts in Git: the staging area. You'll learn why your AI coding assistant constantly asks you to git add files before you commit them, and you'll understand how this intermediate step gives you incredible control over your project's history.
The Draft, The Final Selection, and The Archive
In design work, you rarely go straight from a rough sketch to the final, archived version. There's a process:
- You create and edit: This is your working directory, full of drafts, experiments, and changes. It can be messy.
- You select the best parts for review: You might pull specific screens or assets into a separate presentation deck or folder to show a client. This is a curated, prepared selection.
- You archive the approved version: Once approved, that version is saved as "v2.0" or "Final_Final_v3".
Git works in a remarkably similar way. The step where you prepare your changes for saving is called staging.
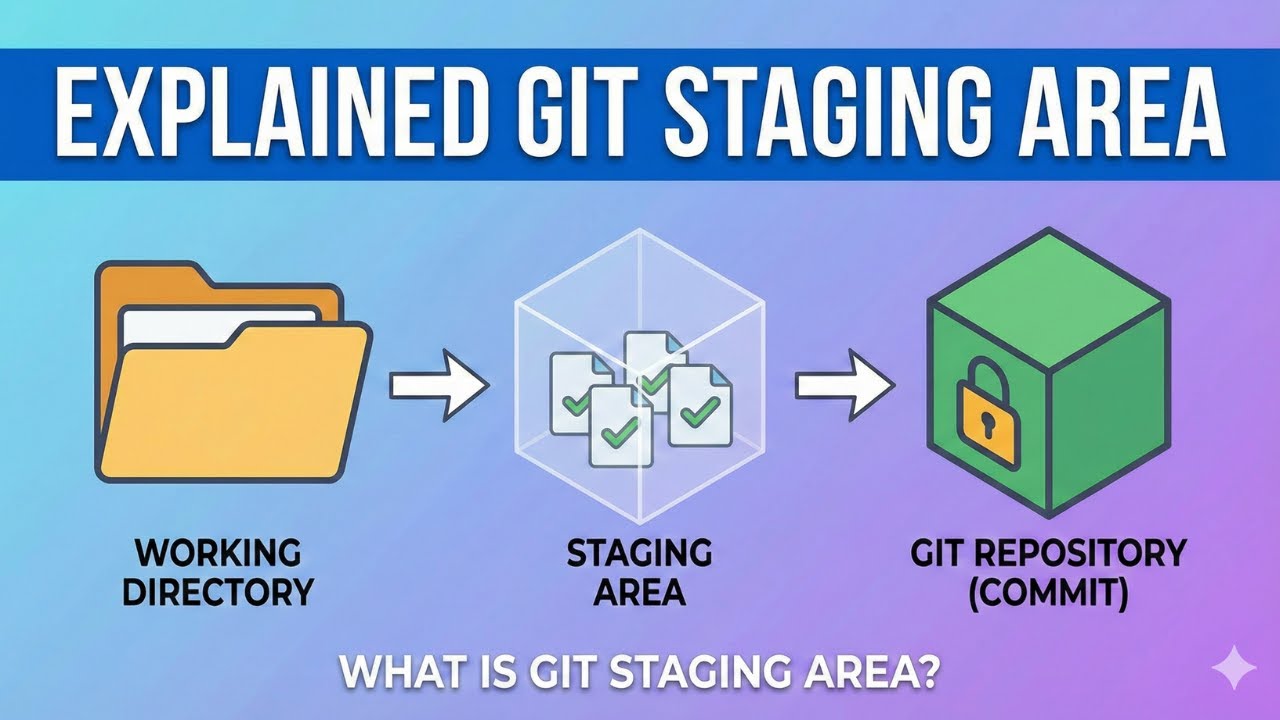
The "Staging Area" is a temporary holding place where you gather all the changes you want to include in your next save point. The command to move changes into this area is git add.
The "Moving Box" Analogy
A simple way to think about the staging area is to imagine you're packing for a move. Your house is the "working directory," full of stuff.
Git Staging Area: Explained Like I'm Five
This article from the DEV Community uses a fantastic analogy to make the staging area click. It's one of the clearest explanations you'll find.
Read the first few sections of the article to understand the "box" analogy. Start with the introduction: "Imagine a box." Then, see how the git add command fits in: git add. Finally, look at the role of git status: git status. This command lets you see what's in your working directory versus what's in your staging area (the box).
When you use git add, you're not saving the file. You are simply putting a version of that file into the "box," getting it ready to be sealed and labeled. You can add multiple files, or even parts of files, to the box before you're ready for the next step.
But Why? The Power of Selective Saving
At this point, you're probably asking, "Why have this extra step? Why not just save everything I've changed?" This is the most important question, and the answer reveals the power of the staging area.
Imagine you're working on two different things:
- You fixed a typo in the website's heading. A small, complete task.
- You started experimenting with a new color palette for the buttons, but it's a total mess and doesn't work yet.
Without a staging area, you'd have to save both changes together. Your project history would show "Fixed typo and also broke all the buttons." That's not helpful.
The staging area lets you be precise. You can choose to add only the file where you fixed the typo, leaving the messy button-color experiment out of this save point. This allows you to create clean, logical save points (commits) that tell a clear story.
This short video from "A shot of code" demonstrates this perfectly with a scenario involving a "secret" file you don't want to commit.
Git Staging - Why do we even need this?
This video provides a concise and practical demonstration of why the staging area is essential for controlling what enters your project's history.
Watch the entire video. Notice how the presenter has two files with changes (two files) but uses git add to selectively stage only one of them (stage one file). This prevents the "secret" file from being included in the commit, keeping the repository clean.
File States and the git status Command
To work with the staging area, you need to understand the "state" of your files. A file in your Git project is always in one of a few states. The video below gives a great overview, and we'll focus on its analogy.
Git Fundamentals: Staging area, repository, working directory, file states, and commits tutorial.
This video from "The Modern Coder" provides a clear breakdown of Git's fundamental concepts, including file states. We'll use its excellent analogy for staging.
Watch the segment explaining the staged state, from this timestamp. The key analogy here is that staging is like selecting files in your computer's file explorer before you perform an action on them (like copy or delete). git add is simply that "selection" step.
The main states you'll see are:
- Modified: You've changed a file that Git already tracks, but you haven't staged it yet. It's sitting on your "desk."
- Staged: You've run
git addon a modified file. You've told Git, "Include this specific version in the next save." It's now in the "box." - Untracked: This is a brand new file in your folder that Git has never seen before. It's not on your desk or in the box; it's just in the room.
How do you know what state your files are in? You ask Git by running the command git status. This is perhaps the most-used command in Git. It gives you a report of what's modified, what's staged, and what's untracked.
Staging Your Changes: Let's Do It
Let's apply this to the my-first-repo project you created in the last lesson.
-
Open your project: Make sure you are inside the
my-first-repofolder in your terminal and open it in VS Code (code .). -
Create a file: In VS Code, create a new file named
index.html. Add a single line of text to it, like<h1>Hello World</h1>, and save it. -
Check the status: Go to your terminal and type
git status. Git will report that you have an "untracked file":index.html. It sees the file but isn't tracking it yet. In VS Code's Source Control panel, you'll seeindex.htmllisted with a "U" for untracked. -
Stage the file: Now, tell Git you want to prepare this file for saving. In the terminal, type:
git add index.html -
Check the status again: Run
git statusone more time. The message is different! It now says "Changes to be committed" and listsindex.html. You have successfully moved the file to the staging area. In VS Code, you'll see the file has moved from a "Changes" list to a "Staged Changes" list. Clicking the little+icon next to a file in the VS Code UI does the exact same thing asgit add.
You've just completed the core loop: edit a file, and then stage it. You've curated exactly what you want your next save point to contain.
Conclusion
You've now demystified one of Git's most important concepts. The staging area isn't an unnecessary complication; it's a powerful feature that gives you fine-grained control. It's the difference between taking a quick, messy snapshot of your entire desk and carefully arranging a clean set of deliverables for archival.
Key Takeaways:
- The Git workflow is a three-step process: edit files, stage changes (
git add), and commit them. - The staging area is an intermediate zone where you prepare changes before permanently saving them.
- The
git addcommand is used to move changes from your working directory into the staging area. - This process allows you to create clean, logical save points (commits) that contain only related changes.
- The
git statuscommand is your guide to understanding which files are modified, staged, or untracked.
Now that your first change is sitting patiently in the staging area, what's next? In our next lesson, we'll take that prepared "box" of changes and seal it shut with a descriptive label using the git commit command.