Recommended resources
The freely available resources this lesson will direct you to.
In our last lesson, we focused on the staging area, using git add to carefully select which of our changes we wanted to prepare for saving. You can think of this as putting specific items into a packing box, getting them ready for a move. Right now, in your my-first-repo project, you have an index.html file sitting in that "box"—the staging area—waiting for the next step.
This lesson is all about that next step: sealing the box and putting a clear, descriptive label on it. We'll be covering git commit, the command that permanently saves your staged changes into your project's history. More importantly, we'll demystify the art and science of writing a good "label," or commit message. This is a crucial skill that turns a messy log of changes into a clear, understandable story of your project's evolution.
What is a Commit? The "Save Point" in Your Code
In the simplest terms, a commit is a snapshot of your project at a specific point in time. It's a permanent record of what all your tracked files looked like when you made the commit.
Think back to old video games. You'd reach a certain point, find a save point, and record your progress. If you made a mistake later, you could always load that saved game. A Git commit is exactly that: a save point for your code.
This action moves your changes from the temporary Staging Area into the permanent Local Repository on your computer.
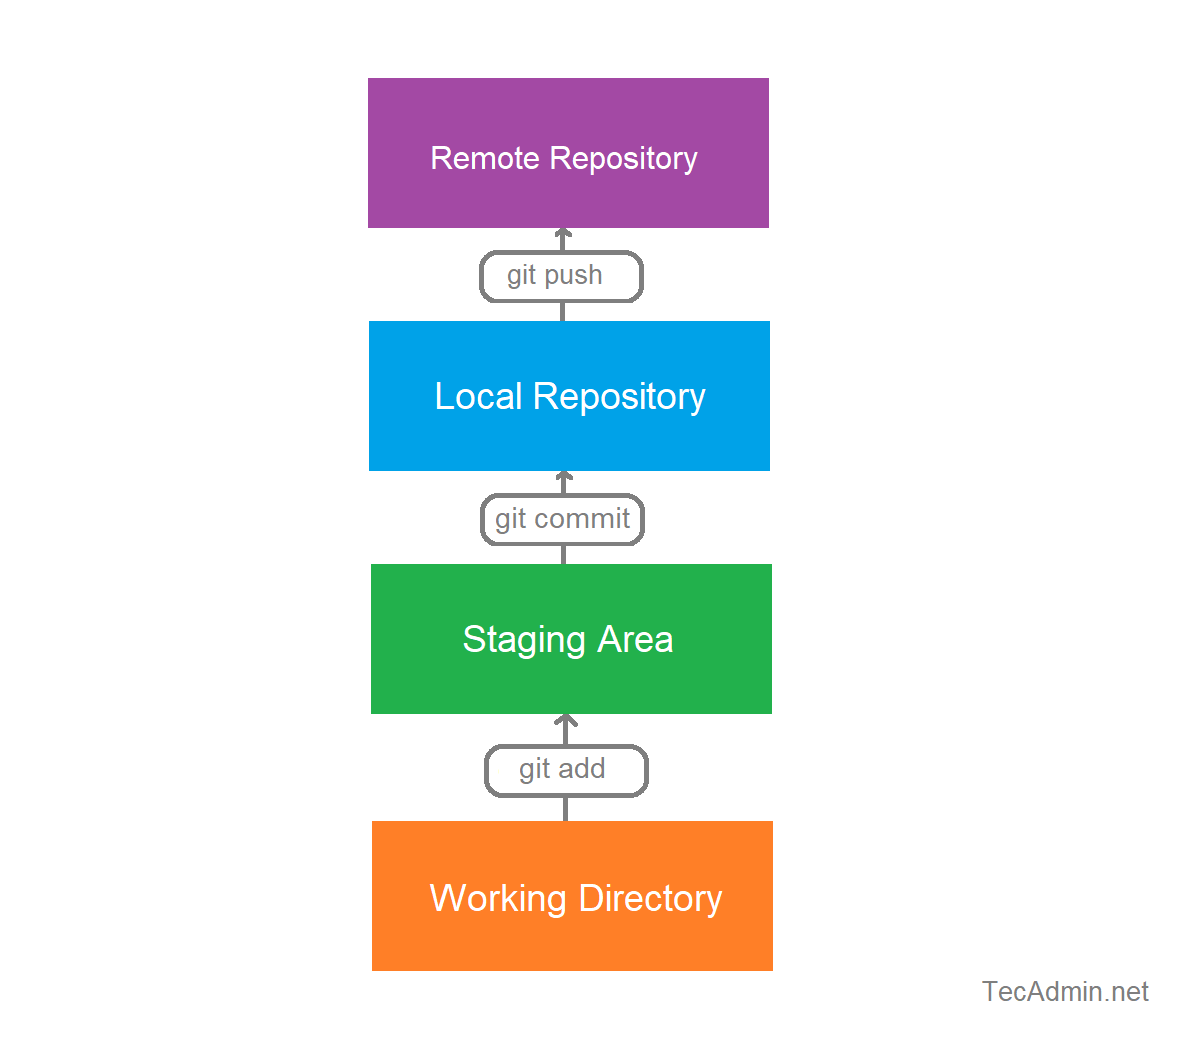
Let's get a formal definition for these concepts.
Stages of Git/Workflow - DEV Community
This article provides a straightforward definition of the Local Repository and the git commit command.
Read the section titled "Local Repository". Focus on how it describes the repository as the place where Git permanently stores changes and what a commit includes: a unique identifier and a message.
The video below explains this concept in a very direct way, calling Git a "memory card for code."
This video by Nick White uses a great analogy to make the concept of committing stick.
First, watch the brief explanation of Git as a memory card for code. Then, jump to the demonstration of the git commit command itself, from this timestamp, to see the command in action.
As you saw, the command is git commit. This takes the snapshot. But a snapshot without context is just a picture. The most important part of the command is what comes next: the message.
The Art of the Commit Message
The command to make a commit is git commit -m "Your descriptive message here". The -m flag stands for "message."
Why is this message so important? Imagine going through your design files and seeing versions named v1, v2, final, final_final. It's chaos. You have no idea what changed between them without opening each one.
A good commit message is like a well-written annotation on a design revision. Instead of "changes," it says "Increased CTA button size for better visibility" or "Updated hero image with new photography." It tells a story.
This is one of the most critical "why" questions we can answer. Claude or any other AI assistant will tell you to commit your code, but you are the one who provides the narrative.
Simply Explained: Git Commit Message - DEV Community
This article does a fantastic job of explaining why spending a little extra time on your commit messages pays off immensely.
Read the sections "What is a commit message?" and "Why are commit messages important?". The author highlights how good messages help you and other developers understand the project's history.
A Simple Recipe for Good Commit Messages
So, how do you write a good message? It doesn't have to be complicated. The same article you just read offers a simple, three-part structure that is perfect for getting started. It's memorable, visual, and adds a bit of personality, which fits the "vibe coding" spirit.
Simply Explained: Git Commit Message - DEV Community
Let's continue with the same article to learn a practical formula for writing great commit messages.
Read from the section "How to make good commit messages?" down to the end of the "Examples" section. Pay close attention to the "Three Ingredients": Emoji, Verb, and Object.
To summarize this excellent advice:
-
Type (Emoji): Start with an emoji that categorizes the change. This makes your history instantly scannable.
✨(sparkles) for a new feature.🐛(bug) for a bug fix.💄(lipstick) for styling and UI changes.📝(memo) for updating text or documentation.- You can find a great list of these at Gitmoji.
-
Verb (Imperative): Start the message with a verb in the present tense, as if you're giving a command.
- Use:
Add,Fix,Update,Remove,Refactor. - Avoid:
Added,Fixing,Updates.
- Use:
-
Object (Subject): Concisely describe what you changed.
Add initial HTML structureFix mobile navigation menuUpdate button color palette
Putting it all together, you get clear, descriptive, and scannable messages like:
✨ Add user login page💄 Update font sizes for hero section🐛 Fix broken image link on about page
Let's Commit Your First Change
Now it's time to put this into practice. In our last lesson, you created and staged index.html. Your terminal, if you run git status, should show index.html under "Changes to be committed."
-
Open your terminal and make sure you are in the
my-first-repodirectory. -
Run the commit command. We are adding a new file that represents the initial structure of our project. A great message would be:
✨ Add initial index.html file.Type the following command and press Enter:
git commit -m "✨ Add initial index.html file"(Note: Your terminal might display the emoji differently or not at all, which is perfectly fine.)
-
Analyze the output. Git will respond with something like this:
[main (root-commit) abc1234] ✨ Add initial index.html file
 1 file changed, 1 insertion(+)
 create mode 100644 index.html
This confirms that one file was changed (your
index.html) and it has now been saved to your project's history. -
Check the status again. Now run
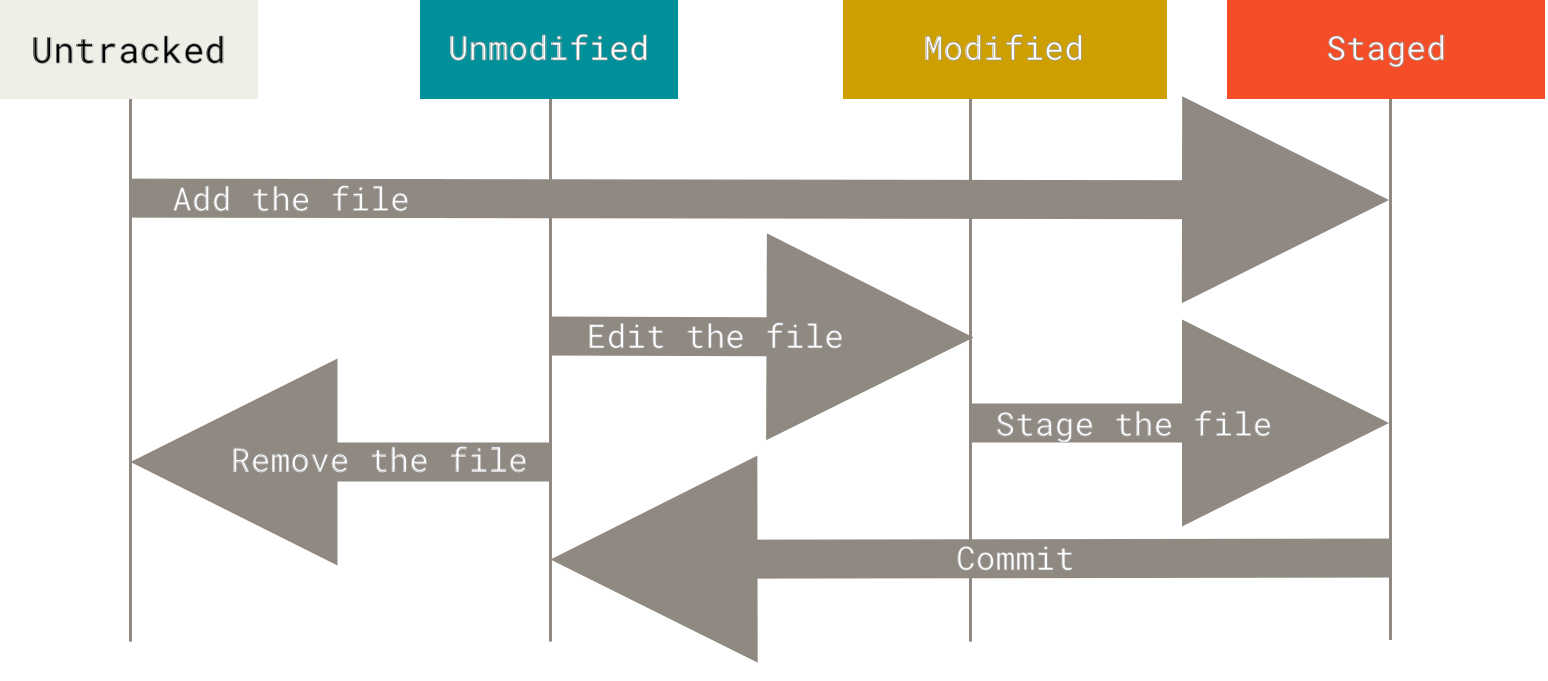
git status. Git will report:On branch main nothing to commit, working tree clean"Working tree clean" is the message you want to see. It means your working directory and your latest commit are in sync. You have no pending changes. The full loop is complete.
Viewing Your Project's History with git log
You've made a save point, but how do you see the list of all your past saves? The command for that is git log.
In your terminal, type:
git log
You will see an entry for the commit you just made. It will include:
- A long string of characters (the commit hash), which is the unique ID for this snapshot.
- The author (you!).
- The date and time.
- Your commit message!
This is your project's history taking shape. As you add more commits, this log will grow into a detailed story of how your project was built, one snapshot at a time.
Conclusion
You have now mastered the complete, fundamental loop of local version control: making a change, staging it with git add, and saving it with git commit. You've not only learned the command but also the "why" behind crafting a good commit message—it's the narrative that gives your project's history meaning.
Key Takeaways:
git committakes the changes from the staging area and saves them as a permanent snapshot in your local repository.- A commit is a "save point" for your code that you can always refer back to.
- The commit message is a crucial description of what change you made and why.
- A good convention for messages is Type (Emoji) + Verb (Imperative) + Object (Subject).
git logallows you to view the history of all the commits you've made.
You now have a solid foundation for saving your work in a clean, organized way. But what happens when you want to start a new feature or experiment with a design change without risking your stable, working code? In the next lesson, we'll explore branches, a powerful Git feature that lets you do just that.