Recommended resources
The freely available resources this lesson will direct you to.
In our last lesson, we drew a clear line between Git, the version control tool on your computer, and GitHub, the cloud platform for hosting your projects. You now understand the "what" and "why" of version control—it’s like a sophisticated history tracker for your code.
Today, we transition from concept to action. We'll tackle the very first practical step your AI coding assistant will ask you to take: initializing a Git repository. This lesson will show you exactly how to tell Git, "Hey, I want you to start tracking the history of this project." By the end, you'll understand the git init command, what it does behind the scenes, and how it marks the official beginning of your project's version-controlled life.
Turning a Folder into a Project
In the previous lesson, we established that a Git repository (or "repo") is simply a project folder that Git is monitoring. But how does a plain folder become a repo? This doesn't happen by magic; you have to give Git an explicit instruction. That instruction is git init.
Think of it this way: when you start a new design in Figma, you create a new file. That action tells the application to start tracking your work within that specific file. git init serves the exact same purpose for a folder on your computer. It's the command that says, "This folder and its contents are now a project that I want to track with Git."
This MindStudio article provides a concise overview of the typical Git workflow, starting with this crucial first step.
What Is Git? Version Control Explained for Non-Developers | MindStudio
This article explains core Git concepts in a way that's perfect for those outside of a traditional development background. We'll use it to solidify the ideas of a repository and the initial workflow.
Please read the following two short sections: Repository (Repo): This section provides a clear, simple definition of what a repository is. How Git Works in Practice: Focus on the very first step mentioned in this workflow description. Notice that git init is presented as the starting point for a new project.
The git init Command: What It Actually Does
When you're vibe coding, your AI assistant will often instruct you to create a new folder and then immediately run git init inside it. Let's demystify this process.
The most common way to initialize a repository is through the terminal. The command is simple:
git init
When you run this inside a project folder, Git does one simple but critical thing: it creates a new, hidden sub-folder named .git. This .git folder is the brain of your repository. It contains all the information Git needs to track the history of your project—every commit, every branch, every version of every file you've ever saved. Your actual project files (your HTML, CSS, JavaScript, etc.) remain untouched in the main folder, ready for you to edit.
This short, visual tutorial does a great job of illustrating this.
A Grip On Git — A simple, visual Git tutorial
This tutorial excels at showing, not just telling. We'll look at its explanation of git init.
Read just the first part of the tutorial, from the start down to the end of the git init explanation. Focus on the key takeaway: the .git folder is where Git's information lives, separate from your project files.
The "Master GIT & GITHUB" video also offers a great analogy for this process.
Master GIT & GITHUB in easy way
This video provides clear, simple analogies for Git's core commands.
Watch the segment explaining git init, from this timestamp. Pay attention to the analogies used, such as "inviting git to start tracking everything" and the .git folder being a "behind-the-scenes memory bank."
Initializing a Repo: Two Approaches
You have two main ways to initialize a repository. Both achieve the exact same result.
1. Using the Terminal
This is the classic method and the one you'll most often see in tutorials and LLM instructions. The workflow looks exactly like this:
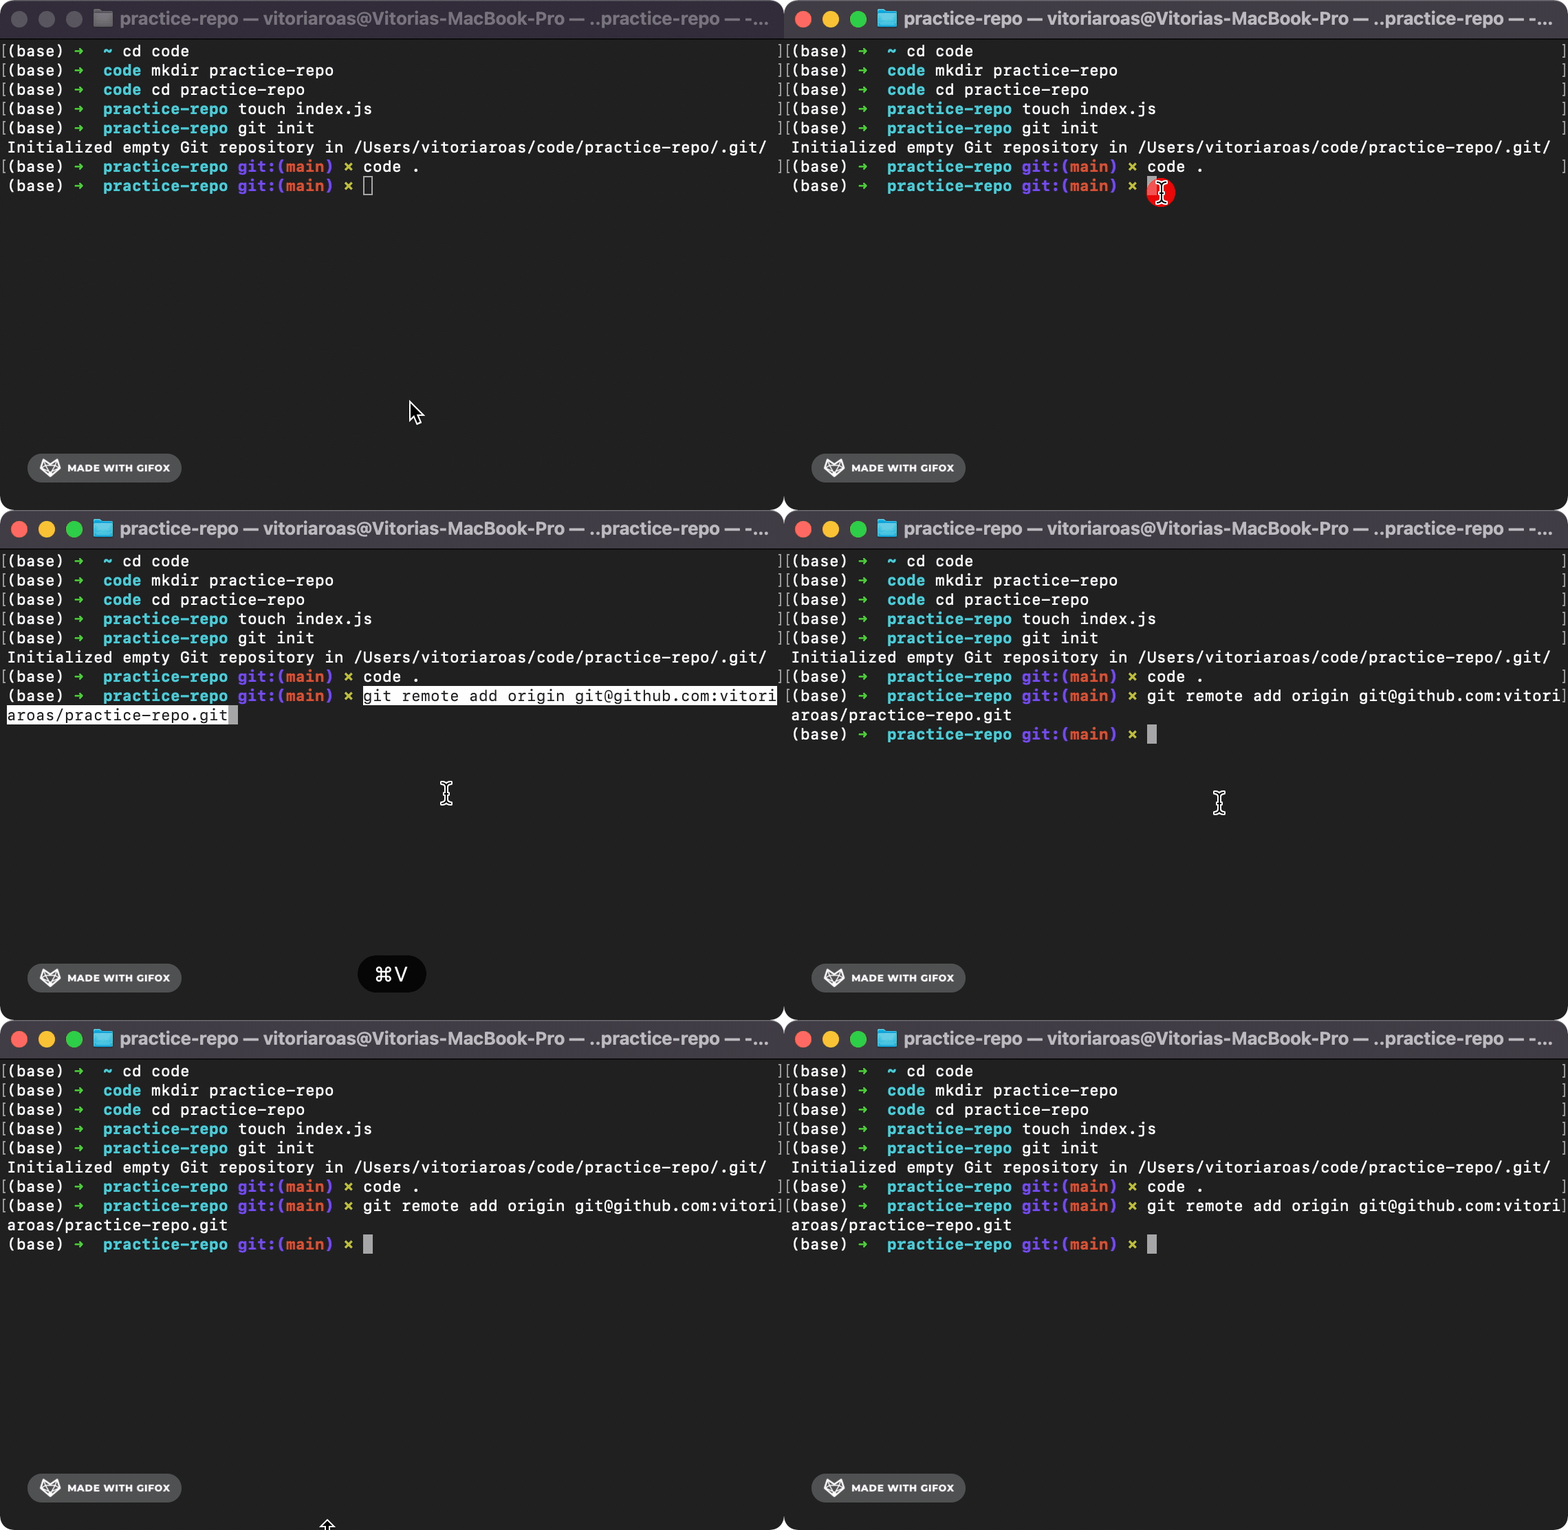
This command-line approach is powerful and universal, working the same way on nearly any system.
2. Using the Visual Studio Code Interface
As a designer, you might prefer a more visual approach. VS Code provides a simple, graphical way to do the same thing. If you open a folder that isn't yet a Git repository, the Source Control panel (the icon with the branching lines on the left) will present you with a button.

Clicking this "Initialize Repository" button does the exact same thing as typing git init in the terminal: it creates the .git folder and turns your project folder into a Git repo. This is a great example of how a user interface often provides a simple clickable action for a more complex-seeming terminal command.
A Quick Note on Scaffolding Tools
Sometimes, you won't even have to run git init yourself. When you use a project scaffolding tool—a common step in vibe coding, like running npx create-next-app—it often handles this for you.
Git for Vibe Coders: What Actually Matters
This video is tailored to the "vibe coder" workflow and highlights a practical reality of modern tools.
Watch the short segment from this point. The key insight is that many modern frameworks, like Next.js, automatically initialize a Git repository for you when you create a new project.
This is important to know because it demystifies what's happening behind the scenes. Even if your AI assistant doesn't explicitly tell you to run git init, the tools it asks you to use are likely doing it for you.
Let's Try It
Now it's your turn. Let's create your very first repository.
- Open your terminal.
- Create a new directory for this test project by typing
mkdir my-first-repoand press Enter. - Navigate into your new directory by typing
cd my-first-repoand press Enter. - Now, initialize it as a Git repository by typing
git initand press Enter. You should see a message like "Initialized empty Git repository in..." - Finally, open this folder in your code editor by typing
code .and press Enter. - Once VS Code opens, click on the Source Control icon in the left-hand sidebar. Notice that it no longer asks you to initialize a repository. It recognizes that this is a Git project, ready for you to start making changes.
You've successfully taken your first step in using Git!
Conclusion
You've now moved from theory to practice, mastering the command that starts it all. You know what git init does and why it's the essential first step for any new project you want to track.
Key Takeaways:
git initis the command that turns a regular folder into a Git repository.- It works by creating a hidden
.gitfolder inside your project directory. This folder is where Git stores all of your project's history. - You can initialize a repository either by typing
git initin the terminal or by clicking the "Initialize Repository" button in VS Code's Source Control panel. - Many project setup tools (like
create-next-app) rungit initfor you automatically.
Your project is now being watched by Git. But watching is not the same as saving. In the next lesson, we'll explore how to tell Git exactly which changes you want to prepare for your first "save point" using the git add command.