Recommended resources
The freely available resources this lesson will direct you to.
In our last lesson, you learned how to navigate the vast Hugging Face Hub, discovering it's like a "GitHub for Machine Learning" filled with specialized AI models. You now know how to find a model for a specific task and test it directly in your browser. Today, we'll bridge the gap between testing a model and actually using it in one of your app projects.
This lesson focuses on the Hugging Face Inference API. This is the mechanism that lets your code "call" a model hosted on Hugging Face's powerful servers and get a result back. By the end of our session, you'll be able to integrate a pre-trained AI model into a simple application, moving from just finding AI tools to actively wielding them.
From Finding to Using: The Inference API
So, what happens when you click "Compute" on a model's interactive widget on the Hugging Face website? Behind the scenes, your browser is making an API call. As you learned in Module 7, an API is a bridge that lets different pieces of software talk to each other. In this case, your app sends a request to Hugging Face's servers, which run the AI model for you (this is called "inference") and send back the result.
This process saves you from the incredibly complex and expensive task of setting up and managing your own AI-ready servers.

To make this happen, we need to follow a few key steps, which will feel very familiar from our lessons on APIs and environment variables.
Step 1: Get Your Access Token
First, you need a way to authenticate your app with Hugging Face, proving that you have permission to use their service. This is done with a User Access Token, which functions exactly like the API keys we discussed before. It's a secret key that you include with your requests.
Let's generate one. You'll need a Hugging Face account, which you can create for free if you haven't already.
A Guide to Hugging Face Inference API in Javascript
This guide has a very clear, illustrated walkthrough of the token creation process.
Follow the steps in the section Create a developer account in Hugging Face. The guide will show you how to navigate to your Settings, then to Access Tokens.
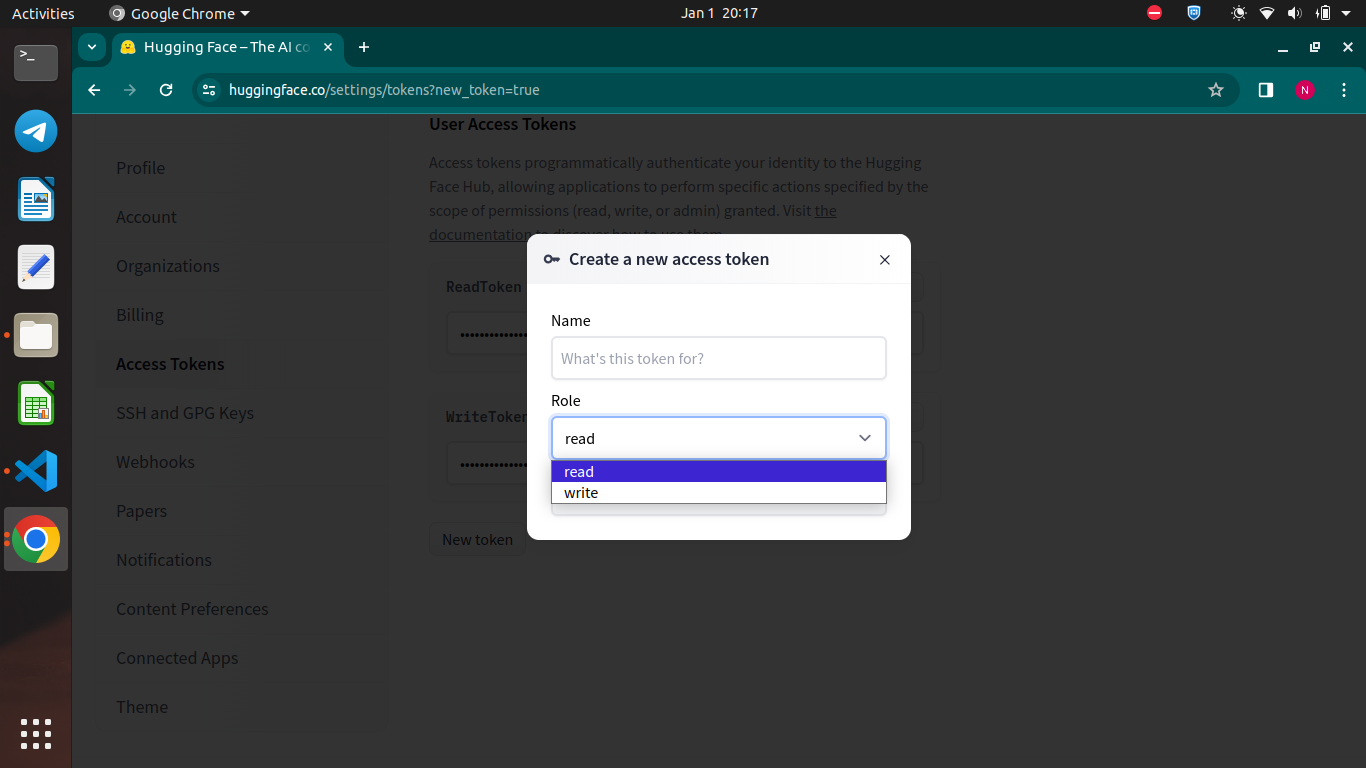
When you create a new token, you'll be asked to choose a "Role". For simply calling models, the read role is all you need. Give your token a descriptive name (like "My Vibe Code App") and copy it somewhere safe. Just like a password, you should never share this token publicly.
Step 2: From Interactive Widget to Code Snippet
Now that you have your key, let's go back to the Model Hub. In the last lesson, you learned to find models and use the interactive widget. Right next to that widget is the magic button that translates that interaction into code you can use in your app.
The official Hugging Face documentation has a perfect walkthrough of this process. We'll use it to see how to get a code snippet for a text-to-image model.
Your First Inference Provider Call · Hugging Face
This official guide demonstrates the core workflow of finding a model and generating the code to call it.
Read through the first three steps of the guide. In Step 1, you'll see how to find a model. Step 2 reviews using the widget, which you're already familiar with. Pay close attention to Step 3. This shows the crucial "View Code Snippets" button that reveals the API code in different languages. Notice how you can switch between Python, JavaScript, and curl.
This "View Code Snippets" feature is your best friend. It gives you the exact URL for the model's API endpoint and the correct structure for the data you need to send.
Step 3: Making the API Call in JavaScript
Let's put this into practice with a hands-on example. We'll create a very simple Node.js project that uses the Inference API to generate an image from a text prompt. This will bring together everything you've learned about the terminal, npm, and APIs.
The "Guide to Hugging Face Inference API in Javascript" that you used to create your token also contains a complete, self-contained code example. We will now implement it.
A Guide to Hugging Face Inference API in Javascript
This section provides all the code and terminal commands needed to run your first inference.
Follow the instructions under the Node.js Application section. Create a new project folder and initialize a Node.js project using the npm init -y command you learned in Module 2. You can skip the npm i @huggingface/inference step for now, as the provided code snippet uses the standard fetch method, which doesn't require any extra packages. Create the huggingFace.js file and copy the code block that starts with async function. Before you run the code, make one crucial change. The code snippet tells you to paste your token directly into the string: Bearer YOUR_HF_TOKEN. As you know from Module 3, this is bad practice. Instead, you should use environment variables. Create a .env file in your project folder. Add your token to it: HF_TOKEN="hf_YourSecretTokenGoesHere" Install the dotenv package (npm i dotenv) to read this file. Add require('dotenv').config() at the very top of your huggingFace.js file. Finally, change the headers line in the code to: headers: { Authorization: \Bearer ${process.env.HF_TOKEN}` },` Now, run the code from your terminal with the node huggingFace.js command. If everything is set up correctly, you should see a message saying "Image downloaded successfully," and a new image file will appear in your project folder!
Video Walkthrough: Seeing it in Action
To see this entire process from another perspective, let's watch a video guide. This developer uses the official @huggingface/inference JavaScript library, which simplifies the code slightly, but the core principles—getting a token, choosing a model, and making a call—are exactly the same.
Huggingface.js: Step-by-Step Guide to Getting Started
This "Step-by-Step Guide to Getting Started" by Developers Digest provides a concise walkthrough of the entire process in a Node.js environment.
Watch these key segments that mirror the steps we just took: Creating the Token: A quick recap of generating your 'read' access token. Setting up the Project: Shows how to install the necessary packages and configure the API key in the code (again, remember to use environment variables!). Running an Image-to-Text Model: This is the core demonstration. The presenter finds an image-to-text model, copies its name, and writes the JavaScript code to send an image URL to the model and log the text description it generates.
This video demonstrates an "image-to-text" model, which is the reverse of the text-to-image model you just ran. It perfectly illustrates the versatility of the models on the Hub. The fundamental API calling process remains the same regardless of the task.
Conclusion
You have now successfully connected your own code to the powerful AI models on the Hugging Face Hub. This is a significant step that moves you from being a user of AI tools to a builder who can integrate AI into applications.
Here are the key takeaways from today's lesson:
- The Inference API is your bridge to using models hosted by Hugging Face without managing any infrastructure.
- You must authenticate every request using a User Access Token (API Key) generated from your account settings.
- Your API token is a secret and should be stored securely using environment variables (
.envfile), never committed to Git. - The "View Code Snippets" button on a model's page is the fastest way to get the boilerplate code for calling its API endpoint.
- You can make API calls using standard JavaScript
fetchor by using a dedicated library like@huggingface/inference.
In the next lesson, we will explore the APIs for the large, commercial LLMs from providers like OpenAI and Anthropic. You'll find that the workflow is remarkably similar to what you learned today, reinforcing these core concepts of API keys, requests, and responses.