Hello! Welcome back to building your high-performance telemetry engine.
In our last lesson, you implemented culling for the LOD plotter, a critical optimization that ensures we only render data visible on screen. Your plotter is now a highly efficient visualization tool for static datasets. The components are built; now it's time to connect them.
This lesson directly addresses the learning outcome: Connect the telemetry capture pipeline's consumer thread to the plotter's data storage. We will bridge the gap between the background data capture system and the real-time user interface, transforming your static plot into a live, dynamic display.
From Two Systems to One
So far, you've built two major, independent systems:
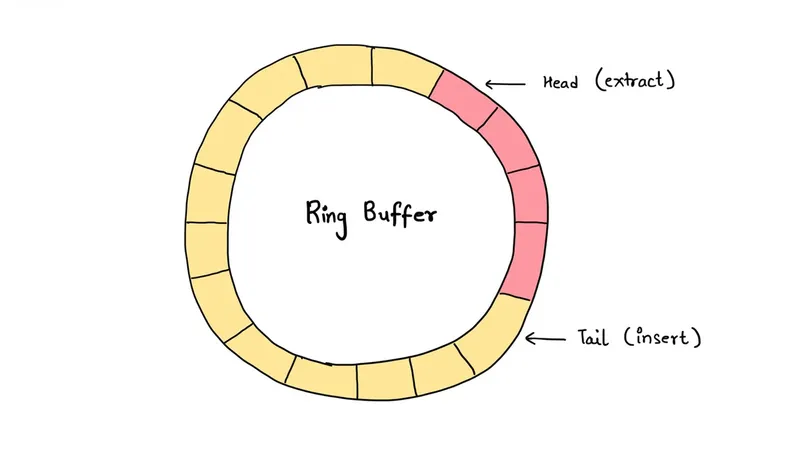
- The Capture Pipeline: A set of per-thread, lock-free SPSC ring buffers that funnel telemetry data into a single consumer thread for consolidation.
- The LOD Plotter: An ImGui-based widget that can efficiently render massive, static datasets using a min-max tree and culling.
Today, we will make these two systems talk to each other. The Consumer Thread from the capture pipeline will become the producer for the UI Thread, which acts as the final consumer of the data.
Designing the Bridge: A Thread-Safe Queue
Your core capture pipeline uses lock-free queues because it operates in a high-frequency, performance-critical domain where producers (your instrumented application threads) cannot be blocked.
However, the connection between the single data consumer thread and the single UI thread has different requirements. The UI thread updates at a relatively slow pace (e.g., 60 times per second). For this link, a simple, robust, lock-based queue is a perfect and safer choice. It's a great opportunity to apply what you learned about mutexes in Module 3.
We will create a simple thread-safe queue to act as the "mailbox" between the two threads.
Here is a C++ template for a basic thread-safe queue. The key feature is the drain function, which is designed to be highly efficient for our use case.
#include <vector>
#include <deque>
#include <mutex>
#include <utility> // For std::move

template <typename T>
class ThreadSafeQueue {
public:
    // Pushed by the consumer thread
    void push(T value) {
        std::lock_guard<std::mutex> lock(m_mutex);
        m_queue.push_back(std::move(value));
    }

    // Called by the UI thread to get all pending data at once
    std::vector<T> drain() {
        std::lock_guard<std::mutex> lock(m_mutex);
        std::vector<T> drained_elements;
        // Avoid reallocations by reserving space
        drained_elements.reserve(m_queue.size());
        // Move all elements from the deque to the vector
        std::move(m_queue.begin(), m_queue.end(), std::back_inserter(drained_elements));
        m_queue.clear();
        return drained_elements;
    }

private:
    std::deque<T> m_queue;
    std::mutex m_mutex;
};
Why this design?
std::mutexandstd::lock_guard: Provides simple and correct mutual exclusion, preventing data races.std::deque: A good choice for a queue, offering efficientpush_backandclearoperations.drain()method: Instead of the UI thread locking and popping elements one by one, it locks the queue just once per frame, moves all pending data in a highly optimized block operation, and unlocks. This minimizes lock contention and is very efficient.
Integrating the Queue into the Application
Now, let's plumb this new queue into our application architecture.
1. Modifying the Consumer Thread
Your existing consumer thread polls the SPSC ring buffers from all instrumented threads. Previously, it might have just printed the collected data. Now, its job is to push that data into our new ThreadSafeQueue.
You will need to:
- Instantiate the
ThreadSafeQueuein a scope accessible to both the consumer thread and the main UI thread (e.g., inmain()). - Pass a pointer or reference to this queue to your consumer thread function.
- In the consumer thread's loop, after collecting a batch of events, push them into the queue.
// In your consumer thread function...
// (assuming `telemetry_queue` is a pointer to our ThreadSafeQueue)

void consumer_thread_func(ThreadSafeQueue<float>* telemetry_queue, TelemetryManager* manager) {
    while (is_running) {
        // This is your existing logic to poll all SPSC buffers
        auto events = manager->pollAllBuffers();

        for (const auto& event : events) {
            // Assuming the event contains a float value we want to plot
            telemetry_queue->push(event.value);
        }

        // Sleep for a short duration to prevent busy-waiting
        std::this_thread::sleep_for(std::chrono::milliseconds(10));
    }
}
2. Modifying the UI Thread
The main application loop, which drives the ImGui rendering, is our UI thread. Once per frame, before rendering the plot, it needs to check the "mailbox" for new data.
// In your main loop...

ThreadSafeQueue<float> telemetry_queue;
// ... start consumer thread, passing &telemetry_queue ...

while (!glfwWindowShouldClose(window)) {
    // ... other loop setup ...

    // 1. Drain the queue to get new data
    std::vector<float> new_data_points = telemetry_queue.drain();

    // 2. If we have new data, give it to the plotter
    if (!new_data_points.empty()) {
        my_plotter.addData(new_data_points);
    }

    // ... ImGui::NewFrame() and render loop ...

    my_plotter.draw(); // The plotter will now draw the updated data

    // ...
}
This creates a clean, one-way data flow from the background thread to the UI.
Making the Plotter Live: Updating the Data Store
The final step is to teach the Plotter class how to handle incoming data. Your plotter currently holds its data in a std::vector<float>. The new addData method will append to this vector.
However, adding data isn't enough. The MinMaxTree you built is based on the old data. If you add new points without updating the tree, the visualization will be incorrect. Therefore, every time we add data, we must rebuild the tree.
Here is what the addData method in your Plotter class should look like:
// In your Plotter class

class LODPlotter {
public:
    // ... other methods ...

    void addData(const std::vector<float>& new_points) {
        // 1. Append the new data points to our internal storage
        m_all_data.insert(m_all_data.end(), new_points.begin(), new_points.end());

        // 2. The data has changed, so the MinMaxTree is invalid. Rebuild it.
        m_minMaxTree.build(m_all_data);
    }

    void draw() {
        // ... your existing drawing logic using m_minMaxTree ...
    }

private:
    std::vector<float> m_all_data;
    MinMaxTree m_minMaxTree;
    // ... other member variables ...
};
This simple "append and rebuild" strategy is the most straightforward way to handle live data. While rebuilding the entire tree for every new batch of data might seem inefficient, your tree-building algorithm is very fast (log-linear time), and for typical data rates, this approach works remarkably well.
Test your understanding!
Question: In our current design, we rebuild the entire min-max tree every time we receive a new batch of data. Imagine your plotter is displaying 1 million data points, and the consumer thread provides a new batch of 100 points.
What is the main drawback of this "append and rebuild" strategy? Can you briefly describe a more optimal (but more complex) alternative?
Show answer
Drawback: The primary drawback is redundant work. We are re-processing the first 1 million data points, which have not changed, just to incorporate the 100 new points. The cost of rebuilding the tree is dependent on the total number of points, not the number of new points. As the dataset grows very large, this rebuild step could eventually become a noticeable performance bottleneck.
Alternative: A more optimal strategy would be an incremental tree update. Instead of rebuilding from scratch, you could design an algorithm that only updates the nodes in the tree affected by the new data. For a min-max tree, this would involve adding new leaf nodes and then walking up the tree to the root, updating the min and max values at each level. This is significantly more complex to implement correctly but would change the update cost from O(N) to O(log N) where N is the total number of points.
Conclusion
Congratulations! You have successfully integrated the two core components of your telemetry engine. By creating a thread-safe queue, you've established a robust communication channel between your background data consumer and your real-time UI. Your plotter is no longer a static viewer; it's a live dashboard.
Key Takeaways:
- A thread-safe queue using
std::mutexis an effective pattern for passing data from a background thread to the UI thread. - The
drainpattern, which moves all available items in a single locked operation, is highly efficient for UI updates. - When live data is added to the plotter's data store, the min-max tree must be rebuilt to reflect the new state.
- The
append and rebuildstrategy is a simple and effective starting point for handling live data streams.
What's Next?
Your plot is now live, but it has a problem: the data vector will grow indefinitely, eventually consuming all available memory.
In the next lesson, we will solve this by implementing a proper circular buffer for the plot data, ensuring the plotter only stores the most recent N data points. This will make your plotter's memory usage constant and stable over long-running sessions, a crucial feature for any real-world monitoring tool.