Hello! Welcome to the next step in your journey to deconstructing the human form.
In our previous lessons, we assembled all the individual components of the Loomis method: we started with a sphere for the cranium, learned to slice the sides, established the crucial facial proportions with the rule of thirds, and finally attached the jaw to complete the basic head volume. You've built all the necessary components.
Today, we assemble everything. Our goal is to construct the complete Loomis head from front, profile, and three-quarter views. We will practice the entire sequence from a blank page to a finished structural drawing. Think of the past few lessons as learning individual functions or subroutines; today, we write the main program that calls them in the correct order to produce a consistent result every time. This will solidify your understanding and build the muscle memory needed for confident drawing.
1. The Full Construction Sequence: A Visual Map
Before we dive into the step-by-step process, let's look at the complete roadmap. The core idea, as originally conceived by Andrew Loomis, is to build a convincing 3D structure using a clear, repeatable process.
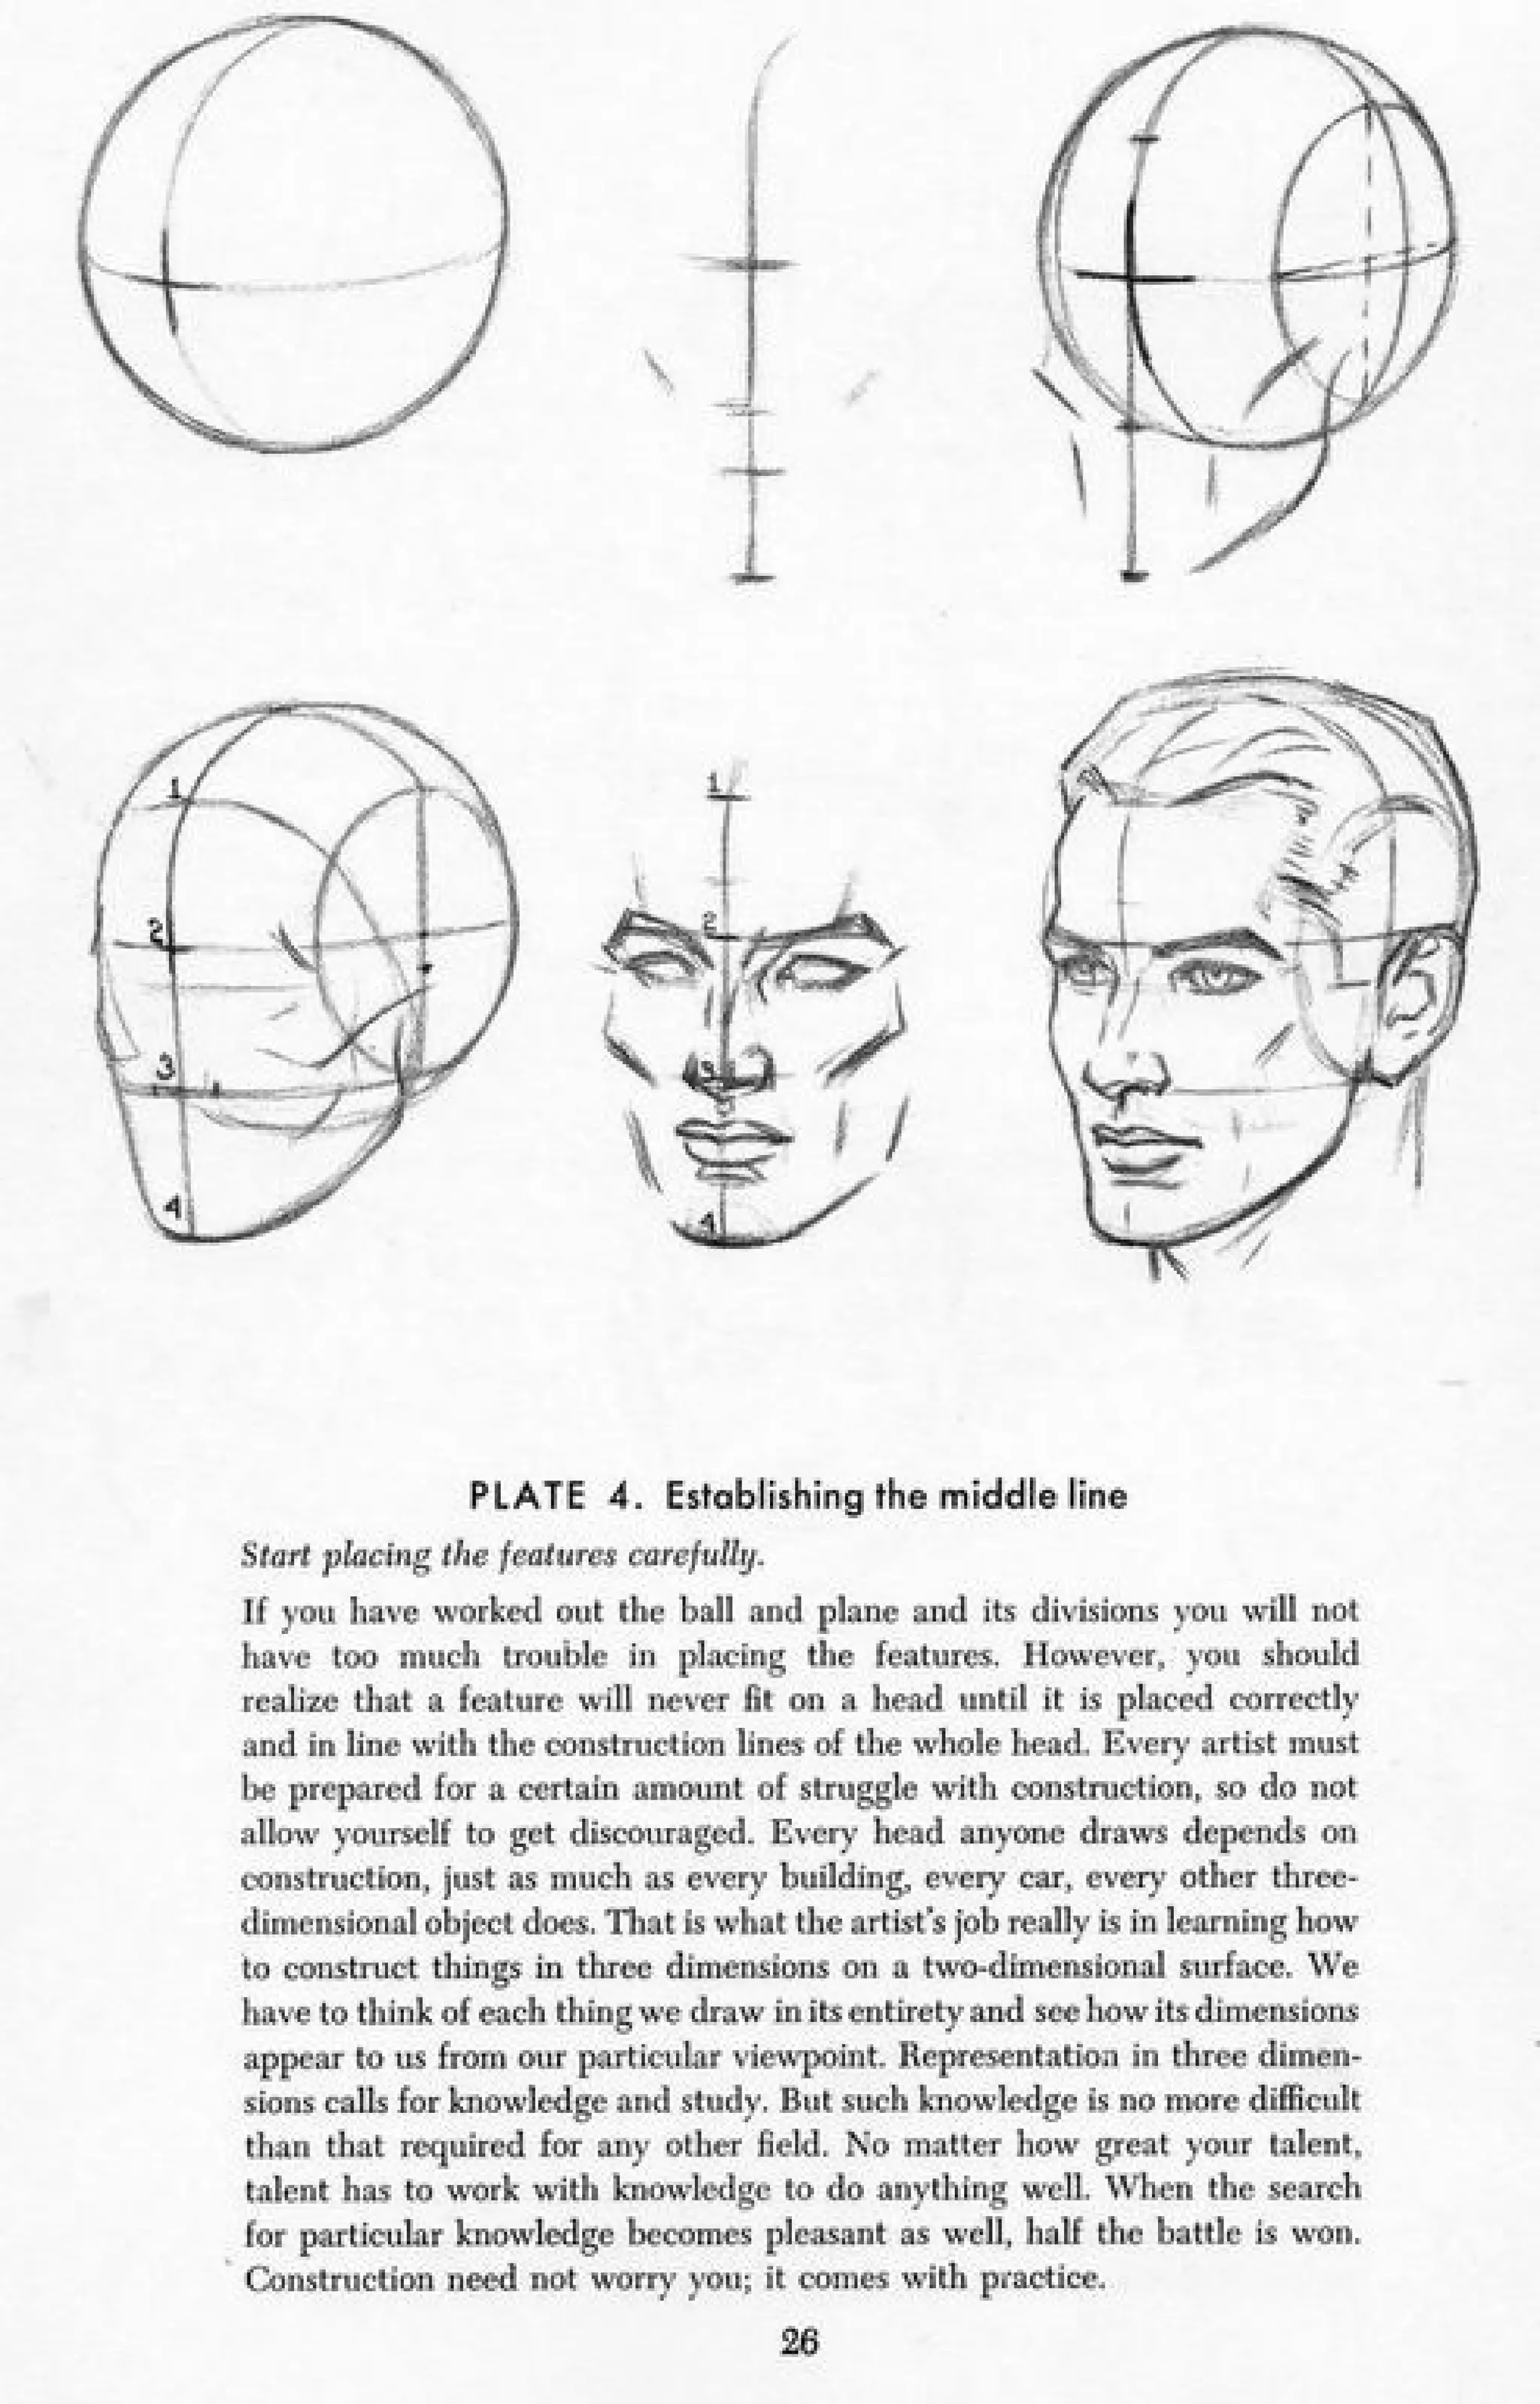
The key is to perform these steps consistently across the three primary viewpoints: front, profile (side), and three-quarter.

2. Guided Construction: Front, Profile, and 3/4 Views
Now, let's walk through the construction of each view with a detailed video guide. The following demonstrations are clear and move at a manageable pace. The goal is to watch how the artist executes each step and then try it yourself.
We will start with the profile view, as it's the most straightforward, then move to the front view, and finish with the most versatile and informative angle, the three-quarter view.
A. The Profile (Side) View
In the profile view, there is no perspective to worry about. All our construction lines are either circles or straight lines, making it the perfect starting point to solidify the process.
How to draw heads with Loomis Method (Tutorial) | DrawlikeaSir
Watch this segment from the video 'How to draw heads with Loomis Method' by Draw like a Sir. It provides a real-time demonstration of constructing the profile view from start to finish.
Watch from 07:30 to 10:22. Pay close attention to these key steps: Drawing the initial circle and crosshairs. Measuring the inner circle for the side plane (2/3 of the main circle). Marking the four key horizontal lines: hairline, brow line, nose line, and chin line. Attaching the jaw from the ear area down to the chin.
B. The Front View
The front view introduces the challenge of symmetry. The process is similar, but you must now mirror your construction on both sides of the central line. Here, we see the "sliced sides" of the cranium clearly.
How to draw heads with Loomis Method (Tutorial) | DrawlikeaSir
Now, let's watch the same artist construct the front view. Notice how the principles remain the same, but are now applied symmetrically.
Watch from 10:22 to 13:25. Focus on how he: Establishes the circle and crosshairs. Measures and marks the 2/3 distance to 'slice off' the sides. Adds the chin line and attaches the jaw, creating a symmetrical face shape.
C. The Three-Quarter (3/4) View
This is the most important view to master. It combines the circular nature of the cranium with the planar structure of the jaw in perspective, creating a true sense of three-dimensional form. This is where your ability to visualize a wireframe model on a 2D plane truly comes to life.
How to draw heads with Loomis Method (Tutorial) | DrawlikeaSir
Finally, let's tackle the 3/4 view. This part can be tricky, so don't worry if it takes a few tries. The key is to think about the guidelines wrapping around a 3D sphere.
Watch from 13:25 to 16:27. This is the most complex construction. Observe carefully: How the initial crosshairs are drawn as ellipses to show the sphere is turned. How the side plane is an oval in perspective. How the horizontal guidelines (brow, nose, etc.) curve as they wrap around the form. How the jaw connects the ear region to the chin to define the final volume.
Test your understanding!
In the three-quarter view, why do the horizontal guidelines (like the brow line) appear curved, while in the profile view they are straight?
Show answer
In the three-quarter view, we are looking at the curved surface of the head from an angle. The guidelines follow the contour of this curved surface, so they appear as ellipses or curves due to perspective. In a direct profile view, we are looking at the head from exactly the side, so these contour lines are seen edge-on and therefore appear as straight horizontal lines.
3. Practice Exercise (25-30 minutes)
Theory and observation are important, but practice is essential. Your goal now is to reproduce these three views yourself. Grab your sketchbook or paper.
- Set up your page: Divide your page into three sections for Profile, Front, and 3/4 views.
- Draw each view: Following the steps shown in the videos, construct the complete Loomis head for each of the three views.
- Start with the Profile View. Draw it once, carefully.
- Move to the Front View. Focus on getting the proportions and symmetry right.
- Finish with the Three-Quarter View. This will be the most challenging. Take your time and try to visualize the 3D form as you draw the wrapping lines.
- Repeat: Once you've completed one of each, do it again. Aim to draw at least two to three versions of each view. Your first will be slow and deliberate. By the third, you should feel the process becoming more familiar.
Tips for Practice:
- Draw lightly: Use light construction lines. You can darken the final outline later.
- Draw from the shoulder: Remember our first lesson. Use your whole arm to draw the initial circles for smoother shapes.
- Accuracy over speed: The goal is not to be fast, but to be accurate. Like debugging code, it's better to go step-by-step and get it right than to rush and have to fix fundamental errors.
- Use references: You can refer to the videos or the article "The Ultimate Guide to Drawing the Turned Head" which provides a great text-based step-by-step tutorial under the section "Step-by-Step Tutorial (Front, 3/4, Side View)" if you prefer a static guide.
Conclusion
Fantastic work today. You have successfully integrated all the components of the Loomis head construction into a complete, repeatable workflow. You are now equipped to build a structurally sound head from the three most fundamental angles.
Key Takeaways:
- The Loomis method is a sequential process: Sphere -> Orientation (Crosshairs) -> Sliced Sides -> Proportions (Thirds) -> Jaw.
- The Profile view is built on straight lines and circles, making it a great warm-up.
- The Front view requires careful attention to symmetry.
- The Three-Quarter view is key for showing 3D form and requires you to think about how lines wrap around a curved surface.
Next Lesson Preview:
You have now built a robust scaffold. But a wireframe is just the beginning. In our next lesson, we will begin to add features. We'll start by learning how to construct simplified 3D forms for the eyes, nose, mouth, and ears from different angles, preparing to place them correctly onto the head structure you've just mastered.