Hello! Welcome back to your AI video creation course.
In the last lesson, you took on the role of a director by creating a detailed, text-based storyboard for an animated story. You finished with a complete visual plan, including specific text-to-image prompts for each scene.
Today, we bring that plan to life. This lesson covers how to generate background images and B-roll visuals using text-to-image AI tools. We will take the prompts from your storyboard and turn them into the very first visual assets for your project. This marks our first step into the "asset generation" stage of our production pipeline.
1. Understanding Backgrounds and B-Roll
Before we start generating, let's clarify what we're creating.
- Backgrounds: These are the static or subtly moving environments that set the scene. In your storyboard, this would be the "gloomy junkyard" or the "stormy sky."
- B-roll: This term comes from traditional film editing. It refers to supplemental footage used to add visual interest and context to a video. For us, AI-generated B-roll can be abstract visuals, close-ups of objects, or atmospheric shots that break up a scene and make it more dynamic.
Why use AI for this? As one article on the topic explains, AI is perfect for creating shots that would be difficult or impossible to film, such as abstract visualizations or fantasy landscapes.
How to create AI B-roll for better video edits
To start, let's read a quick introduction to AI-generated B-roll from the Artlist Blog. This will help you understand its purpose in video editing.
Read the first two sections, 'What is B-roll — and what is AI-generated B-roll?'. Focus on how it's used to support the main story and is most effective for abstract shots or atmosphere.
2. The Anatomy of a Great Visual Prompt
The quality of your AI-generated images depends almost entirely on the quality of your text prompts. In the last lesson, you created some prompts for your storyboard. Now, let's learn how to refine them to get truly professional results.
A great prompt for a background or visual scene is specific and layered. The article "10 Powerful Text to Image Prompts" offers excellent guidance on this.
10 Powerful Text to Image Prompts to Master in 2025
This article from ai-media-studio provides fantastic, actionable tips for writing prompts. We'll focus on the section dedicated to creating environments.
Read section '2. Environment & Landscape Prompts' and the summary section 'Key Principles for Effective Prompting'. Pay close attention to the 'Implementation Tips' for environments, such as defining lighting, layering composition, and referencing art movements.
Based on the reading, here's a structure for a powerful environment prompt:
- Subject & Composition: Start with the main focus and its placement. Use terms like
foreground, midground, background.- Example:
A massive gnarled oak tree in the foreground...
- Example:
- Environment Details: Describe the setting.
- Example:
...rolling green hills in the midground, and distant snow-capped mountains.
- Example:
- Lighting & Atmosphere: This is crucial for setting the mood.
- Example:
...under golden hour sunlight and a dramatic sky.
- Example:
- Art Style & Quality: Specify the aesthetic you want.
- Example:
...in the style of a contemporary digital matte painting, photorealistic, 8k.
- Example:
Putting it all together:A massive gnarled oak tree in the foreground, rolling green hills in the midground, and distant snow-capped mountains under golden hour sunlight and a dramatic sky, in the style of a contemporary digital matte painting, photorealistic, 8k.
3. Your Primary Tool: Leonardo.AI
Now it's time to generate. We will use Leonardo.AI, a powerful and popular tool that offers a generous free plan, perfect for our needs.
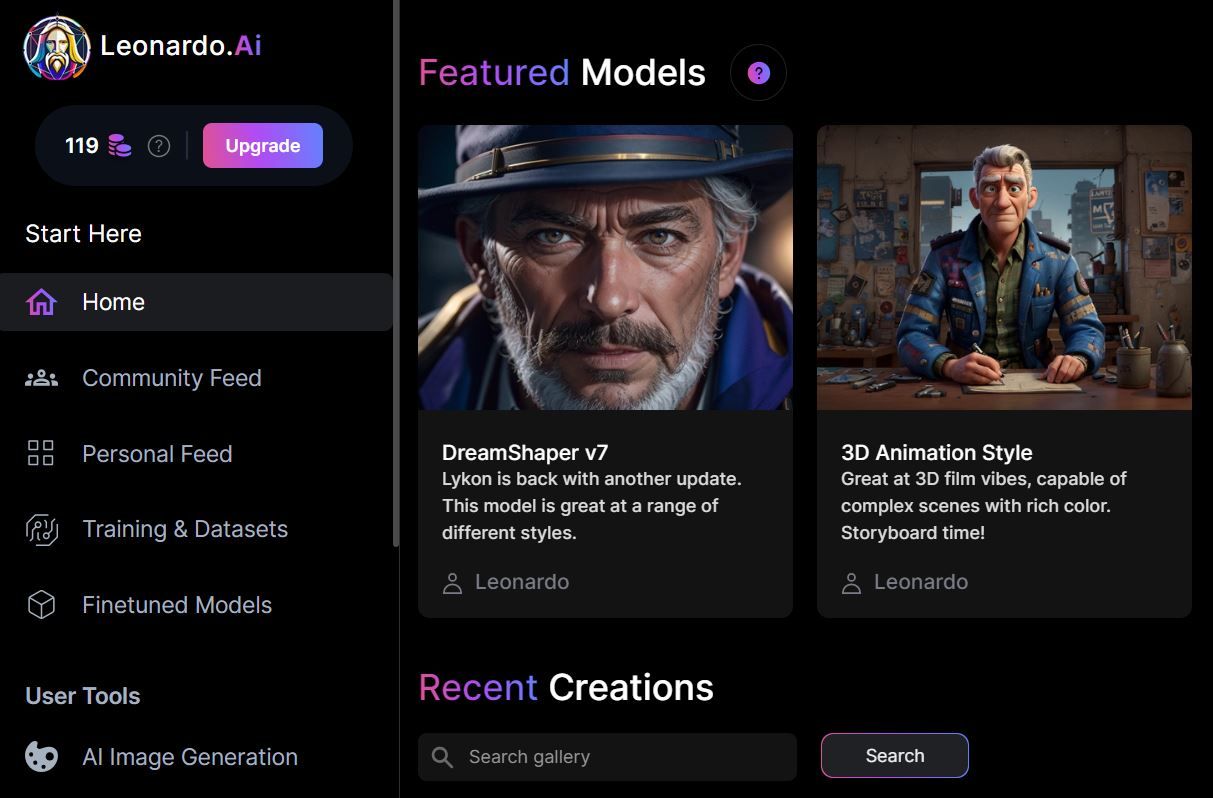
The following video is a comprehensive beginner's guide. We'll walk through it step-by-step to learn the essential features.
Leonardo AI - Tutorial for Beginners - How to Use [ FULL GUIDE 2026 ]
This 'Tutorial for Beginners' from the Skills Factory channel will be our guide to Leonardo.AI. It covers everything from basic generation to more advanced settings.
Watch from 00:48 to 05:21. This covers the most critical parts for today: The Basics (00:48 - 01:39): Learn where to enter your prompt and generate your first image. Models and Styles (01:56 - 03:13): See how to switch AI models (like 'DreamShaper' for realism or '3D Animation Style') and choose a basic style ('Cinematic', 'Creative'). Refining Your Image (03:13 - 05:21): Discover how to use a 'Negative Prompt' to remove unwanted elements and how to write more effective prompts.
Key takeaways from the video:
- Models: Different models produce different styles. Experimenting with models like "DreamShaper v7" (photorealistic) or "3D Animation Style" can drastically change your output.
- Negative Prompts: This is a field where you describe what you don't want to see. For example, if your images keep coming out blurry or with strange text, you could add
blurry, text, watermarkto the negative prompt. - Prompt Magic/Assistance: Leonardo.AI has built-in tools to help improve your prompts, which is great for getting new ideas.
4. Practical Exercise: Generate Your Storyboard Scenes
Let's apply what you've learned. You'll take the prompts from your storyboard exercise in the previous lesson and bring them to life in Leonardo.AI.
Your Task:
- Sign up for a free account at Leonardo.AI. You get 150 free tokens per day.
- Go to the AI Image Generation tool.
- Take an image prompt from your storyboard. For example:
3D animation, WALL-E style, wide shot, a tiny, lonely robot with a boxy body and one camera-lens eye moves through a vast junkyard under a grey, overcast sky, mountains of rusted metal scrap, cinematic, gloomy atmosphere. - Paste the prompt into Leonardo.AI and click "Generate."
- Iterate and Refine:
- Change the Model: Generate the same prompt using at least two different models (e.g., '3D Animation Style' and then 'DreamShaper v7'). Notice the difference.
- Refine the Prompt: Add more detail based on what you learned in Part 2. Try adding specific lighting (
harsh overhead lighting) or atmospheric effects (soft morning mist). - Use a Negative Prompt: If you see things you don't like (e.g., the robot looks too complex, or the image is too bright), add terms to the negative prompt like
complex details, bright colors, sunny.
- Save Your Best Image: Once you have a background image you're happy with, download it.
Spend about 15-20 minutes on this exercise. The goal is not just to create one image, but to get a feel for how small changes in the prompt and settings can influence the AI.
5. Final Touch: Upscaling for Video Quality
The default images from AI generators can sometimes be too small for high-quality video. Upscaling increases the resolution of an image, making it sharper and more detailed.
Leonardo AI - Tutorial for Beginners - How to Use [ FULL GUIDE 2026 ]
Let's return to the Leonardo.AI tutorial to see how to upscale our images for free.
Watch from 08:03 to 08:44. The video explains how to use the 'Universal Upscaler,' which is available on the free plan. You simply upload your generated image and let the tool enhance it.
Upscaling your final images is a critical step to ensure your videos look crisp and professional. Always use it for the assets you plan to include in your final edit.
6. Alternative Workflow: CapCut's Built-in Generator
For quick and simple backgrounds, you don't always need to leave your video editor. Since you're familiar with CapCut, you should know it has its own built-in AI image generator.
How To Replace A Background Using AI in CapCut!
This video by Ben Claremont demonstrates how to use CapCut's internal AI to create and replace a background. This is a great alternative for simpler tasks.
Watch the section from 01:21 to 02:40. Focus on how a prompt is used to generate a background directly within the CapCut interface. Notice that the options are simpler than Leonardo.AI, but it's very convenient.
The advantage of using CapCut's generator is speed and convenience. The disadvantage is that you have less control over the models, styles, and other advanced settings compared to a dedicated tool like Leonardo.AI. Knowing both options allows you to choose the right tool for the job.
Conclusion
Fantastic work today! You've successfully made the leap from text to visuals, a cornerstone of AI video production. You now have the skills to create the rich worlds and supporting imagery your stories will inhabit.
Key Takeaways:
- Prompting is a skill: The more specific you are with lighting, composition, and style, the better your results will be.
- Leonardo.AI is a powerful free tool: It offers different models, negative prompts, and upscaling to give you fine-grained control over your visual assets.
- Workflow matters: You can use dedicated tools like Leonardo.AI for high-quality, specific assets, and integrated tools like CapCut's generator for quick, convenient backgrounds.
- Always upscale: To ensure your final video looks professional, upscale your key visual assets to a higher resolution.
Next Lesson Preview:
So far, we've generated images without worrying too much about their shape. But for video, the aspect ratio (the ratio of width to height) is critical. In our next lesson, we will focus on generating images using specific aspect ratios (e.g., 9:16 for vertical video, 16:9 for widescreen) to ensure your visuals are perfectly formatted for platforms like YouTube, TikTok, and Instagram.