Hello! Welcome back to our course on AI video creation.
In our last lesson, you successfully generated your first visual assets—backgrounds and B-roll—using Leonardo.AI. You learned how to write detailed prompts to create rich, atmospheric scenes. This was a huge step in bringing your ideas to life.
However, you might have noticed that the images were generated in a default shape, usually square. For video, one size does not fit all. Today's lesson focuses on a crucial next step: generating images using specific aspect ratios (e.g., 9:16, 16:9) suitable for different social media platforms. Mastering this will ensure your visuals are perfectly framed for your intended audience, whether they're watching on YouTube, TikTok, or Instagram.
1. What is Aspect Ratio and Why Does It Matter?
Aspect ratio is simply the ratio of an image's width to its height. It determines the shape of your visual frame. A video created for a widescreen TV looks very different from one designed for a vertical phone screen. Using the correct aspect ratio is fundamental to creating professional-looking content.
This image gives a great overview of the most common aspect ratios and where you'll find them.
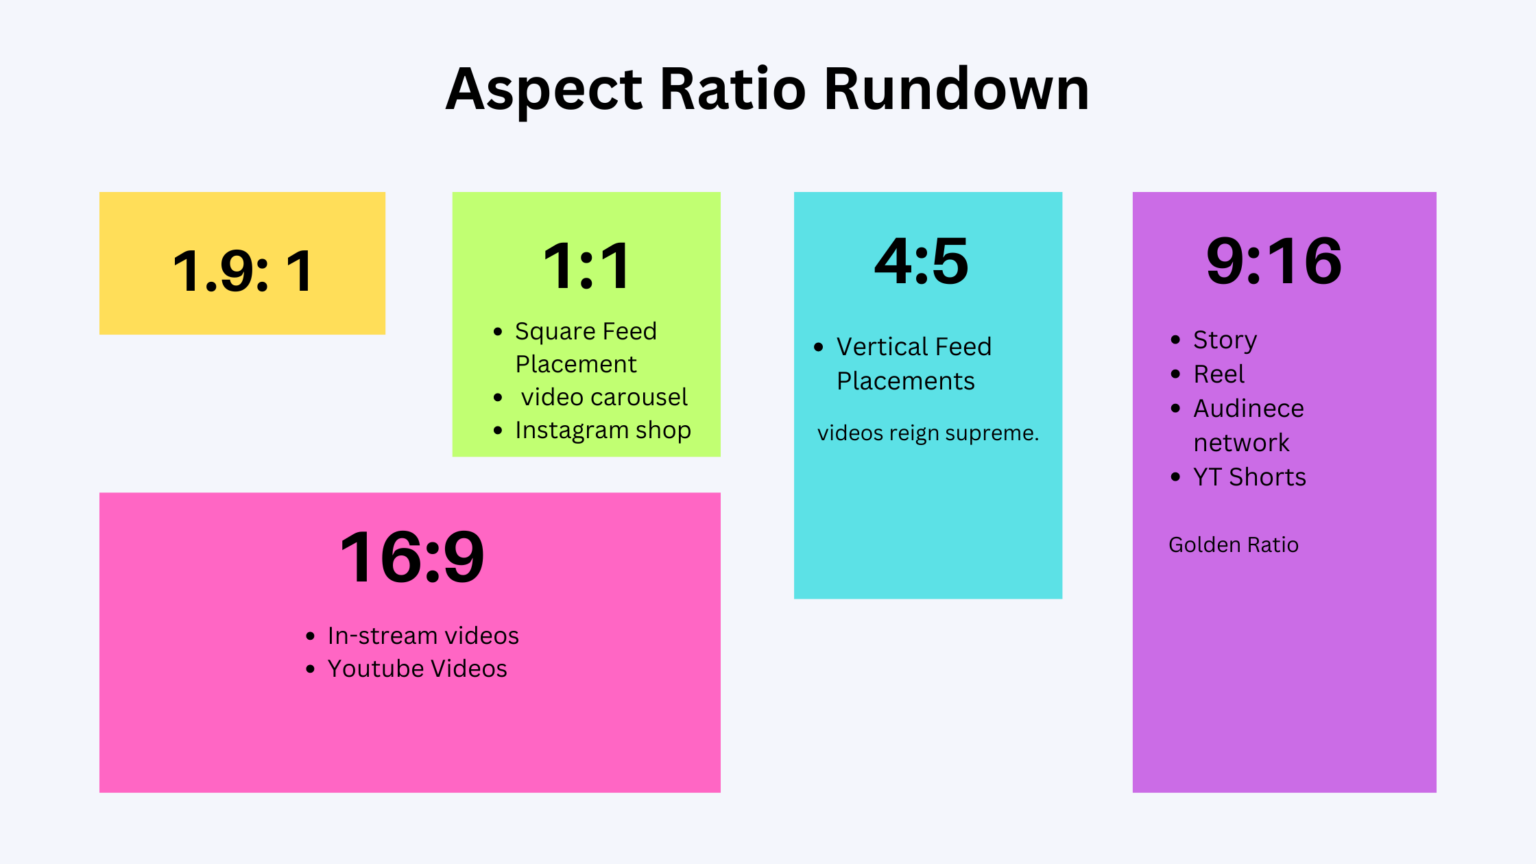
As you can see, the main ones we'll focus on are:
- 16:9 (Landscape): The standard for YouTube videos, presentations, and traditional film.
- 9:16 (Portrait/Vertical): Dominates mobile-first platforms like TikTok, Instagram Reels, and YouTube Shorts. This is essential for UGC-style content.
- 1:1 (Square): A classic for Instagram and Facebook feed posts.
- 4:5 (Vertical): A slightly less tall vertical format also popular on Instagram feeds.
Generating your assets in the right aspect ratio from the start saves you a lot of time and avoids awkward cropping or stretching later in the editing process.
2. Setting Aspect Ratios in Leonardo.AI
Since you're already familiar with Leonardo.AI from our last lesson, let's start there. The platform gives you precise control over the dimensions of your generated images.
The following video clip quickly shows you where to find this setting.
LEONARDO AI Tutorial 2025: The ULTIMATE AI Image Generation Guide for Beginners!
This short clip from Lucas AI Academy's guide to Leonardo.AI gets straight to the point, showing you where the aspect ratio settings are located.
Watch from 02:40 to 02:49. Notice how it directly links specific ratios (16:9, 9:16) to their target platforms (YouTube, Shorts).
To dive a little deeper, let's explore the "Image Dimensions" panel in more detail.
How to Use Leonardo AI – Beginner's Guide
This guide from Videoproc explains the 'Image Dimensions' setting in Leonardo.AI and offers a crucial best-practice tip.
Read section '4. Set Image Dimensions (Aspect Ratio)'. Also, read the 'Tip' at the beginning of the 'Custom Model Training' section. Focus on the advice to stay close to the model's default aspect ratio for the best results.
The key takeaway is that while you can force any aspect ratio, AI models are "trained" on images of a certain size. Sticking close to the recommended dimensions for a given model will usually prevent weird stretching or distorted objects in your images.
This is what the control panel looks like. You have presets for common ratios and can also input custom resolutions.

3. An Alternative: Using Canva's Magic Media
Sometimes, you might want an even simpler workflow. Canva, a very popular and user-friendly design tool, has its own AI image generator called Magic Media. It's a fantastic, free option, especially for social media content.
Let's see how to set aspect ratios in Canva.
How to Use Canva AI Image Generator
This article from Bring Your Own Laptop provides a step-by-step guide to using Canva's AI generator. We'll focus on how it handles aspect ratios.
First, skim the section 'Using a Basic Prompt to Generate an AI Image in Canva' to see the user interface. Then, read the part about 'Aspect ratio' at the bottom of that section. Notice how it simplifies the choices to 'Square', 'Landscape', and 'Portrait' and explains what each is for.
Canva's approach is great for beginners because it uses simple terms (Landscape, Portrait) instead of numerical ratios, while still giving you the control you need to create assets for different platforms.
4. Practical Exercise: Generating for Different Platforms
Now it's time to put this into practice. Your task is to generate visuals for the same concept but formatted for three different platforms. You can use either Leonardo.AI or Canva for this exercise.
Your Prompt: A sleek, modern home office with a large window showing a rainy city, a minimalist desk with a glowing laptop, cinematic lighting, photorealistic.
Your Task (15-20 minutes):
-
Generate for YouTube (16:9):
- Set the aspect ratio to 16:9 (Landscape).
- Generate the image using the prompt above.
- Observe how the AI composes the shot for a wide frame. This would be perfect as a background for a standard video.
- Save the best result.
-
Generate for TikTok/Reels (9:16):
- Change the aspect ratio to 9:16 (Portrait).
- Generate the exact same prompt again.
- Notice how the AI has to recompose the scene to fit a tall, vertical frame. The window might become more prominent, or the view of the desk might be tighter.
- Save the best result.
-
Generate for an Instagram Post (1:1):
- Finally, set the aspect ratio to 1:1 (Square).
- Generate the prompt one last time.
- See how the composition changes again to fit neatly into a square. The focus might shift to the center of the desk.
- Save the best result.
By the end of this exercise, you will have three variations of the same scene, each perfectly tailored to a different social media platform. This experience is key to developing an efficient AI video workflow.
Conclusion
Excellent work! You've now unlocked one of the most practical and important skills in the AI asset generation pipeline. You are no longer just creating images; you are creating images with a specific purpose and destination in mind.
Key Takeaways:
- Aspect ratio is non-negotiable for video: You must match your visuals to the platform (e.g., 16:9 for YouTube, 9:16 for TikTok).
- AI tools give you control: Both Leonardo.AI and Canva have easy-to-use settings to define the aspect ratio before you generate an image.
- The same prompt yields different results: Changing the aspect ratio forces the AI to rethink the composition, leading to different but equally useful images from a single idea.
Next Lesson Preview:
We now have the skills to create beautifully composed backgrounds and scenes in any shape we need. But what about the main subject? In our next lesson, you will learn how to design a detailed character prompt to generate a consistent-style character image. This is the foundational skill for creating the custom talking avatars you'll use in your marketing videos and animated stories.