Hello! Welcome back.
In our last lesson, we took a big step up in narrative complexity by exploring how to use midpoints and subplots to expand the basic 3-act structure. You learned how to prevent the "saggy middle" and add emotional depth, preparing you to build stories longer than a single minute.
Now, we'll move from the architect's high-level blueprint to the builder's detailed plan. This lesson focuses on your next learning outcome: to outline a multi-scene story, ensuring each scene contributes to the overall plot progression. We will break down the acts, midpoints, and subplots you've planned into a concrete, scene-by-scene outline. This outline will become the direct guide for generating your AI video clips, ensuring every piece you create serves a purpose in your final visual story.
Recap: The Story's Skeleton
Remember our expanded 3-act structure. It provides the main "bones" of your story.
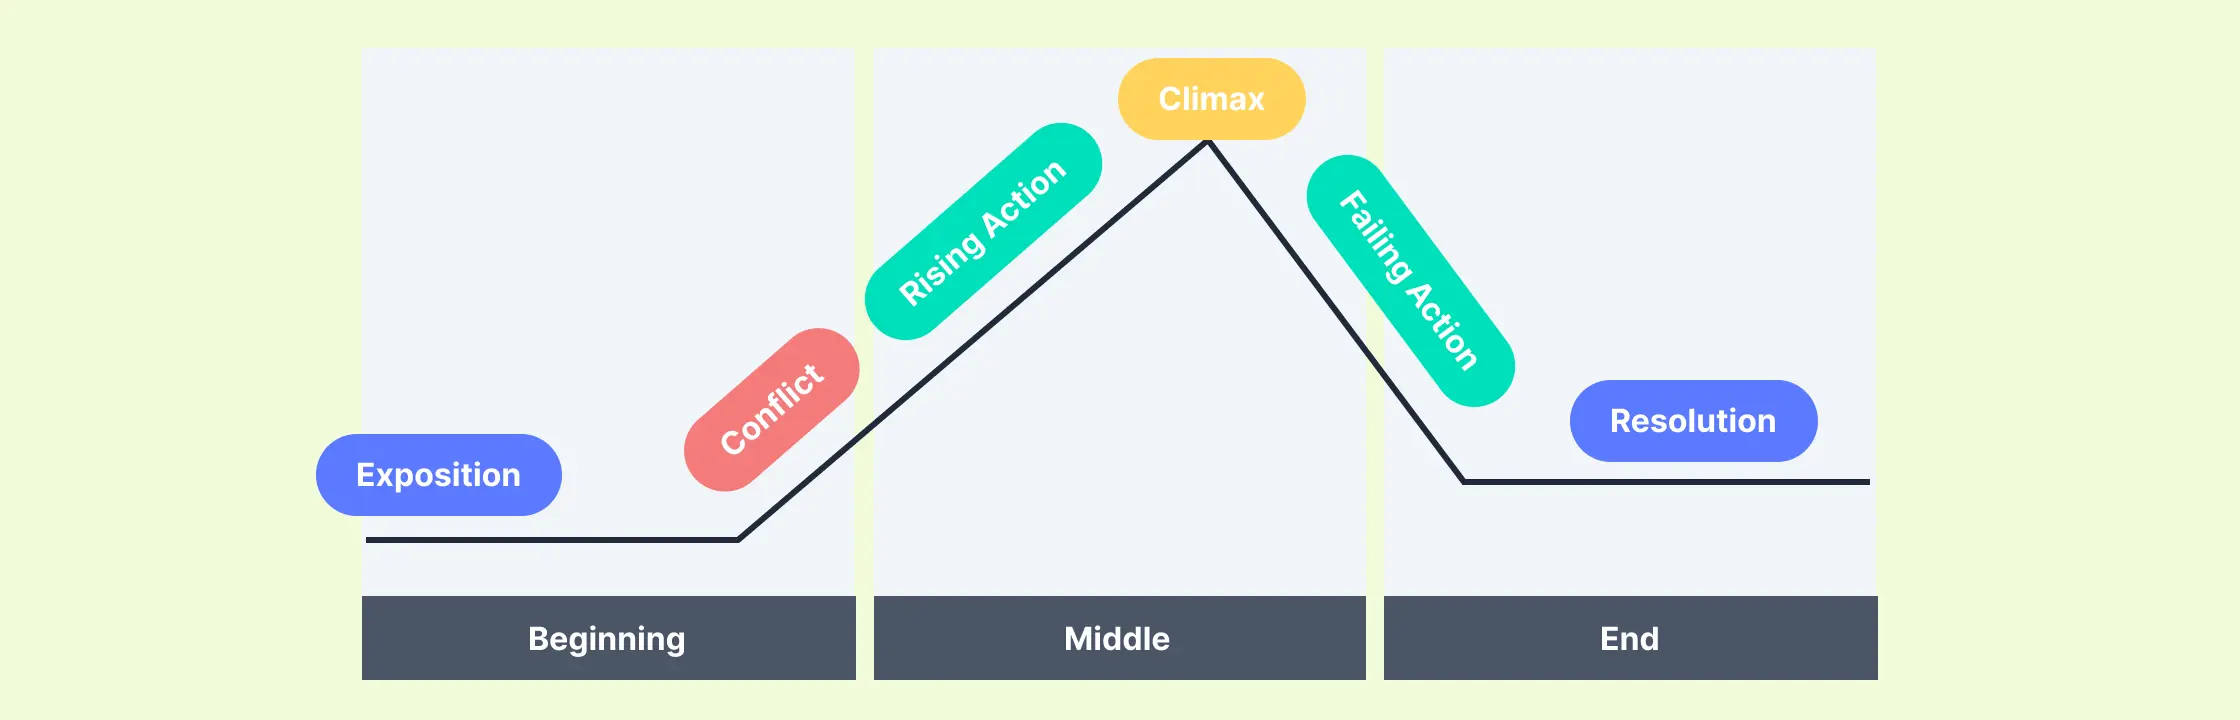
Your story has a beginning (Act 1), a middle (Act 2), and an end (Act 3), with major turning points like the Inciting Incident, a Midpoint, and a Climax. Now, let's put some meat on those bones.
Part 1: Every Scene Must Do a Job
Before we start stringing scenes together, we need to understand the single most important rule: every scene must be essential. If you can remove a scene and the story still makes perfect sense, that scene wasn't doing its job. This is the key to ensuring plot progression. A "lazy" scene that only restates information or doesn't change anything will kill your story's momentum.
So, what job should a scene do? A great scene often does several jobs at once.
Stop Writing Boring Scenes -- Use this Secret 9-Step Formula
This video, 'Stop Writing Boring Scenes,' by Bookfox, offers a concise and powerful framework for evaluating your scenes. It will help you think like an editor and ensure every scene pulls its weight.
Please watch the following three clips. They get straight to the point. Clip 1 (03:10 - 04:35): Focus on the concept of 'multitasking scenes.' Clip 2 (07:56 - 09:03): Pay attention to the analogy of scenes as linked 'box cars' that pull the story forward. Clip 3 (09:41 - 10:26): Note the three essential questions to ask of every scene you create.
To summarize the key ideas from the video, when you are planning a scene, ask yourself:
- Is it multitasking? Does it advance the plot, AND reveal character, AND build mood? The more jobs it does, the better.
- How does it move the story forward? What has fundamentally changed by the end of the scene? The character's situation, their knowledge, or their emotional state should be different from when the scene began.
- What would happen if I cut this scene? If the answer is "not much," you either need to cut it or combine it with another scene to make it more impactful.
This mindset is crucial. As you build your outline, you are the director and the editor, making sure only the essential moments make it into the final cut.
Part 2: The Action/Reaction Engine
If every scene must cause a change, how do you create a smooth, logical flow from one scene to the next? The answer lies in a classic cause-and-effect pattern often called Scene and Sequel, or more simply, Action and Reaction.
This structure ensures that your scenes are linked like dominoes, where one action inevitably triggers a reaction, which in turn leads to a new action. This is the engine that drives your plot progression.
The excellent article "Scene Structure and Transitions" by K.M. Weiland breaks this down beautifully.
Scene Structure and Transitions in Big Scenes
This article provides a practical, two-part structure for scenes that you can use over and over again. Understanding this will make outlining much more methodical.
Please read from the beginning of the section 'How to Use Story and Particularly Scene Structure to Create Transitions' down to the end of 'Structuring Your Story’s Sequels: Reaction.' Focus on the two main halves: The Scene (Action): Made of Goal, Conflict, and Outcome. The Sequel (Reaction): Made of Reaction, Dilemma, and Decision.
Let's distill this powerful framework:
Part 1: The ACTION Scene
- Goal: The character enters the scene wanting something specific. (e.g., The robot janitor wants to find a quiet place to hide the alien plant.)
- Conflict: They face an obstacle. (e.g., A security drone patrols the corridor.)
- Outcome (Disaster): They either fail, or succeed with a negative consequence. (e.g., The robot hides the plant just in time, but in doing so, drops its keycard near the drone's path.)
This "disaster" creates the need for the next part.
Part 2: The REACTION Scene (or Sequel)
- Reaction: The character reacts emotionally to the outcome. (e.g., The robot freezes in panic, watching the drone approach the keycard.)
- Dilemma: They have to process what happened and figure out what to do. There is no easy choice. (e.g., Should it risk revealing itself to grab the card, or abandon it and risk being locked out of essential areas?)
- Decision: They make a new choice, which becomes the Goal for the next ACTION scene. (e.g., It decides to create a diversion to lure the drone away. Its new goal is to cause a minor malfunction in a nearby cargo lift.)
This cycle—Goal -> Conflict -> Outcome -> Reaction -> Dilemma -> Decision -> New Goal—is the engine of your story. A single scene in your video might be an "Action" beat, and the very next scene could be the "Reaction."
Test your understanding!
Let's use the inventor story from our last lesson. The inventor's robot has just malfunctioned and embarrassed him in front of his crush (the Outcome of the previous scene).
What would be the Reaction, Dilemma, and Decision that could form the next scene?
Show answer
- Reaction: The inventor is mortified and hides, watching his crush look confused.
- Dilemma: He's faced with a terrible choice: does he go out and try to explain, risking more embarrassment, or does he cut his losses and give up on the date entirely?
- Decision: He decides he can't leave things like this. He must apologize in person, without any technology. His new goal is to walk over and talk to her face-to-face.
Part 3: Building Your Multi-Scene Outline
Now you have the principles: every scene must have a purpose, and scenes link together through action and reaction. How do you map this out for a whole 3- or 5-minute story? A beat sheet is the perfect tool.
A beat sheet is essentially a list of the key emotional moments and plot points—the "beats"—that form your narrative. It's more detailed than a 3-act summary but less granular than a full script.
Save The Cat Beat Sheet: What Everyone Gets Wrong - Naomi Beaty
The 'Save The Cat Beat Sheet' is one of the most famous story-structuring tools. While it details 15 beats for a feature film, the core concepts are perfectly scalable and provide an amazing checklist for ensuring your story has all the key ingredients. This video from Film Courage explains it well.
Watch the full video (it's about 14 minutes). As you watch, don't worry about memorizing all 15 beats. Instead, focus on how the beats serve as signposts for the story's journey: the beginning state, the call to action, the escalating conflict, the lowest point, and the final resolution. Pay attention to the distinction between a 'beat' as a single moment (like the Catalyst) versus a 'section' (like the Setup).
For your 3-5 minute videos, you don't need to slavishly follow all 15 beats. Instead, think of them as a "greatest hits" checklist to build your outline around:
- The Setup (Act 1): A few scenes showing the character's ordinary world and what's missing in their life.
- The Catalyst (Act 1): One scene. The event that kicks off the story.
- Break into Act 2: The character commits to the journey.
- The Midpoint (Middle of Act 2): A major scene where the stakes are raised or the game changes (as we discussed last lesson!).
- All Is Lost (End of Act 2): The lowest point. A scene where it looks like the hero has failed completely.
- Break into Act 3: The character finds a new resolve or a new plan.
- The Finale (Act 3): A sequence of scenes where the character confronts the final conflict.
- Final Image: The very last scene, showing how the character or their world has changed.
From Beats to Scenes
Your outline connects these major beats using the Action/Reaction cycle. A single beat on your sheet might become one, two, or even three scenes in your outline.

Finally, let's make this practical. How long should your acts be? The resource "Short Film Story Outline Structure" provides a fantastic, simple guide.
Short Film Story Outline Structure
This article gives you concrete numbers for mapping your story structure to specific video lengths, which is directly relevant to your goal of making 1, 3, and 5-minute videos.
Please read the sections '3 Act Story Structure for Short Films' and 'Acts and Lengths.' Pay close attention to the table that breaks down act timings for different video lengths.
Using their 20%/60%/20% rule, here’s a rough guide for your projects:
| Video Length | Act 1 (Setup) | Act 2 (Confrontation) | Act 3 (Resolution) |
|---|---|---|---|
| 1 Minute | ~12 seconds | ~36 seconds | ~12 seconds |
| 3 Minutes | ~36 seconds | ~1 min 48 sec | ~36 seconds |
| 5 Minutes | ~1 minute | ~3 minutes | ~1 minute |
You can place your Midpoint roughly halfway through Act 2. This gives you a clear temporal map for placing your scenes.
Conclusion
Today, we've translated high-level story structure into a practical, scene-by-scene outlining process. By ensuring every scene serves a purpose and by using the action/reaction cycle, you can build a narrative that flows logically and keeps your audience engaged from start to finish.
Key Takeaways:
- Every scene must cause a change. Ask yourself: "What's different at the end of this scene?" and "What would happen if I cut it?"
- Use the Action/Reaction cycle (Goal/Conflict/Outcome -> Reaction/Dilemma/Decision) to create a strong chain of cause and effect between your scenes.
- A beat sheet provides a structural checklist to ensure your story hits all the key emotional and plot points.
- You can map these beats onto a timeline based on the intended length of your video, giving you a clear blueprint for generation.
Preview of the Next Lesson:
With a solid multi-scene outline in hand, the next major challenge is bringing it to life visually. How do you make sure your main character looks the same from scene to scene? How do you maintain the style of your world? Our next lesson, "Develop strategies for maintaining character and world consistency across a longer project," will tackle this head-on, focusing on the practical techniques of using anchor images and character reference sheets in your AI prompts.