Hello! Welcome back.
In our previous lesson, we explored the "why" behind the Coordinator pattern, establishing its role in decoupling view controllers and centralizing navigation logic. You learned that by extracting navigation responsibility into a separate object, we can create more reusable, testable, and maintainable UI components.
Today, we transition from theory to practice. Our goal is to implement a basic Coordinator to manage the navigation flow between two screens. We will build the essential components of the pattern from the ground up, giving you a concrete, hands-on understanding of how it works.
Step 1: Laying the Foundation with Protocols
A robust implementation of the Coordinator pattern starts with a good protocol. This defines a clear contract for what any coordinator in our app must be able to do. We'll also create a useful helper protocol to simplify how we create view controllers from storyboards.
How to use the Coordinator pattern in iOS
To begin, let's watch Paul Hudson from Hacking with Swift explain and implement the core Coordinator and Storyboarded protocols. This provides a clean and reusable foundation for our navigation logic.
Watch from 05:13 to 10:33. Pay close attention to the definition of the Coordinator protocol and the clever Storyboarded protocol, which uses the view controller's class name to instantiate it from the Main storyboard.
To complement the video, here is the same content in a written format from the Hacking with Swift article. It's a great reference to have open as you work.
How to use the coordinator pattern in iOS apps - Hacking with Swift
This article is the textual version of the video. It's useful for reviewing the code snippets at your own pace.
Read the section titled 'Coordinators in action' up to the part about creating the MainCoordinator. This covers the creation of the Coordinator and Storyboarded protocols.
Let's recap the key components from that segment:
-
The
CoordinatorProtocol:
This is our blueprint.protocol Coordinator { var childCoordinators: [Coordinator] { get set } var navigationController: UINavigationController { get set } func start() }navigationController: The coordinator needs a reference to aUINavigationControllerto push and pop view controllers. The coordinator "owns" and directs this navigation stack.childCoordinators: This array is crucial for memory management. When a coordinator starts a new, complex flow (like user onboarding), it might create a child coordinator for that flow. Storing a reference here keeps the child coordinator alive. We won't use it today, but it's essential for scalable architectures.start(): This is the entry point that kicks off the coordinator's flow.
-
The
StoryboardedProtocol:
This is a helper that elegantly solves the problem of instantiating view controllers from a storyboard without using error-prone string identifiers directly in your code.protocol Storyboarded { static func instantiate() -> Self } extension Storyboarded where Self: UIViewController { static func instantiate() -> Self { let fullName = NSStringFromClass(self) let className = fullName.components(separatedBy: ".")[1] let storyboard = UIStoryboard(name: "Main", bundle: Bundle.main) return storyboard.instantiateViewController(withIdentifier: className) as! Self } }By conforming a
UIViewControllertoStoryboardedand ensuring its Storyboard ID matches its class name, you can now create it simply withMyViewController.instantiate().
Step 2: Creating the MainCoordinator and Launching the App
With our protocols defined, we can create our first concrete coordinator. We'll then configure our app to hand over control to this coordinator at launch, instead of loading an initial view controller from the storyboard automatically.
This is a critical step: we are manually taking over the app's startup process.
How to use the Coordinator pattern in iOS
Let's continue with Paul Hudson's video to see how to create the MainCoordinator and, most importantly, how to set up the AppDelegate to launch it.
Watch from 10:33 to 12:45. Focus on the two main parts: creating the MainCoordinator class, and modifying the AppDelegate to instantiate and start this coordinator when the app finishes launching.
Here's a breakdown of the app launch configuration, which can be tricky the first time:
-
Disable Storyboard Launch: In your project's settings, under Targets > General, you must clear the "Main Interface" field. This tells the app not to load any storyboard automatically.
-
Modify
AppDelegate.swift: You need to take manual control of setting up theUIWindow.// In AppDelegate.swift var coordinator: MainCoordinator? var window: UIWindow? func application(_ application: UIApplication, didFinishLaunchingWithOptions launchOptions: [UIApplication.LaunchOptionsKey: Any]?) -> Bool { // 1. Create a UINavigationController let navController = UINavigationController() // 2. Create the MainCoordinator, handing it the navigation controller coordinator = MainCoordinator(navigationController: navController) // 3. Tell the coordinator to start its flow coordinator?.start() // 4. Create a UIWindow and set its root to our navigation controller window = UIWindow(frame: UIScreen.main.bounds) window?.rootViewController = navController window?.makeKeyAndVisible() return true } -
Implement
MainCoordinator: This class brings everything together. It owns theUINavigationControllerand itsstart()method is responsible for creating and displaying the very first screen of the app.// In MainCoordinator.swift class MainCoordinator: Coordinator { var childCoordinators = [Coordinator]() var navigationController: UINavigationController init(navigationController: UINavigationController) { self.navigationController = navigationController } func start() { let vc = ViewController.instantiate() // We'll add something here in the next step! navigationController.pushViewController(vc, animated: false) } }
At this point, if you run the app, it should launch and show the initial ViewController, but it's the coordinator doing the work, not the storyboard.
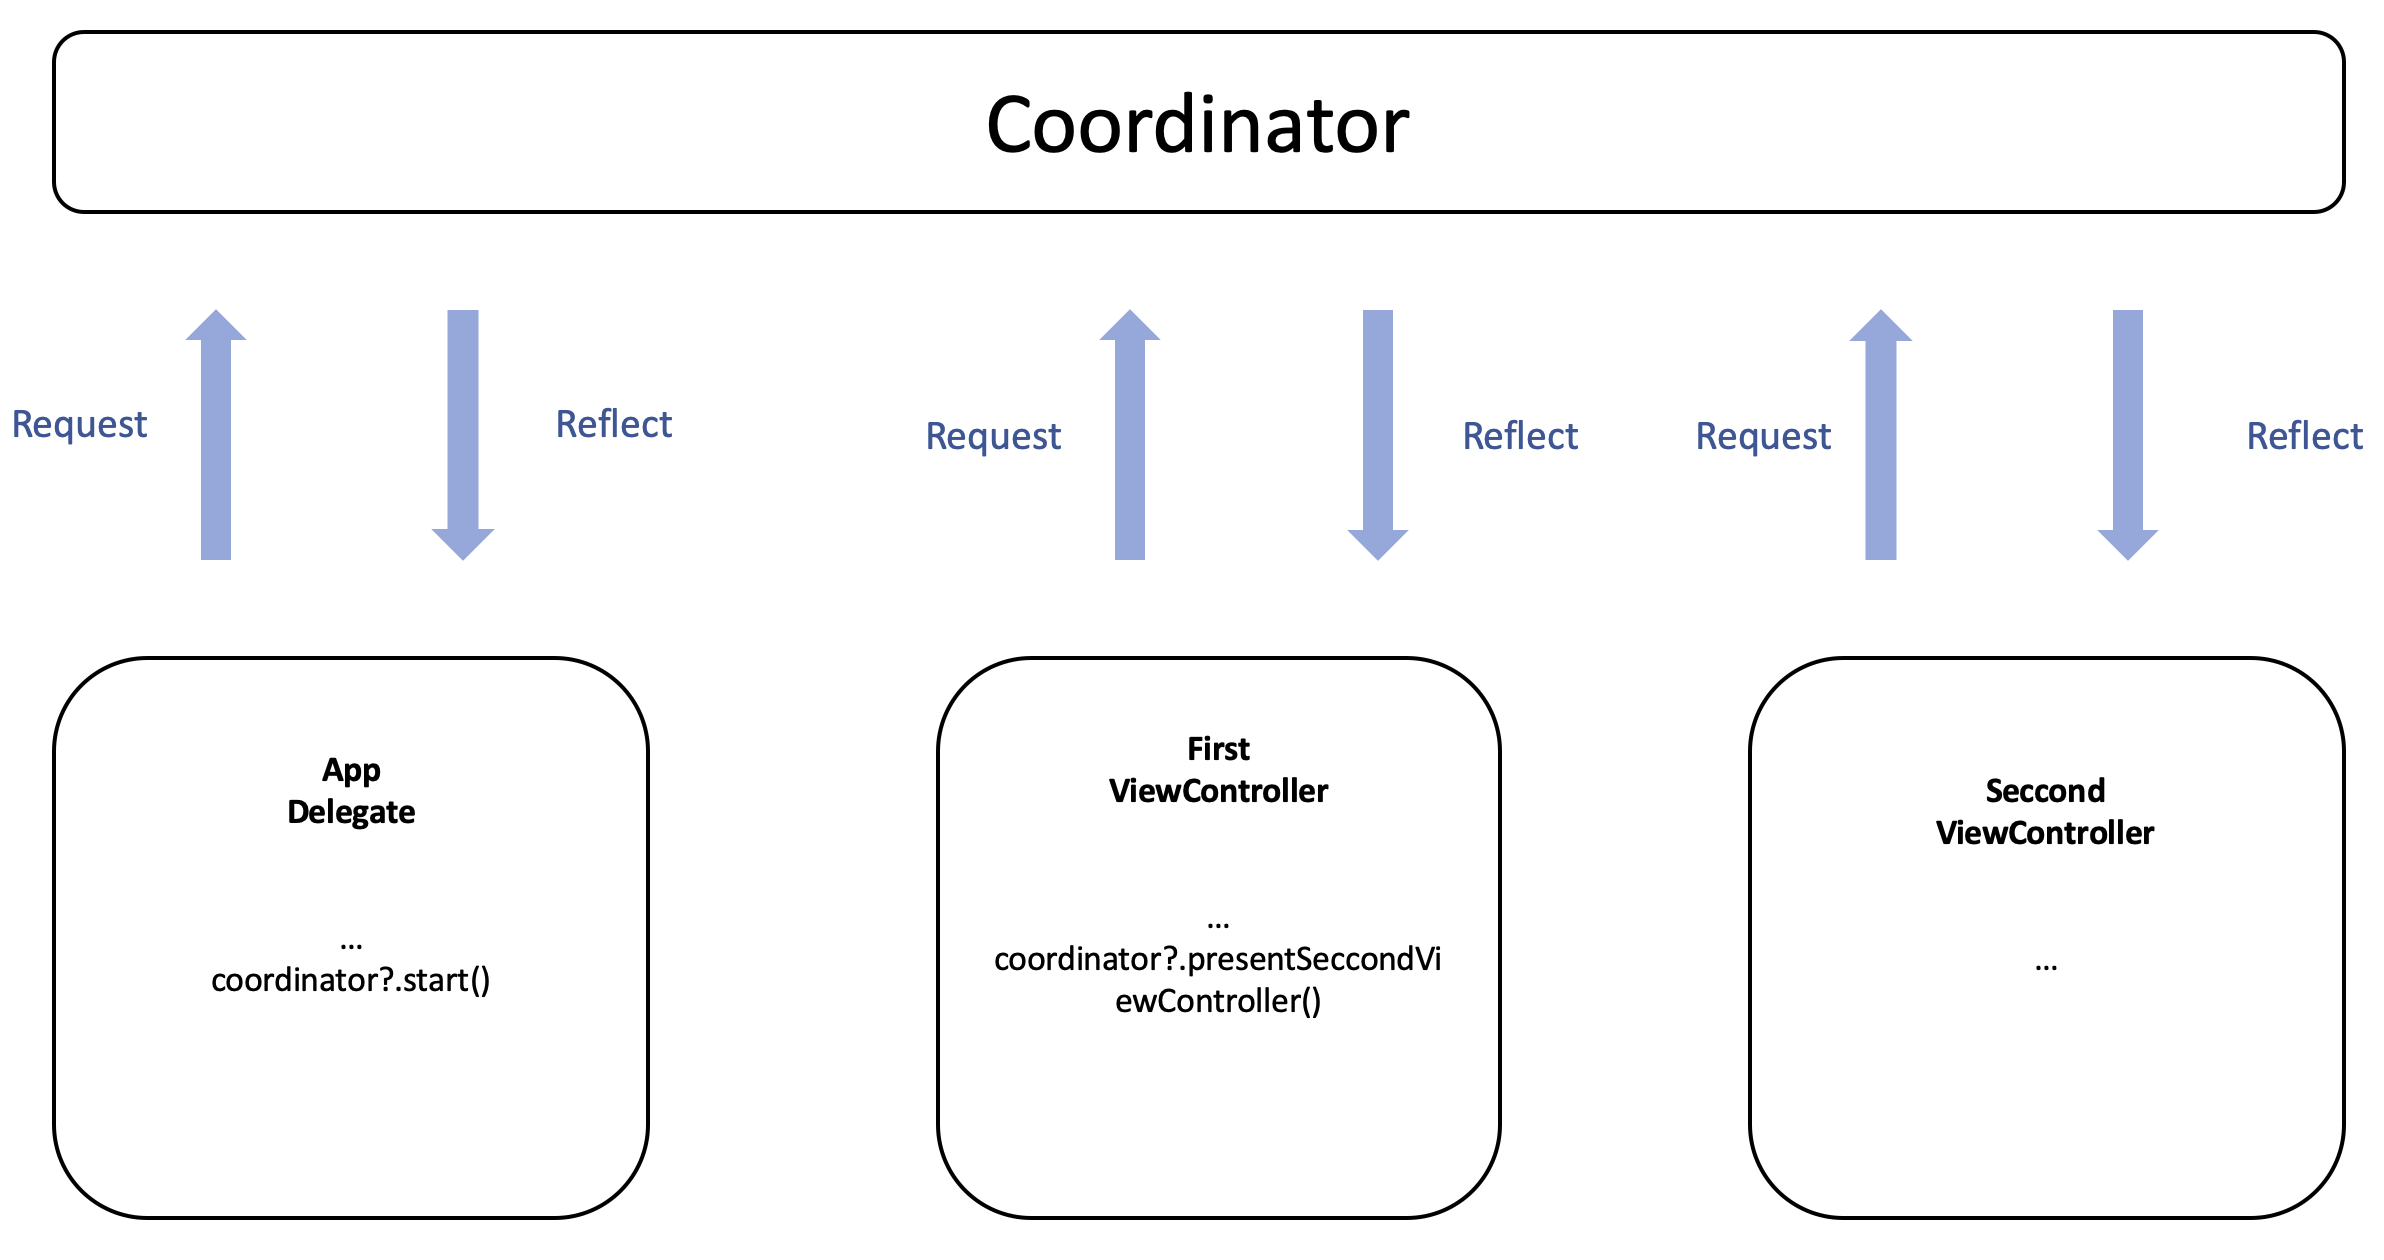
Step 3: Implementing the Navigation Flow
Now for the final piece: making the coordinator navigate from one screen to another.
The process is:
- A user taps a button in
ViewController. ViewControllertells its coordinator about the tap.- The coordinator creates the next screen (
BuyViewController) and pushes it onto the navigation stack.
How to use the Coordinator pattern in iOS
This final clip shows how to connect the view controller back to the coordinator to trigger navigation.
Watch from 12:45 to the end (18:11). Notice how a weak var coordinator property is added to the view controllers. This allows them to call back to the coordinator, which then executes the navigation logic.
Here is the full implementation loop:
-
Give the VC a reference to the Coordinator:
Add a weak reference to the coordinator in your view controller. It must beweakto prevent a retain cycle, as the coordinator's navigation controller already holds a strong reference to the view controller.// In ViewController.swift class ViewController: UIViewController, Storyboarded { weak var coordinator: MainCoordinator? // ... } -
Connect the Coordinator and VC:
When the coordinator creates the view controller, it sets itself as thecoordinatorproperty.// In MainCoordinator.swift's start() method func start() { let vc = ViewController.instantiate() vc.coordinator = self // This is the connection! navigationController.pushViewController(vc, animated: false) } -
Add Navigation Logic to the Coordinator:
Create methods on theMainCoordinatorfor each navigation action. This centralizes the logic.// In MainCoordinator.swift func showBuyScreen() { let vc = BuyViewController.instantiate() vc.coordinator = self navigationController.pushViewController(vc, animated: true) } func showCreateAccountScreen() { let vc = CreateAccountViewController.instantiate() vc.coordinator = self navigationController.pushViewController(vc, animated: true) } -
Trigger Navigation from the View Controller:
Finally, the view controller calls the coordinator's method in response to a user action. The view controller doesn't know what will happen next, only that an event occurred.// In ViewController.swift @IBAction func buyTapped(_ sender: Any) { coordinator?.showBuyScreen() } @IBAction func createAccountTapped(_ sender: Any) { coordinator?.showCreateAccountScreen() }
You have now fully implemented the pattern! ViewController is successfully decoupled from BuyViewController and CreateAccountViewController.
Conclusion
Congratulations! You have successfully moved from theory to practice by building your first coordinator. You've taken full control of the application's launch process and implemented a clean, decoupled navigation flow between screens.
Key Takeaways:
- A
Coordinatorprotocol provides a consistent blueprint for all coordinators. - Taking control of app launch in the
AppDelegateorSceneDelegateis the entry point for a coordinator-based architecture. - View controllers hold a
weakreference to their coordinator to communicate navigation events. - Navigation logic lives in dedicated methods on the coordinator (e.g.,
showBuyScreen()), not inside view controllers. This makes the flow explicit, centralized, and easy to change.
This foundational skill is a significant step toward writing more professional, large-scale iOS applications.
Preview of the Next Lesson:
Having mastered navigation between screens, we will broaden our architectural perspective. In the next lesson, we'll explore the principles of Clean Architecture and its layers (Entities, Use Cases, Presenters). You will learn how to structure the entire application's logic, not just the navigation, for maximum testability and separation of concerns.