Hello! Welcome to our next lesson.
In our last session, you mastered the fundamental git add and git commit commands, learning how to take "save points" of your project on your local machine. This is a great foundation, but so far, all your work lives only on your computer.
Today, we're going to change that. We'll connect your local project to the wider world by using GitHub. You'll learn how to create a remote repository—a copy of your project stored on GitHub's servers—and push your local commits to it. This is how you back up your code, collaborate with others, and, most importantly for your career goals, showcase your work to potential employers.
By the end of this lesson, you will be able to create a remote repository on GitHub and push your local changes to it.
Local vs. Remote: Your Code's Second Home
First, let's clarify the difference between what you have now and what we're about to create.
- Local Repository: This is the
.gitfolder inside your project directory on your computer. It contains all your commits and project history, but it's isolated to your machine. If your computer breaks, that history is gone. - Remote Repository: This is a version of your repository hosted on a server, in our case, on GitHub. Think of it as a central cloud backup for your project.
The process of sending your local commits to the remote repository is called a push. The process of getting changes from the remote repository to your local machine is called a pull. Today, we'll focus on the push.
This diagram illustrates the relationship:

Step 1: Create a Remote Repository on GitHub
Your first task is to create a new, empty home for your project on GitHub.
How to Create and Sync Git and GitHub Repositories
The freeCodeCamp article 'How to Create and Sync Git and GitHub Repositories' provides an excellent, step-by-step walkthrough of creating a repository on the GitHub website. We'll follow its guidance.
First, make sure you are logged into your GitHub account. Then, read the section 'How to Create a Remote GitHub Repository' and follow the steps to create a new repository. Important: In the setup form, give your repository the name my-first-repo to match your local project. For now, do not check the boxes to add a README, .gitignore, or license. We want to start with a completely empty remote repository. Click 'Create repository' once you've named it.
After you create the repository, GitHub will show you a "Quick setup" page. This page contains the URL of your new remote repository. Keep this page open; you'll need that URL in the next step.
Step 2: Connect Your Local Repository to the Remote
Now that your remote repository exists, you need to tell your local repository where to find it. You do this by adding a "remote" link.
Adding locally hosted code to GitHub
GitHub's own documentation, 'Adding locally hosted code to GitHub,' gives the precise commands for this process. We will use it to connect our local my-first-repo project to the one you just created on GitHub.
Read the section titled 'Adding a local repository to GitHub using Git.' Follow steps 2 through 6. Step 2: You'll copy the HTTPS URL from the GitHub 'Quick setup' page you have open. Step 3-4: Open the terminal in VS Code within your my-first-repo directory. Step 5: Run the git remote add origin REMOTE-URL command, replacing REMOTE-URL with the URL you copied. The name origin is the standard, conventional nickname for your primary remote repository. You'll see it used everywhere in the industry. Step 6: Run git remote -v to verify that the remote was added successfully. You should see your repository's URL listed for both 'fetch' and 'push'.
Your local project now knows the address of its remote counterpart. All that's left is to send your local history (your commits) to it.
Step 3: Push Your Changes to GitHub
This is the moment where your local work gets published to your GitHub profile. We'll use the git push command.
Let's continue with the same GitHub documentation resource.
-
In your terminal, inside the
my-first-repodirectory, run the final command shown in the guide:git push -u origin main -
You might be prompted to log in to GitHub through your terminal. Follow the instructions that appear.
Let's break down that command, as it's one you'll use constantly:
git push: The command to send commits.origin: The destination—you're pushing to the remote you namedorigin.main: The branch you're pushing. Your default branch is namedmain.-u(short for--set-upstream): This is a special option for the first time you push a branch. It links your localmainbranch to themainbranch onorigin. Thanks to this, the next time you want to push, you can simply typegit push.
Once the command finishes, go back to your browser and refresh your GitHub repository page. You should now see your index.html file listed!
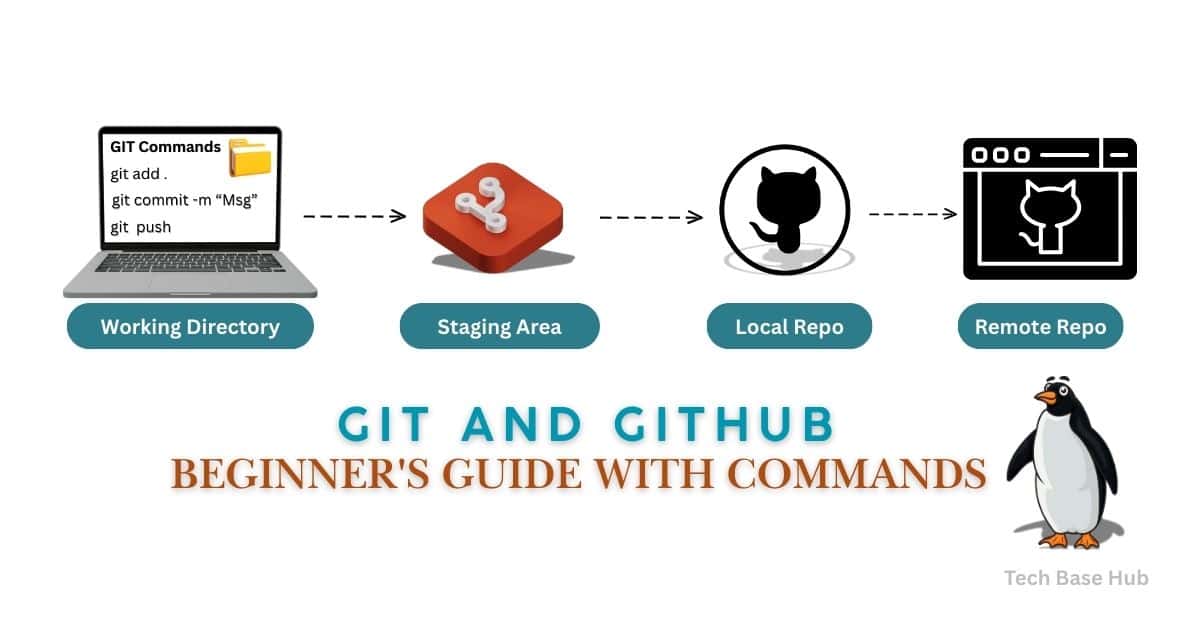
This diagram provides a great visual summary of the entire workflow you just completed, from your local file changes to the final push.
Conclusion
Excellent work today. You've bridged the gap between your local machine and the cloud, a critical step for every developer. Your code is now backed up, visible, and ready to be shared. This is a tangible skill you can put on a resume and use in every project you build from now on.
Here are the key takeaways:
- Repositories can be local (on your machine) or remote (hosted on a server like GitHub).
- You create a new remote repository directly on the GitHub website. For the simplest workflow, start with an empty one.
- You connect your local and remote repositories with the command:
git remote add origin <your-repo-url>. - You send your local commits to the remote with the command:
git push -u origin main.
In our next lesson, we will make your new GitHub repository look professional. We'll learn to write a clear README.md file using Markdown syntax. This file is the front page of your project; it's the first thing recruiters and collaborators see, so making it good is essential.