Welcome back! In our last lesson, you successfully designed the user interface for a "New Client" data entry form. You created a professional-looking layout with labels, text boxes, and a combo box. However, as you know, it's currently just a visual shell; the buttons don't perform any actions.
Today, we're going to bring that form to life. This lesson focuses on writing the VBA code that powers the form's functionality. You will learn how to respond to button clicks, validate the information entered by the user, and transfer that data into a worksheet. Mastering this process is a cornerstone of building the custom, user-friendly tools that clients value so highly.
1. Handling Button Clicks: The Click Event
Every action on a UserForm begins with an event. Just as we used the UserForm_Initialize event to populate your combo box, we will use the Click event for your command buttons. Writing code in a button's Click event procedure tells Excel exactly what to do when that button is pressed.
Let's start with the "Cancel" button, as its job is simple: to close the form.
- Open your project in the Visual Basic Editor (VBE).
- In the Project Explorer, double-click your
frmNewClientform to open it in the design view. - Double-click on your
cmdCancelbutton.
The VBE will automatically open the code window and create an empty procedure for you named Private Sub cmdCancel_Click(). Anything you write between this line and the End Sub line will execute when the button is clicked.
To close the form, add a single line of code:
Private Sub cmdCancel_Click()
    Unload Me
End Sub
The Unload command removes the form from memory, and Me is a special keyword that refers to the form itself. Press F5 to run your form, then click your "Cancel" button. The form should disappear.
2. Transferring Form Data to a Worksheet
Now for the main event: the "Submit" button. The primary goal of our cmdSubmit button is to take the data entered into the form's controls and save it to a worksheet.
Let's break down the logic for this process:
- Prepare a "database" worksheet: This will be the destination for our data.
- Reference the worksheet: In our code, we need to tell VBA which sheet to work with.
- Find the next empty row: We want to add new client records one after another, not overwrite existing ones.
- Copy the data: We'll transfer the values from each control (
TextBox,ComboBox) to the cells in that new row.
First, go back to Excel and create a new worksheet named Clients. In the first row, create the following headers: Client Name, Contact Email, and Project Type.
Now, let's look at the VBA code that accomplishes the data transfer. The following resource provides a clear, step-by-step explanation of a very similar procedure.
Build an Excel UserForm for Data Entry Step by Step
This article from Contextures.com explains the code for an "Add" button, which is exactly what we need for our "Submit" button. The principles are identical.
Focus on the section Step 4. This walks you through the four key steps: Defining variables for the worksheet and row number. Finding the first empty row to prevent overwriting data. Copying the data from the form controls to the worksheet cells. Clearing the form to prepare for the next entry.
Now, let's adapt that logic for your frmNewClient form. Double-click your cmdSubmit button to create its Click event, and enter the following code:
Private Sub cmdSubmit_Click()

    ' 1. Declare variables
    Dim ws As Worksheet
    Dim nextRow As Long

    ' 2. Set the worksheet object
    Set ws = ThisWorkbook.Worksheets("Clients")

    ' 3. Find the next empty row
    nextRow = ws.Cells(ws.Rows.Count, "A").End(xlUp).Row + 1

    ' 4. Transfer data from form controls to the worksheet
    ws.Cells(nextRow, 1).Value = Me.txtClientName.Value
    ws.Cells(nextRow, 2).Value = Me.txtEmail.Value
    ws.Cells(nextRow, 3).Value = Me.cboProjectType.Value

    ' 5. Clear the form for the next entry
    Me.txtClientName.Value = ""
    Me.txtEmail.Value = ""
    Me.cboProjectType.Value = ""

    ' Set focus back to the first input field
    Me.txtClientName.SetFocus

    ' 6. Notify the user
    MsgBox "Client data has been added successfully.", vbInformation

End Sub
Let's briefly analyze the line that finds the next row: ws.Cells(ws.Rows.Count, "A").End(xlUp).Row + 1. This is a robust way to find the last-used row in column A. It starts from the very last cell in column A (ws.Rows.Count), shoots up (.End(xlUp)) until it hits the last cell with data, gets its row number (.Row), and adds 1 to find the first empty row below it.
Press F5 to run your form, fill in some test data, and click "Submit". You should see your data appear in the Clients worksheet and a success message pop up.
3. Validating User Input
Our form works, but it's not foolproof. What happens if the user forgets to enter a client name and clicks "Submit"? Right now, it will happily add a blank entry to our database. This is bad practice, leading to incomplete and useless data. The principle is "Garbage In, Garbage Out."
We must validate the user's input before accepting it. A basic but essential validation is to check that required fields are not empty.
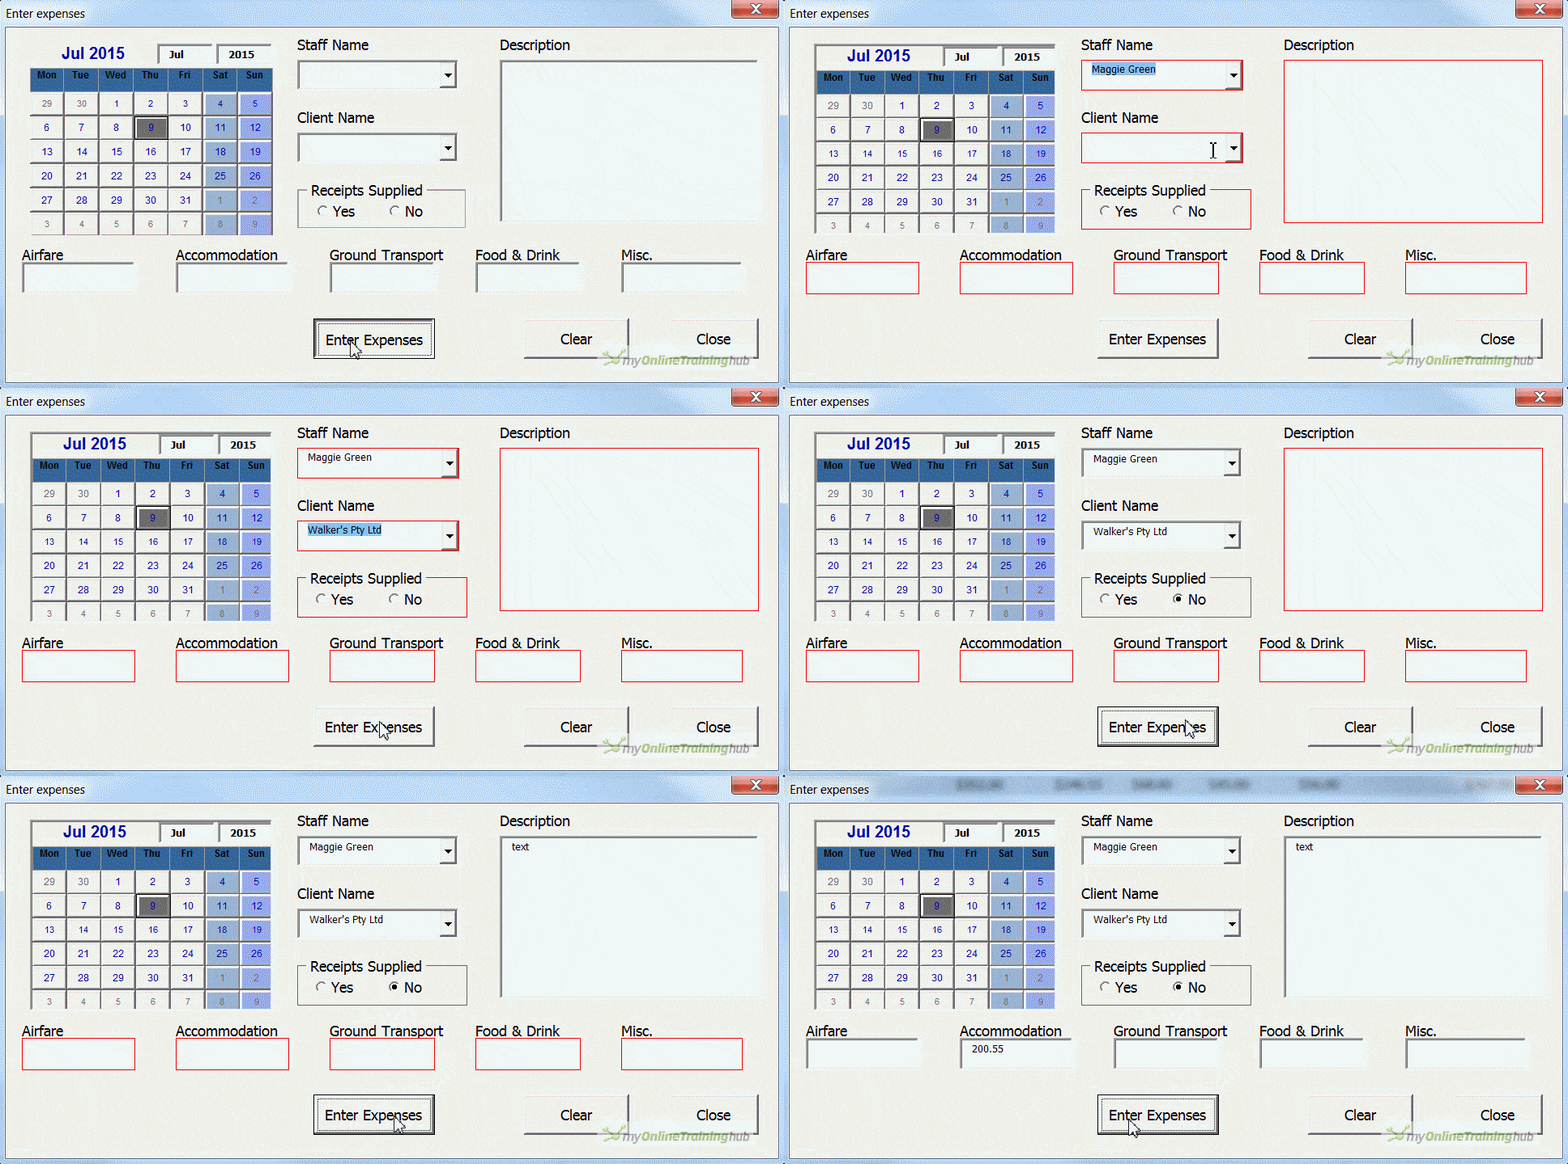
We can add a check at the beginning of our cmdSubmit_Click procedure.
' Add this validation block at the beginning of the cmdSubmit_Click procedure

' --- VALIDATION ---
If Trim(Me.txtClientName.Value) = "" Then
    MsgBox "Please enter a Client Name.", vbExclamation
    Me.txtClientName.SetFocus ' Place the cursor in the problematic field
    Exit Sub ' Stop the code from running further
End If

If Trim(Me.txtEmail.Value) = "" Then
    MsgBox "Please enter a Contact Email.", vbExclamation
    Me.txtEmail.SetFocus
    Exit Sub
End If

' Check if a project type has been selected
If Me.cboProjectType.ListIndex = -1 Then
    MsgBox "Please select a Project Type.", vbExclamation
    Me.cboProjectType.SetFocus
    Exit Sub
End If
' --- END VALIDATION ---

' 1. Declare variables
' ... the rest of your code follows ...
Key components of this validation code:
Trim(): This function removes any leading or trailing spaces from the text. This prevents a user from entering just a space and fooling the validation.MsgBox: Displays a helpful warning message to the user..SetFocus: Moves the user's cursor directly to the control that needs attention.Exit Sub: This is crucial. It immediately stops thecmdSubmit_Clickprocedure, so the data transfer part of the code is never reached.cboProjectType.ListIndex = -1: For a combo box, the.ListIndexproperty tells us which item is selected (starting from 0). If nothing is selected, its value is -1.
Add this validation block to the top of your cmdSubmit_Click procedure. Now, try to submit the form with empty fields. You'll see it enforces your rules.
For a complete walkthrough of building a form that includes adding, validating, and saving data, the following video is an excellent resource.
VBA User Form: Add, Update, Delete and Save
The video "VBA User Form: Add, Update, Delete and Save" provides a practical demonstration of programming the core functions of a data entry form.
Watch the section on programming the Add button (Add button logic). Pay close attention to how the code: Checks if fields are empty. Finds the last row. Transfers values to worksheet cells. Clears the fields after saving. This will reinforce the complete workflow you just built.
4. A More Professional Validation Technique
The If/Then checks we just wrote work perfectly well for a small form. However, if you had a form with 20 required fields, writing 20 separate If/Then blocks would be tedious and difficult to maintain. For the professional-grade tools you aim to build, a more scalable approach is better.
A slicker method is to list the names of the controls you want to validate in a range on a "helper" worksheet. Then, you can write a single loop that reads each name from that range and checks the corresponding control on the form.
The following video demonstrates this powerful, modular technique.
How To Validate Userform Inputs With Excel VBA (Excel Userforms For Intermediates 2)
The video "How To Validate Userform Inputs With Excel VBA" from Tiger Spreadsheet Solutions details a highly professional and scalable validation method.
Watch the entire video (full process) to understand this advanced technique. The key steps are: Listing the names of the controls to be validated in a named range on a worksheet. Creating a separate Sub procedure that loops through this list. Inside the loop, accessing each control by its name using Me.Controls("control_name"). Checking if the control's value is blank and showing a message if it is. Calling this validation procedure from the main "Submit" button's click event.
While you don't need to refactor your code right now, keep this technique in your toolkit. When a client asks for a complex data entry form, this modular approach will save you time and make your code far more robust and easier to update.
Conclusion
In this lesson, you've bridged the gap between design and functionality. You have transformed a static UserForm into an interactive data entry tool. You now know how to capture user actions with Click events, implement essential data validation to ensure data quality, and transfer that clean data to a permanent location in a worksheet.
Key Takeaways:
- VBA code for buttons is placed within their
Clickevent procedure. Unload Meis the standard command to close a UserForm.- The data transfer process involves identifying the target worksheet, finding the next empty row, and copying values from controls to cells.
- Input validation is critical. Use
Trim()to check for blank text boxes andListIndex = -1for combo boxes. MsgBoxandExit Subare your key tools for halting a submission and informing the user when validation fails.- For more complex forms, a modular, loop-based validation approach is more scalable and professional.
You now have a foundational skill for building client solutions. The ability to create a custom interface for data entry is a significant step up from standard spreadsheets.
In our next lesson, we will move on to another powerful automation task: writing a procedure to automate the creation and formatting of a report from raw data. Now that you can build tools to collect clean data, you'll learn how to process that data into polished, client-ready outputs.