Hello! Welcome to the next lesson in our journey with Docker Compose.
In our last session, we configured networks to allow our different services to communicate with each other. We created a secure setup where the frontend could talk to the API, but not directly to the database. However, we left a critical question unanswered: what happens to our data when a stateful service, like our database, is stopped and removed?
As we know, containers are ephemeral. By default, any data created inside a container is destroyed when that container is removed. This is a major problem for any application that needs to store data, such as user accounts, posts, or application state.
Today, we will solve this problem. Our goal is to manage persistent data for stateful services using named volumes in a Compose file. This is one of the most important concepts for running real-world applications with Docker.
1. The Problem: The Ephemeral Nature of Containers
Before we implement a solution, it's vital to see the problem firsthand. A stateful service is any part of an application that needs to save data between sessions—a database is the classic example. A stateless service, like a web server serving static files, doesn't need to remember anything.
Let's watch a demonstration of what happens to the data in a PostgreSQL database container when it's part of a Docker Compose setup without a volume.
How to create a volume in Docker-Compose for a PostgreSQL database
The following video from Very Academy sets up a Django and PostgreSQL application. The first part vividly demonstrates how creating a user in the application works fine initially, but that user data is completely lost after running docker compose down and docker compose up.
Watch from 00:14 to 09:30. The presenter will set up the application, add some data to the database (by creating a superuser), and then show how a simple restart of the Compose stack causes the application to crash because the data is gone. This perfectly illustrates the problem we need to solve.
This demonstration makes it clear: without a mechanism for data persistence, our database is unreliable and effectively useless in a real-world scenario. Every time we update and redeploy our application with docker compose down and docker compose up, we would wipe our entire database.
2. The Solution: Docker Volumes
Docker's solution to this problem is volumes. A volume is a directory that is managed by Docker and exists on the host machine, outside of any container's filesystem. When we attach a volume to a container, the data written to that directory inside the container is actually being saved to the host machine, thus persisting even if the container is deleted.
Docker offers two main ways to mount data into a container:
- Bind Mounts: A file or directory on the host machine is mounted directly into a container. You specify the exact path on the host. This is great for development when you want to mount your source code into a container and see changes immediately.
- Named Volumes: Docker manages a dedicated storage area on the host filesystem (e.g.,
/var/lib/docker/volumes/on Linux). You refer to the volume by a name (e.g.,postgres-data), but you don't manage its location on the host yourself. This is the preferred and recommended method for persisting application data for services like databases in both development and production.
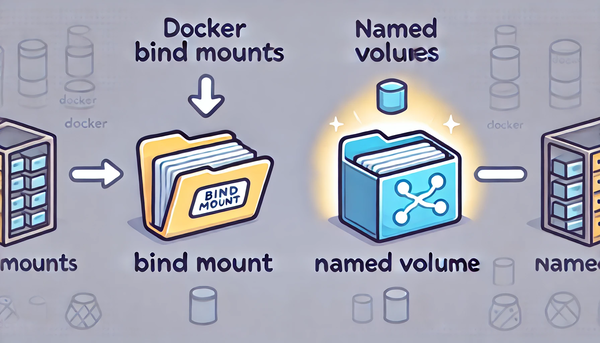
For a deeper dive into this distinction, the following article provides a concise explanation.
Understanding Docker Volumes and Persistent Storage
Let's read a short article, 'Understanding Docker Volumes and Persistent Storage,' to solidify our understanding of the difference between named volumes and bind mounts.
Read the sections 'Introduction to Docker Volumes' and 'Two types of Mounts in Docker'. Focus on the characteristics of Named Volumes and why they are the recommended choice for database data.
3. Implementing Named Volumes in Docker Compose
Now for the practical part. To use a named volume in Docker Compose, you need to make two changes to your docker-compose.yml file:
- Declare the Volume: At the top level of the file (at the same indentation level as
services), add avolumes:key. Under this key, you list the names of the volumes you want to create. - Mount the Volume: Under the specific service that needs the data (e.g., your
dbservice), add avolumes:key. The value will map your declared named volume to the path inside the container where the service stores its data.
The syntax looks like this: <volume-name>:<path-in-container>.
Let's watch how the presenter from the first video applies this fix to his docker-compose.yml.
How to create a volume in Docker-Compose for a PostgreSQL database
Continuing with the Very Academy video, we'll now see the solution being implemented. This section clearly shows the two-step process of declaring and mounting a named volume.
Watch from 10:02 to 12:13. Pay close attention to the two additions in the YAML file: the new top-level volumes section at the bottom, and the modification to the postgres service to use the new pg-data volume.
Here is a static example of what this looks like, adapted from the resources:
version: '3.8'

services:
  web:
    # ... web service configuration
    depends_on:
      - db

  db:
    image: postgres:14-alpine
    environment:
      POSTGRES_PASSWORD: mysecretpassword
    # Step 2: Mount the named volume into the container
    # The 'db-data' on the left is the name of our volume.
    # The path on the right is where PostgreSQL stores its data inside the container.
    volumes:
      - db-data:/var/lib/postgresql/data

# Step 1: Declare the named volume
volumes:
  db-data:
4. Verification and Management
With the volume configured, how do we know it worked? We repeat the experiment from the beginning: tear down the stack and bring it back up. This time, the data should still be there.
We also need to know how to see and manage the volumes that Docker is creating for us.
How to create a volume in Docker-Compose for a PostgreSQL database
Let's watch the final part of the video to see the proof and learn some useful volume management commands.
Watch from 12:13 to 17:51. The presenter will run docker compose up again, add the user data, and then run docker compose down. Crucially, when he brings it back up, the application works and the user data is intact. He also demonstrates using docker volume ls and docker volume inspect.
As you saw, the key verification is that the application functions correctly after a full stop and restart. The commands to help you manage and inspect your volumes are:
docker volume ls: Lists all the volumes Docker is managing on your host. You'll see the volume created by Compose, typically prefixed with your project directory name (e.g.,myproject_db-data).docker volume inspect <volume_name>: Provides detailed JSON output about a specific volume, including itsMountpoint, which is the actual path on your host machine where the data is stored.docker volume rm <volume_name>: Deletes a volume. Be careful with this! This will permanently delete the data. You typically only do this when you want to start completely fresh. Note that you can't remove a volume if it's currently being used by a container.
Test your understanding!
You are deploying a WordPress site using Docker Compose. The application consists of a wordpress service and a db service (using the mysql:5.7 image). You look up the documentation for the MySQL Docker image and find that it stores its data in the /var/lib/mysql directory inside the container.
How would you modify the docker-compose.yml file to ensure the MySQL database data persists using a named volume called mysql-data?
Show answer
You would need to make two additions to the file.
- Under the
dbservice, add avolumessection to mount the named volume. - At the top level of the file, add a
volumessection to declare the named volume.
Here is what the relevant parts of the docker-compose.yml would look like:
services:
  wordpress:
    image: wordpress
    # ... other configs
    depends_on:
      - db

  db:
    image: mysql:5.7
    # ... other configs
    volumes:
      - mysql-data:/var/lib/mysql

volumes:
  mysql-data:
Conclusion
You have now mastered one of the most critical aspects of running containerized applications. By separating data from the container lifecycle using named volumes, you can build robust, stateful applications that can be updated, restarted, and redeployed without data loss.
Key Takeaways:
- Containers are ephemeral and lose their data when removed.
- Stateful services like databases require a data persistence strategy.
- Named volumes are the Docker-native, recommended way to persist application data in Compose.
- Implementation is a two-step process in
docker-compose.yml: declare the volume at the top level and mount it within the service definition. - You can verify your setup by restarting your stack and using commands like
docker volume lsanddocker volume inspectto manage your volumes.
Next Up
Our application is now persistent and its services can communicate. But we've hardcoded sensitive information like database passwords directly into our docker-compose.yml file. This is not secure. In the next lesson, we will learn how to manage service configurations and secrets using environment variables and .env files, making our application more secure and configurable.