Hello again!
In our last lesson, we focused on displaying data from your database using Django's generic ListView and DetailView. You learned how to efficiently create pages that show lists of objects and the specific details of a single object.
Today, we'll tackle the other side of the coin: collecting data from users. This lesson is designed to help you create a form from a model using ModelForm. This is a cornerstone of building interactive Django applications, as it bridges the gap between your database models and the user interface.
Since you're comfortable with Python classes, you'll find the concept of a ModelForm to be a very logical extension of what you already know. It's an elegant application of the Don't Repeat Yourself (DRY) principle that lets you automatically generate forms directly from the models you've already defined.
Why Use a ModelForm?
Imagine you have a Project model in your portfolio app:
# portfolio/models.py
class Project(models.Model):
    title = models.CharField(max_length=100)
    description = models.TextField()
    technology = models.CharField(max_length=50)
    project_url = models.URLField(blank=True)
To create a new project, you'd need an HTML form with input fields for the title, description, technology, and URL. Manually writing this HTML is one task. Then, in your view, you'd have to write logic to validate the submitted data (e.g., is the title less than 100 characters?) and save it to the database. This creates redundancy, as you've already defined these constraints in your model!
This is precisely the problem ModelForm solves. It's a helper class that creates a Form class directly from your Django model.

The ModelForm automatically:
- Generates the necessary form fields based on your model's fields.
- Uses the model field types to select appropriate HTML input types (e.g.,
CharFieldbecomes<input type="text">,TextFieldbecomes<textarea>). - Applies the validation rules from your model (e.g.,
max_length). - Provides a
.save()method to write the validated data to the database.
Let's see how to build one.
1. Creating Your First ModelForm
The standard convention is to place all form-related classes in a file named forms.py inside your app directory.
First, to get a quick overview of the entire process from creation to saving, watch this short video.
In this video, Dennis Ivy provides a concise walkthrough of creating a ModelForm, rendering it in a template, and processing the submitted data. This will give you a great high-level understanding.
Watch the video from the beginning to 06:35. Pay attention to the three main steps: creating the CustomerForm in forms.py, instantiating and passing it in views.py, and finally rendering and processing it in the template and view logic.
Now, let's break down that process in more detail.
The forms.py File
Inside your app's directory (e.g., portfolio/), create a new file: forms.py.
In this file, you'll define a class that inherits from django.forms.ModelForm. The core of the ModelForm is its inner Meta class, which tells Django which model to use and which fields to include.
# portfolio/forms.py
from django import forms
from .models import Project

class ProjectForm(forms.ModelForm):
    class Meta:
        model = Project
        fields = ['title', 'description', 'technology', 'project_url']
Let's examine the Meta class options:
model = Project: This links the form directly to yourProjectmodel.fields = [...]: This is an explicit list of the model fields you want to include in the form.
It is strongly recommended that you always explicitly list the fields you want to be editable using the fields attribute. This prevents a common security vulnerability where adding a new, sensitive field to your model could automatically expose it on a form.
To understand this and other core concepts more deeply, the official Django documentation is the best resource.
The official Django documentation provides the definitive explanation of ModelForm. This reading will solidify your understanding of how it works and the best practices for using it.
Read the introductory section ('ModelForm') and the section 'Selecting the fields to use'. Pay close attention to the security warning about using fields = '__all__' versus explicitly listing fields.
2. Rendering the Form in a Template
Now that you have a ProjectForm class, let's see how to display it on a webpage. We will use a simple function-based view for this demonstration. We'll integrate this with Class-Based Views in the next lesson.
The following video provides a practical demonstration of setting up the view and template.
This clip from a tutorial by Dave Gray walks through the steps of importing the form into a view, passing it to a template, and rendering it with the necessary HTML.
Watch from 03:07 to 06:58. Notice how the form is instantiated in the view and passed in the context. In the template, pay special attention to the three key elements inside the <body>: the <form> tag, the {% csrf_token %}, and the {{ form }} template variable.
Here's a summary of that process:
Step 1: The View (views.py)
Your view needs to instantiate the form and pass it to the template.
# portfolio/views.py
from django.shortcuts import render
from .forms import ProjectForm

def create_project(request):
    form = ProjectForm()  # Create an instance of the form
    context = {'form': form}
    return render(request, 'portfolio/project_form.html', context)
Step 2: The Template (project_form.html)
The template needs an HTML <form> tag. Inside it, you must include Django's {% csrf_token %} for security, and then you can render the entire form with a single variable.
<!-- portfolio/templates/portfolio/project_form.html -->
{% extends "base.html" %}

{% block content %}
  <h1>Create a New Project</h1>

  <form method="POST">
    {% csrf_token %}
    {{ form.as_p }}  <!-- Renders form fields as paragraphs -->
    <button type="submit">Save Project</button>
  </form>
{% endblock %}
method="POST": Tells the browser to send the form data in the body of the HTTP request.{% csrf_token %}: This is a mandatory security tag that protects against Cross-Site Request Forgery attacks. Django will reject any POST request from a form that doesn't include it.{{ form.as_p }}: This renders the form fields wrapped in<p>tags. You can also use{{ form.as_ul }}for list items or simply{{ form }}for basic rendering.
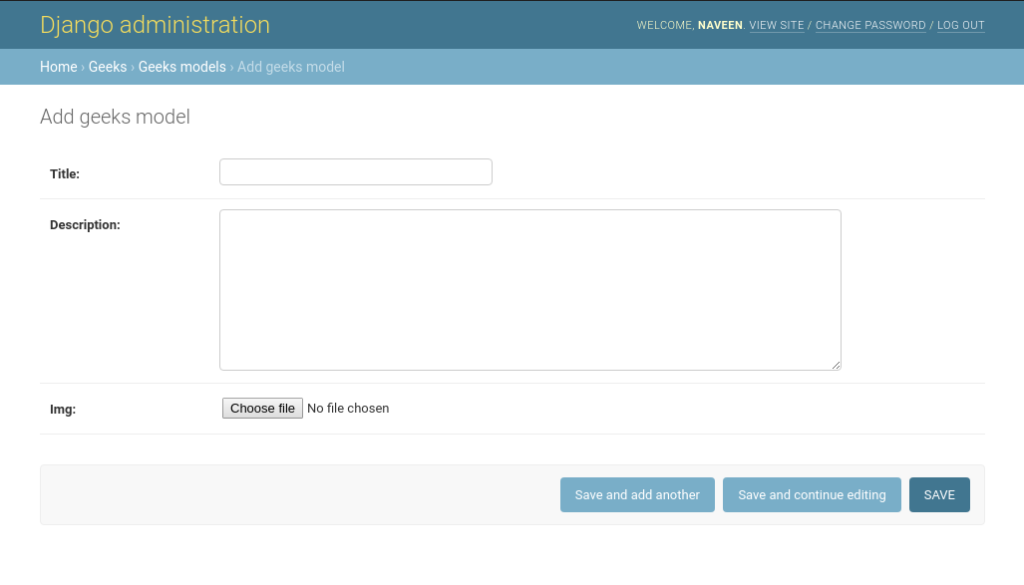
The rendered output will look something like this, generated automatically from your model definition.
Test your understanding!
You have a BlogPost model with fields title, content, author, and publication_date. You want to create a form that only allows a user to edit the title and content. How would you define the BlogPostForm and its inner Meta class?
Show answer
from django import forms
from .models import BlogPost

class BlogPostForm(forms.ModelForm):
    class Meta:
        model = BlogPost
        fields = ['title', 'content']
By specifying only title and content in the fields list, the author and publication_date fields are excluded from the form.
3. Handling Form Submission
Displaying a form is only half the story. You also need to process the data when the user submits it. This involves:
- Detecting a
POSTrequest. - Binding the submitted data (
request.POST) to a form instance. - Validating the data using
form.is_valid(). - Saving the data to the database with
form.save().
The following video demonstrates this flow clearly.
Dave Gray's tutorial continues by showing how to add logic to the view to handle POST requests, validate the form, and save the data. It also introduces an important concept for handling file uploads.
Watch from 08:49 to 12:00. Focus on the if request.method == 'POST' block. Note how the form is instantiated differently for a POST request (forms.createPost(request.POST, request.FILES)). Understand the roles of form.is_valid() and the subsequent redirect.
Here's the updated create_project view with submission handling logic:
# portfolio/views.py
from django.shortcuts import render, redirect
from .forms import ProjectForm

def create_project(request):
    if request.method == 'POST':
        # Create a form instance and populate it with data from the request
        form = ProjectForm(request.POST)
        if form.is_valid():
            # The form data is valid, save it to the database
            form.save()
            # Redirect to a new URL, e.g., the project list page
            return redirect('projects_list_url_name')
    else:
        # If it's a GET request, create a blank, unbound form
        form = ProjectForm()

    context = {'form': form}
    return render(request, 'portfolio/project_form.html', context)
This pattern is fundamental to handling forms in Django: a single view function handles both displaying the empty form (on a GET request) and processing the submitted data (on a POST request).
Conclusion
In this lesson, you've learned how to leverage one of Django's most powerful and time-saving features. By creating forms directly from your models, you reduce boilerplate code, minimize redundancy, and ensure your data validation rules are consistent.
Key Takeaways:
- A
ModelFormis a special type of form that is automatically generated from a Django model. - They are defined in a
forms.pyfile by creating a class that inherits fromforms.ModelForm. - The inner
Metaclass is used to link the form to amodeland specify whichfieldsto include. - In a template, a
ModelFormcan be rendered with{{ form.as_p }}inside<form>tags, but you must include the{% csrf_token %}. - Form submission is handled by checking if
request.method == 'POST', bindingrequest.POSTdata to the form, checking validity withform.is_valid(), and saving withform.save().
You've now seen the manual mechanics of using a ModelForm within a function-based view. In our next lesson, we will see how Django's generic editing views—CreateView and UpdateView—abstract this process even further, allowing you to create and update objects with even less code.