Hello! Welcome back to our exploration of the Django Admin Interface.
In our last lesson, you learned how to register your models, making them instantly manageable through Django's built-in admin. You saw that a simple admin.site.register(MyModel) command brings your data into the UI. However, you probably noticed that the default list view for your models is quite basic, only showing the string representation (__str__) of each object. This is fine for a handful of items, but it quickly becomes uninformative as your database grows.
Today, we'll address that limitation directly. Your learning goal is to customize the list display for a model in the admin using list_display. You will learn how to transform the default object list into a rich, multi-column table that provides at-a-glance information, making the admin far more powerful for data management.
The Key to Customization: ModelAdmin
To move beyond the default admin behavior, we need to stop using the simple admin.site.register(MyModel) function and instead create a dedicated configuration class. This is where admin.ModelAdmin comes in.
A ModelAdmin class is a Python class that you create in your admin.py file to describe how a specific model should be displayed and managed in the admin. Since you're proficient with Python classes, you'll find this a natural and powerful way to organize your admin configurations.
Let's see how to set this up.
Django Tutorial Part 4: Django admin site
The MDN Web Docs article 'Django Tutorial Part 4: Django admin site' provides a clear explanation of how to create and register a ModelAdmin class. This is the foundational step for all admin customizations.
Read the section 'Register a ModelAdmin class'. Pay close attention to the two methods shown: using admin.site.register(Author, AuthorAdmin) and using the @admin.register(Book) decorator. The decorator approach is generally preferred as it's more concise and idiomatic Python.
To summarize, instead of this:
# admin.py
from django.contrib import admin
from .models import Author

admin.site.register(Author)
You will now write this:
# admin.py
from django.contrib import admin
from .models import Author

@admin.register(Author)
class AuthorAdmin(admin.ModelAdmin):
    pass # Customizations will go here
For now, the pass statement means there are no customizations, and the admin will look exactly the same. But we've now set the stage for our improvements.
Adding Columns with list_display
The primary tool for customizing the list view is the list_display attribute. By setting this attribute on your ModelAdmin class to a tuple or list of strings, you tell Django exactly which model fields to show as columns in the change list.
Let's watch a quick demonstration to see how this simple change transforms the admin interface.
Intro to Customizing the Django Admin Dashboard
The video 'Intro to Customizing the Django Admin Dashboard' by Pretty Printed provides an excellent visual walkthrough of implementing list_display.
Watch from 06:35 to 08:29. The video shows how to create a PropertyAdmin class and add various model fields to the list_display tuple, instantly creating a more informative table view.
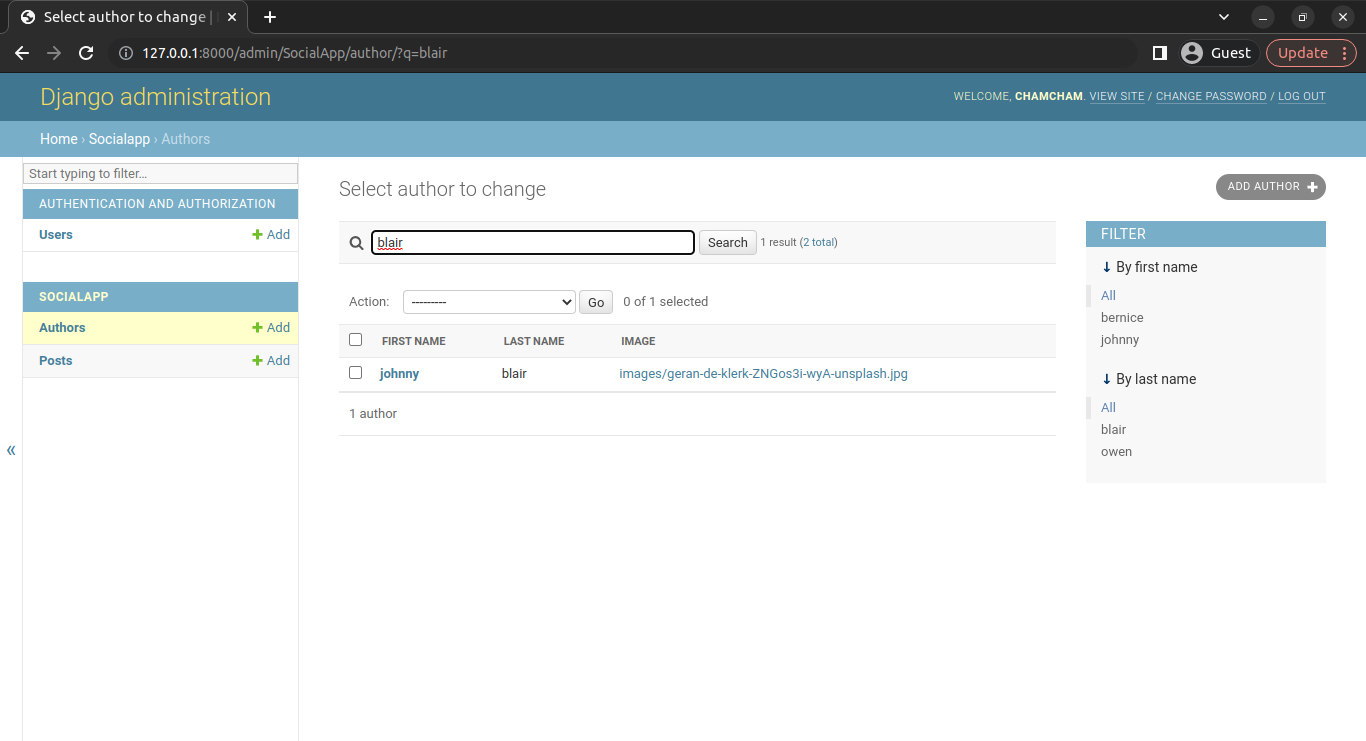
As you saw, adding a list_display is straightforward. If your Author model has first_name and last_name fields, your AuthorAdmin would look like this:
@admin.register(Author)
class AuthorAdmin(admin.ModelAdmin):
    list_display = ('last_name', 'first_name', 'date_of_birth', 'date_of_death')
This simple change produces a much more useful list of authors.
Displaying More Than Just Fields
The power of list_display goes beyond just naming your model's fields. You can also include callables (like methods) to display computed or related data.
Displaying Methods from your ModelAdmin
You can define a method on your ModelAdmin class and include its name (as a string) in list_display. Django will call this method for each object in the list and display the return value. This is perfect for showing calculated values.
The obj parameter in the method refers to the model instance for the current row.
Customize the Django Admin With Python
The article 'Customize the Django Admin With Python' from Real Python has a great section on using methods in list_display and how to set custom column titles.
Read the section 'Modifying a Change List Using list_display'. Focus on the example where a show_average method is added to PersonAdmin. Pay special attention to how show_average.short_description is used to give the column a clean title.
For example, if you wanted to display an author's full name in one column, you could do this:
@admin.register(Author)
class AuthorAdmin(admin.ModelAdmin):
    list_display = ('full_name', 'date_of_birth')

    def full_name(self, obj):
        return f"{obj.first_name} {obj.last_name}"

    full_name.short_description = 'Author Name' # Sets the column header
Handling ManyToManyField
What if you want to display a ManyToManyField, like the genres for a book? You can't put a ManyToManyField directly into list_display because it would be very inefficient (it could require a separate database query for every row).
The solution is the same as above: create a method that fetches and formats the data, and then add that method's name to list_display.
Django Tutorial Part 4: Django admin site
Let's revisit the MDN tutorial, which has the canonical example for displaying a ManyToManyField in the admin list.
In the 'Configure list views' section, find the part that discusses the BookAdmin. Read how it can't use the genre field directly and instead uses a display_genre function. Note that in their example, they define the function on the model, but it can also be defined on the ModelAdmin class.
Test your understanding!
You have a Project model with a name field. You also have a Task model with a ForeignKey relationship to Project.
How would you customize the Project admin to show two columns: the project's name and the number of tasks associated with it?
Show answer
You would define a ModelAdmin for Project. The list_display would include the name field and a custom method, let's call it task_count, to calculate the number of related tasks.
# admin.py
from django.contrib import admin
from .models import Project

@admin.register(Project)
class ProjectAdmin(admin.ModelAdmin):
    list_display = ('name', 'task_count')

    def task_count(self, obj):
        # obj is a Project instance.
        # We can use the reverse relationship 'task_set' to get related tasks.
        return obj.task_set.count()

    task_count.short_description = 'Number of Tasks'
Advanced Technique: Linking to Related Objects
One of the most powerful uses of a custom method in list_display is to create clickable links to other parts of the admin. For example, in a list of courses, you could have a link that takes you to a pre-filtered list of all students enrolled in that course.
This involves using Django's reverse function to find the correct admin URL and format_html to safely render an HTML <a> tag. Your background in web fundamentals and Python programming will make this advanced pattern very approachable.
Customize the Django Admin With Python
The Real Python article demonstrates this advanced and highly useful technique for creating interactive admin interfaces.
Read the section 'Providing Links to Other Object Pages'. Follow the logic of the view_students_link method: it counts the related objects, constructs a URL using reverse and urlencode, and then returns a formatted HTML link. This is a very common and powerful pattern.
Conclusion
You've now moved from a basic admin registration to a powerful, customized list view. By leveraging the ModelAdmin class and its list_display attribute, you can present data in a way that is immediately useful for you and your team.
Key Takeaways:
- To customize the admin for a model, you create a
ModelAdminsubclass and register it with your model, preferably using the@admin.registerdecorator. - The
list_displayattribute, a tuple of strings, defines the columns in the model's list view. list_displaycan contain model field names.ForeignKeyfields will display the__str__of the related object.list_displaycan also contain the names of methods on yourModelAdminclass, allowing you to display computed or related data.- Use the
.short_descriptionattribute on a method to set a custom, user-friendly title for its column.
In our next lesson, we'll continue enhancing this list view. Now that we can display a lot of information, we need ways to manage large datasets. We will learn how to add filtering and search capabilities to the admin interface, making it easy to find specific records even when you have thousands of them.