Hello! Welcome to the final lesson in our first module, "Foundations of Line and Control."
Introduction
Over the last few lessons, you've built a strong foundation. You started by practicing confident strokes with the ghosting technique, learned to draw smooth lines of varying weights, and then used that skill to create depth and emphasis. Most recently, you trained your hand-eye coordination with continuous contour drawing.
Today, we'll bring all of these skills together by learning how to self-correct. The goal for this lesson is to identify and correct common line work mistakes like scratchiness and overworking. Think of this as learning to be your own art critic—recognizing what isn't working in your lines and, more importantly, knowing the specific techniques to fix it.
Mastering this will ensure the clean, confident lines you've been practicing become a consistent part of your drawing habit. This is the perfect way to wrap up our focus on lines before we move on to building forms.
1. Identifying Common Line Mistakes
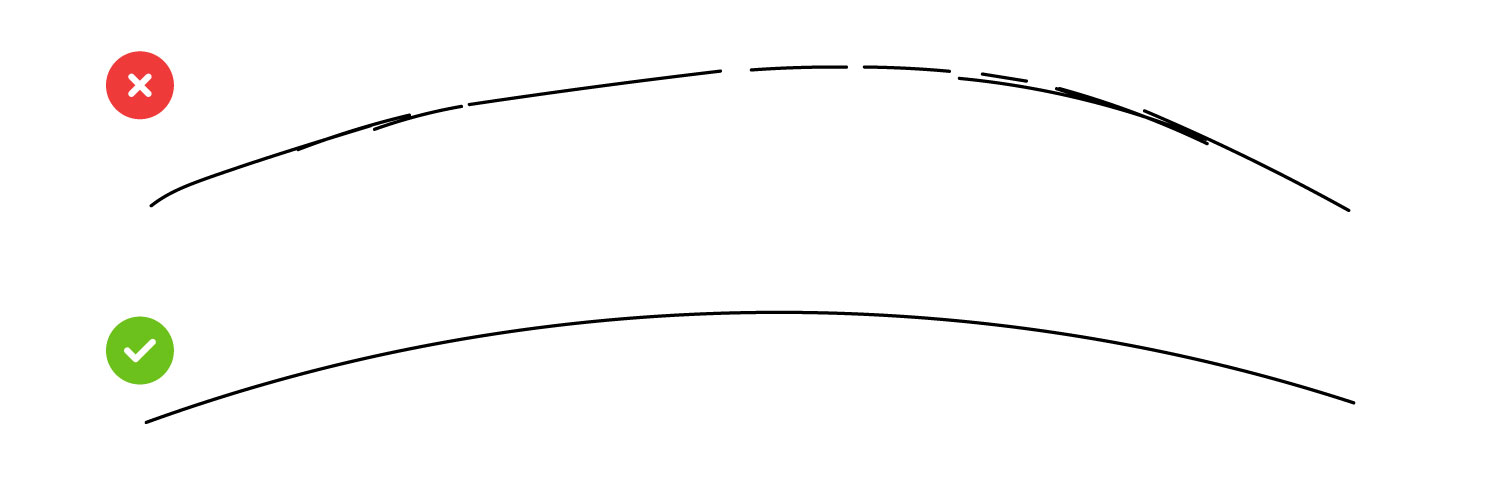
The first step to correction is accurate identification. Many beginner artists, and even experienced ones, fall into habits that produce lines that look uncertain or messy. The two most common culprits are scratchy lines and overworked/chaotic lines.
To understand these mistakes better, let's watch a segment from a video by the Proko channel.
6 Habits for Good Line Quality
In his video '6 Habits for Good Line Quality,' Stan Prokopenko clearly defines the common mistakes we're talking about and sets the stage for why it's important to build good habits early on.
Watch the section from 00:47 to 02:14. Pay attention to his distinction between using searching lines for brainstorming versus using confident lines for a presentable drawing.
So, why do these scratchy, uncertain lines happen? It often stems from two things:
- Hesitation: A fear of making a mistake causes you to draw with small, tentative marks instead of a single, committed one.
- Muscle Memory: We are trained from a young age to write, which uses small muscles in the fingers and wrist for precise, small symbols. Drawing, however, often requires using your entire arm for larger, more fluid motions.
This conflict between a "writing mindset" and a "drawing mindset" is a key hurdle to overcome. The next video explains this distinction perfectly.
The channel dr. Draw breaks down why we tend to draw with small muscles and the importance of shifting to a 'drawing mindset' that involves the whole arm.
Watch from 02:43 to 03:25 to see the physical result of using only small muscles. Then, watch from 04:41 to 05:14 to understand the concept of a 'drawing mindset' versus a 'writing mindset'.
2. A Toolkit for Correction and Prevention
Now that you can spot these issues, let's build a toolkit of techniques to prevent and correct them. These are not just abstract ideas, but concrete actions you can take while drawing.
Mindful Speed and Follow-Through
The speed of your stroke is critical. Too slow, and your natural hand tremor creates a wobbly line. Too fast, and you lose control and accuracy. The solution is to find a deliberate, comfortable pace.
Connected to this is the idea of "follow-through." Just like a baseball player swings through the ball, your arm should continue its motion even after the line ends. This ensures the stroke is energetic and lands accurately, avoiding the hesitant, stuttering quality that comes from stopping short.
6 Habits for Good Line Quality
Let's return to the Proko video, where he explains how to find your optimal drawing speed and demonstrates the 'follow-through' technique.
Watch from 02:14 to 04:28. Notice the analogy of throwing a ball to understand speed, and see how he demonstrates following through past the end-point of a line to improve accuracy.
Ghosting as a Corrective Tool
You're already familiar with ghosting as a way to plan your strokes. It's also one of the best tools for active correction. If you find yourself drawing a wobbly or inaccurate line, stop. Re-ghost the motion several times, focusing on the exact path, and then execute the stroke. This rebuilds the muscle memory for the correct movement before you commit to paper.
Simplifying Complex Lines
Overworking often happens when you try to capture a complex curve with one elaborate, shaky stroke. A much better strategy is to break that complex line into a series of simpler, connected strokes: straights, 'C' curves, and 'S' curves. By constructing a complex shape from these simple building blocks, you maintain control and create a much cleaner result.

The Proko video has one last segment that perfectly illustrates this idea of construction.
6 Habits for Good Line Quality
This final clip from Proko's video explains how to use simple C, S, and straight strokes to build more complex forms, which is a powerful strategy to prevent your lines from becoming chaotic.
Watch from 08:11 to 09:32. Pay close attention to how he breaks down the complex outline of an arm into a series of more manageable, simpler curves.
3. Practice Drills (30 minutes)
It's time to put these correction techniques into practice. These drills are designed to help you diagnose your own tendencies and deliberately work on them.
Drill 1: The Diagnostic "Wheel of Pain" (10 minutes)
This first exercise is purely diagnostic. Its purpose is to reveal the angles and directions where you lack confidence.
- Take a fresh sheet of paper and draw a large circle in the middle.
- Now, draw straight lines that pass through the center of the circle, connecting one side to the other.
- Crucially, do not rotate the paper. Force yourself to draw lines at all angles—vertical, horizontal, and diagonal.
- As you do this, pay attention to how it feels. Which angles are easy and produce a straight, confident line? Which angles feel awkward and result in wobbly or scratchy lines? This exercise will give you a clear map of your personal weak spots.
The 'Wheel of Pain' exercise is demonstrated in the dr. Draw video. Seeing it in action will clarify the goal.
Watch the demonstration from 06:37 to 07:34. Notice how he identifies the zones where his lines are confident and where they become less controlled.
Drill 2: The Overlap & Refine Technique (10 minutes)
This exercise combats the fear of making a mistake by embracing iteration—a concept you'll be familiar with from programming. Instead of aiming for one perfect line, you'll build it up with several confident passes.
6 Easy Exercises to Improve Your Line Quality
The article '6 Easy Exercises to Improve Your Line Quality' from The Design Sketchbook explains this 'Overlap Technique' as a way to build confidence and add a dynamic quality to your sketches.
Read the section titled 'EXERCISE 1. The Overlap Technique.' Focus on the 4-step process described.
Now, practice it:
- On your paper, start with simple shapes like circles and ovals.
- Draw the shape with a light, quick, continuous stroke. Don't worry if it's not perfect.
- Without lifting your pen, go over the shape again 2-3 times, refining the contour with each pass. The goal is a flowing motion, not a slow, careful trace.
- Try this with a few different shapes. Feel how this process encourages confident movement rather than hesitant scratching.
Drill 3: Straight Line Control (10 minutes)
This final drill brings the focus back to pure control. We'll use an exercise focused on creating uniform lines.
10 Exercises for Confident Lines and Accurate Hatching
The Virtual Instructor's article '10 Exercises for Confident Lines' provides an excellent drill for practicing straight lines with different characteristics.
Read the section 'Exercise 1 – Drawing Straight Lines.' Pay close attention to the image showing the four different types of line endings (a, b, c, d).
Now, practice it:
- On a new section of your paper, draw a series of parallel horizontal lines freehand. Try to make them as straight and evenly spaced as possible.
- Next, draw a series of parallel vertical lines.
- Finally, try to replicate the four line types from the article's image:
- "Full stop" lines: Start and end with thick, blunt points.
- Tapered lines: Start and end with sharp, light points.
- Thick-to-thin lines.
- Thin-to-thick lines.
This drill gives you direct practice in controlling the pencil's pressure and speed from beginning to end.
Conclusion
Fantastic work today. You've now completed the first major stage of your sketching journey. By learning to identify and correct your own mistakes, you've gained one of the most important skills an artist can have: the ability to engage in deliberate practice.
Key Takeaways:
- Scratchy and overworked lines often result from a "writing mindset," hesitation, or improper speed.
- You can correct these mistakes with physical techniques like mindful speed, follow-through, ghosting, and simplifying complex curves.
- Diagnostic exercises like the "Wheel of Pain" help you identify your specific weaknesses.
- Corrective drills like the Overlap Technique build confidence and break the habit of hesitation.
With a full module on line control now complete, you are ready to start using these lines to build. The confident, clean strokes you've been practicing are the essential building materials for constructing believable three-dimensional objects.
In our next lesson, we will begin Module 2, "Constructing with Basic Forms." You will learn how to look at any complex object—from a coffee mug to a car—and break it down into its fundamental 3D primitives: cubes, spheres, cylinders, and cones.