Hello! Welcome to the first lesson of our second module, "Constructing with Basic Forms."
Introduction
In the previous module, you built a fantastic foundation in line control. You learned to execute confident strokes, vary your line weight for emphasis, and self-correct common mistakes. Think of those skills as learning how to create strong, high-quality building materials.
Now, it's time to start building.
Today's lesson addresses the learning outcome: Break down complex objects into their fundamental 3D primitives (cubes, spheres, cylinders, cones). This is one of the most significant shifts in thinking for an artist. Instead of seeing objects as a collection of outlines and details, you will learn to see their underlying three-dimensional structure. This is the first step towards being able to draw anything you want, from any angle, even from imagination.
1. Why Simplify? The Power of Form
You mentioned that you primarily draw from references. A common challenge with this approach is that it can feel like you're just "copying" what you see. If you wanted to draw that same object from a different angle, you'd need a new reference. The skill we're learning today is the solution to that problem.
To start, let's hear from artist Stan Prokopenko on why this skill is so fundamental.
In his video 'The Secret of Simple Forms,' Prokopenko explains that the key to drawing things from imagination isn't just copying, but reducing complex objects to simple forms you can manipulate.
Watch the segment from 01:03 to 02:05. Pay close attention to the distinction he makes between 'copying' and 'reinventing' an image through form.
As Prokopenko highlights, the secret is simplification. But what exactly are we simplifying to?
Shape vs. Form
First, a quick but crucial distinction:
- A shape is two-dimensional (e.g., a square, a circle). It has height and width.
- A form is three-dimensional (e.g., a cube, a sphere). It has height, width, and the illusion of depth.

When we draw, we are creating the illusion of 3D form on a 2D surface. The easiest way to do this is to build complex subjects from a small set of simple, predictable forms. The main ones you'll use constantly are the cube, the sphere, the cylinder, and the cone.
This video provides a concise summary and shows a great example of how this applies to organic subjects, like the cats you enjoy drawing.
This will help you understand art better || Form (P.1)
The Bluebiscuits channel gives a clear definition of form and demonstrates how a complex subject like a cat can be broken down into these basic primitives.
Watch from 00:39 to 01:51. Notice how the combination of a sphere for the head, a larger oval/sphere for the body, and cylinders for the limbs creates a recognizable cat structure.
2. An Analytical Approach: How to See in Forms
Seeing in forms is an analytical skill. It’s like being a programmer who deconstructs a complex problem into smaller, manageable functions. To do this with drawing, you need to learn to look past the surface details (texture, color, small bumps) and identify the main volumes that make up an object.
This article provides a clear, step-by-step process for this kind of analysis.
Drawing with Confidence, Part 5: Breaking Down Complex Subjects ...
The article 'Drawing with Confidence, Part 5' by Francesca Sciandra lays out a structured method for analyzing objects. We'll focus on her analytical approach and the teapot example.
Read the sections titled 'Understanding Form vs. Shape,' 'The Analytical Approach,' and 'Practical Application.' Focus on the 5-step process and how it's applied to the teapot.
To summarize and reinforce that process:
- Observe Overall Proportions: Is the object taller than it is wide? Squat and long?
- Identify Major Geometric Forms: Find the biggest, most dominant form. A bottle is mostly a cylinder. A TV is a box. An orange is a sphere.
- Note Connections: How do the forms connect? Does the cylindrical spout of a teapot blend into the spherical body? Does it just stick on top?
- Add Secondary Forms: Look for the smaller parts. The handle of a mug is a curved, torus-like shape attached to the main cylinder.
- Refine (Later): Details like logos, textures, and small imperfections come last, after the main structure is solid. We are focusing only on steps 1-4 today.
Here's another great visual breakdown using everyday objects.
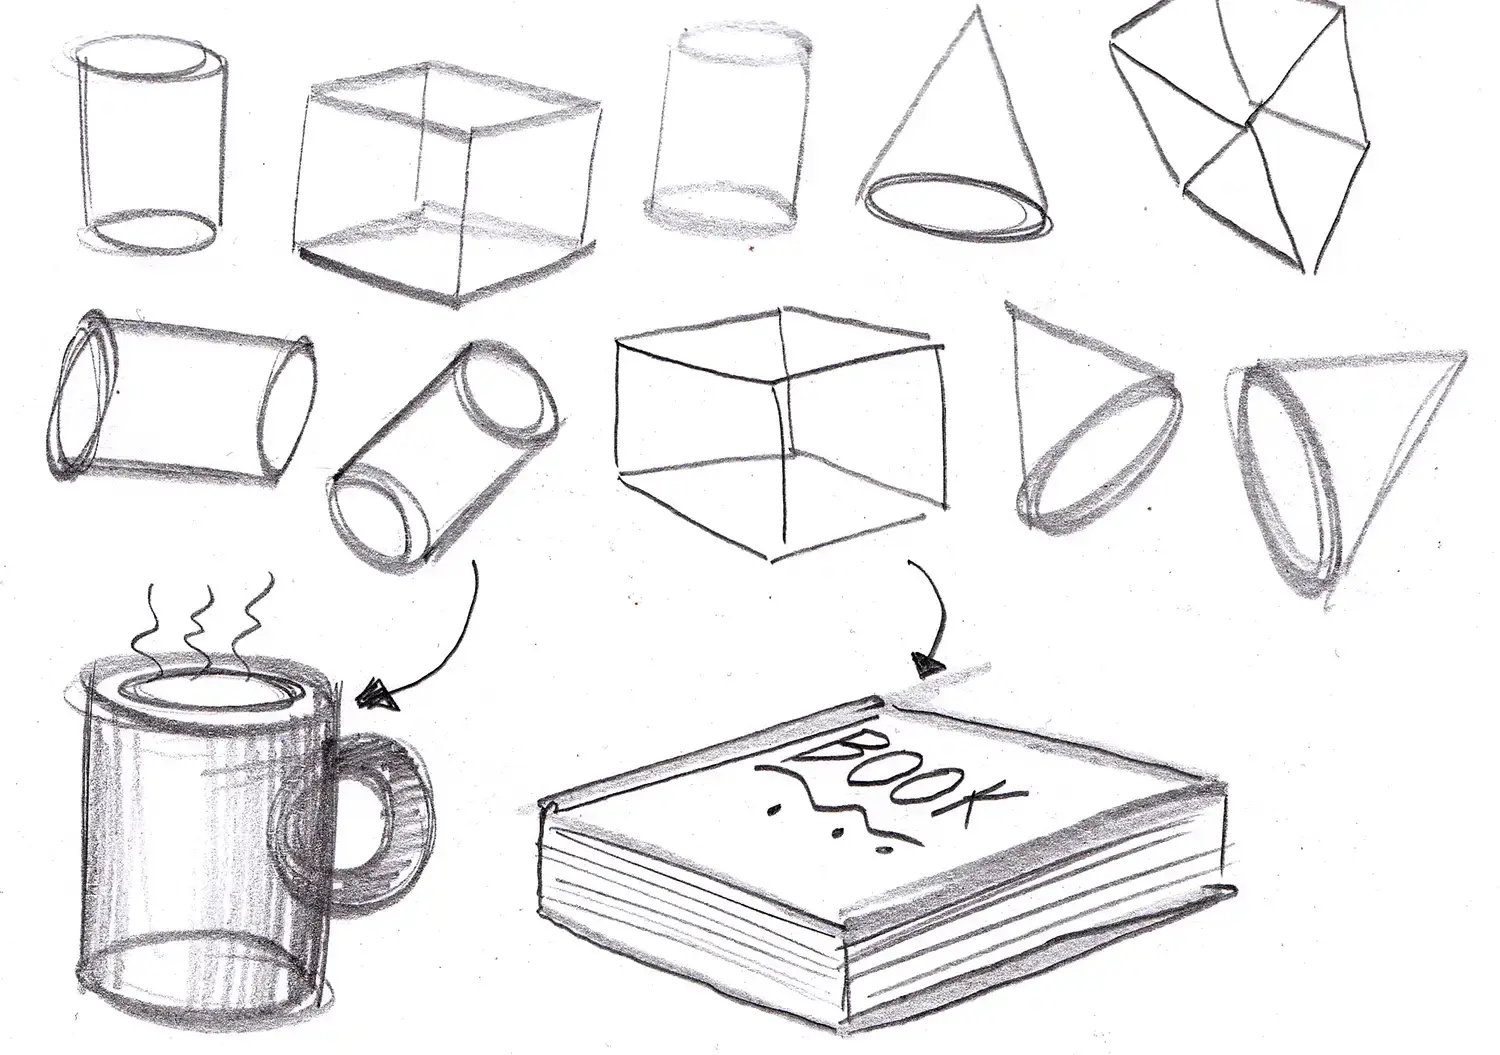
3. Practice Drills (30 minutes)
Now it's time to put this into practice. The goal of these drills is to train your brain to see this underlying structure everywhere.
Drill 1: Form Spotting (10 minutes)
This is a purely observational exercise. You're not aiming for a beautiful drawing, just a quick analysis.
Drawing with Confidence, Part 5: Breaking Down Complex Subjects ...
We'll use the 'Form Spotting' activity from the Francesca Sciandra article you just read.
Find the section titled 'Activity: Form Spotting' and follow the instructions.
Your Task:
- Look around your immediate environment.
- Choose at least three different objects.
- For each object, do a very quick sketch (30-60 seconds) showing how it can be simplified into basic forms. Don't worry about clean lines or details.
- Some ideas: a computer mouse (a flattened sphere or ovoid), a speaker (a cube), a water bottle (a cylinder with a cone on top), a lamp (a cone for the shade, cylinder for the neck, sphere/cube for the base).
Drill 2: Deconstruction Drawing (20 minutes)
This is a more focused exercise that ties everything together. We will use a structured activity that forces you to switch between seeing detail and seeing form.
Drawing with Confidence, Part 5: Breaking Down Complex Subjects ...
The 'Exploration Activity' in the same article provides a perfect structure for this practice. It will help you compare your observational drawing with your new structural analysis.
Find the 'Exploration Activity' near the end of the article. We will follow its three-step process.
Your Task:
- Select a single, relatively simple object from your desk or room. A stapler, a pair of scissors, a spray bottle, or a computer mouse would be excellent choices.
- Drawing 1 (5 mins): Make a detailed observational drawing. Use the contour line skills from the last module. Try to capture its outline accurately.
- Drawing 2 (10 mins): On a new sheet of paper, draw the same object again, but this time, you are only allowed to use basic geometric forms (cubes, spheres, cylinders, cones, and variations). Focus on capturing the object's structure and proportions with these simple volumes.
- Compare: Look at your two drawings. How did breaking it down into forms change your perception of the object? Did it help you understand its three-dimensional nature better?
Conclusion
Excellent work! You've just taken a massive step forward. Learning to see in forms is like being given a key that unlocks the structure of the world. It’s a powerful mental model that moves you from simply copying surfaces to understanding and constructing objects.
Key Takeaways:
- Drawing from form, rather than just copying outlines, is the key to drawing objects from different angles and from imagination.
- Everything in the world can be simplified and broken down into combinations of cubes, spheres, cylinders, and cones.
- The process is analytical: identify the major forms first, then see how the secondary forms connect to them.
Now that you can see the basic forms in the world around you, our next lesson will focus on how to draw them convincingly. We will tackle the challenge of drawing these primitives from multiple angles while making them look solid and three-dimensional.