Hello! Let's dive into our next lesson on building solid forms.
Introduction
In our last session, you practiced drawing basic 3D primitives—cubes, cylinders, spheres, and cones—from various angles. You focused on getting their proportions right and making them look three-dimensional. We briefly touched upon the idea of "wireframe drawing," and today, we're going to explore that concept in depth.
This lesson is dedicated to a single, powerful idea: applying the concept of 'drawing through' to visualize and represent the hidden edges of a form.
"Drawing through" means drawing objects as if they are transparent, constructed from glass or wire. By sketching the lines you can't technically see, you force your brain to understand the object's complete volume. This skill is the secret to making your drawings feel solid and grounded in space. It's what separates a flat-looking shape from a convincing 3D form.
Mastering this will be essential for our next lesson, where we'll start combining and intersecting these forms to create more complex objects.
1. Why Draw Lines That Aren't There?
At first, it might seem counterintuitive. Why add extra lines that you'll just have to erase later? The answer is that drawing is as much a mental exercise as it is a physical one. The "extra" lines of construction are not mistakes; they are a record of your thought process and a tool for building a more accurate drawing.
This excellent article from Drawabox explains the philosophy behind this "constructional" approach.
Lesson 2: Contour Lines, Texture and Construction
Let's read a short section from the Drawabox lesson, 'Contour Lines, Texture and Construction,' to understand why these 'extra lines' are a crucial learning tool, not a sign of a messy drawing.
Please read the section titled 'A technique for learning.' Focus on the author's explanation of why you should not try to hide your construction lines and how they help develop your spatial reasoning.
As the article states, the goal is to reinforce your belief that you are creating solid three-dimensional objects, not just drawing lines on a page. This is analogous to how a 3D model in computer graphics is first built as a "wireframe" mesh before textures and lighting are applied. The wireframe defines the object's complete structure.
2. Visualizing the Unseen Form
To draw the hidden parts of an object, you first have to see them in your mind's eye. Let's watch a video that introduces some helpful mental models for visualizing a form's full volume.
This will help you understand art better || Form (P.1)
The video 'This will help you understand art better || Form (P.1)' from Bluebiscuits offers some great visualization exercises. It's a different take on the same core idea.
Watch from 02:03 to 03:46. Pay attention to two key ideas: 'Imagining all corners and all sides' of a geometric shape. Using 'rubber bands' (contour lines) that wrap around an organic shape to understand its width and depth.
The "rubber band" concept is particularly powerful. These are essentially contour lines that follow the surface of the form. By drawing these lines, you are "drawing through" the object's volume and describing its surface at every point, not just at its silhouette.
3. How to Draw Through Basic Forms
Now, let's put this into practice. The technique differs slightly between rectilinear forms (like cubes) and curved forms (like cylinders).
Transparent Boxes
For a box, drawing through means constructing all 6 faces and 12 edges.
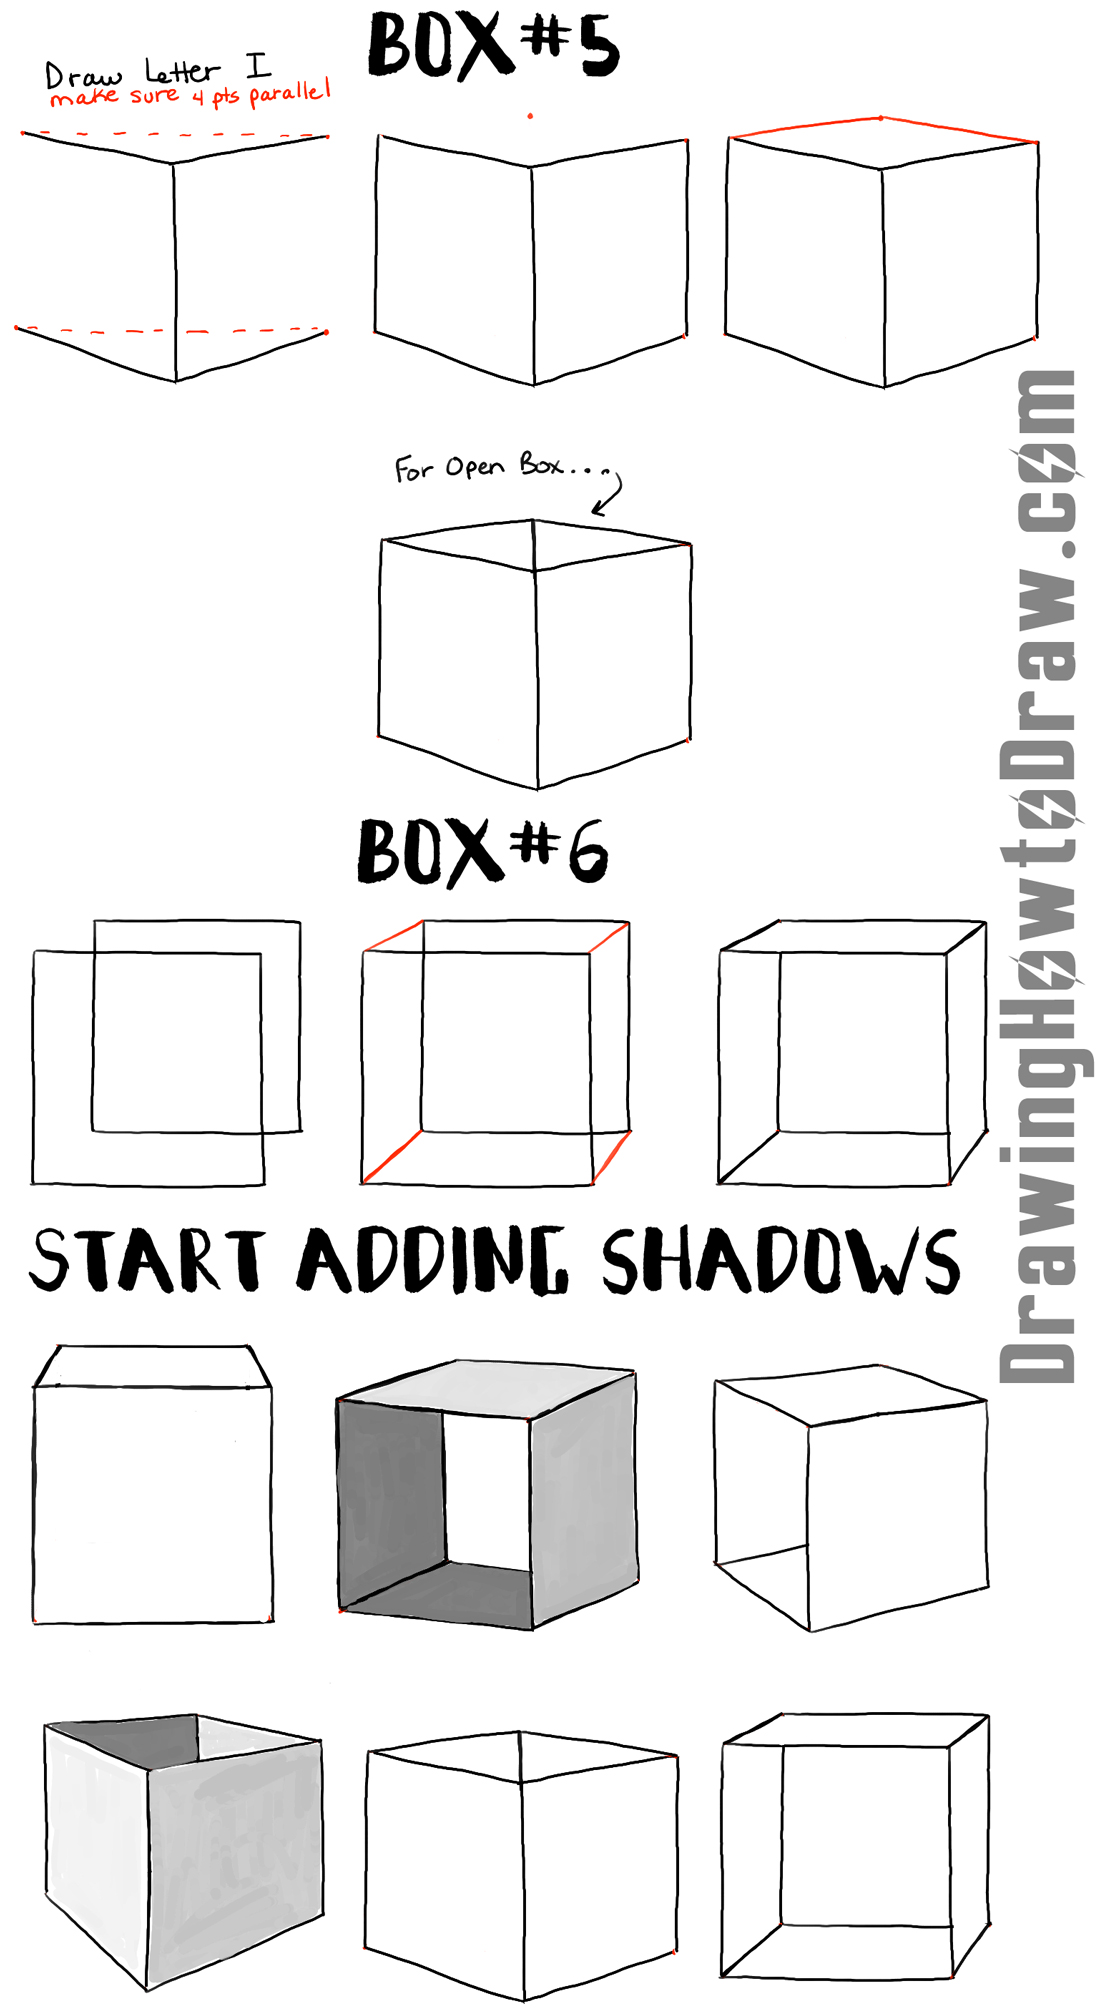
A great way to ensure accuracy is to use perspective. The following resource provides a detailed, step-by-step guide for drawing transparent boxes.
[PDF] PERSPECTIVE HAND DRAWING
This PDF, 'PERSPECTIVE HAND DRAWING,' gives clear, technical instructions for drawing transparent boxes. We'll focus on the one-point and two-point perspective examples.
First, read the section 'ONE-POINT PERSPECTIVE BOX STEP-BY-STEP' (page 27). Pay close attention to the separate instructions for 'Drawing Visible Edges' and 'Drawing Hidden Edges.' Then, review the section 'TWO-POINT PERSPECTIVE STEP-BY-STEP' (page 30). Again, notice how the hidden back and bottom edges are constructed last to complete the transparent form.
Transparent Cylinders
For cylinders, drawing through means drawing the complete ellipse for both the near and far caps. Many beginners draw the front half of the back ellipse, which often leads to alignment issues. Drawing the full, complete ellipse for the back of the cylinder ensures it feels solid and correctly oriented.
A robust method for drawing an accurate cylinder is to first construct a box in perspective and then inscribe the ellipses on the appropriate faces.

4. Practice Drills (25 minutes)
Time to build some muscle memory. Get your pencil and paper ready. Remember to use light, confident lines for your construction.
Drill 1: A Crate of Glass Boxes (10 minutes)
Your goal is to draw a series of transparent boxes from different viewpoints.
- Draw 3 transparent boxes in one-point perspective. Place one below your eye level, one above, and one straddling it. Follow the steps from the LINK PDF.
- Draw 3 transparent boxes in two-point perspective, also at varying heights and angles.
- Focus: Ensure all 12 edges are present for each box. Double-check that your parallel lines are parallel and your perspective lines converge correctly.
Drill 2: Drawing Through Cylinders (10 minutes)
Now let's apply the concept to cylinders.
- Draw 5 transparent cylinders.
- Draw one standing upright. Make sure you draw the full, complete ellipse for the bottom base, even the part you can't see.
- Draw one lying on its side. Again, draw the full ellipse for the far end of the cylinder.
- For a challenge, try drawing the other three cylinders using the "cylinder in a box" method shown in the LINK image. First draw a transparent box, then inscribe the ellipses and connect them.
Drill 3: Organic Forms with "Rubber Bands" (5 minutes)
Let's practice with non-geometric forms.
- Lightly sketch 3-4 simple, organic shapes. Think of a potato, a bean, or a sausage.
- Now, "draw through" them by wrapping contour lines (the "rubber bands" from the Bluebiscuits video) around their surfaces.
- Draw some lines that wrap around the short axis and some that run along the long axis. Overlap them. Feel how this exercise immediately gives the simple shapes a sense of volume and form.
Conclusion
Excellent work. Today you've learned one of the most important principles in constructive drawing. By drawing forms as if they are transparent, you are not just copying what you see; you are understanding and building their three-dimensional reality on the page.
Key Takeaways:
- Drawing Through: The practice of drawing all edges of an object, including the hidden ones, to understand and represent its full volume.
- A Tool for Thinking: The extra construction lines are not clutter; they are a crucial part of the process for ensuring solidity and correct proportions.
- Rectilinear vs. Curved: For boxes, this means drawing all 12 edges. For cylinders and spheres, it means drawing full ellipses and contour lines that wrap around the entire surface.
In our next lesson, Constructing simple composite objects by combining and intersecting basic primitives, you will see exactly why drawing through is so vital. You can't accurately connect two objects if you don't know where their hidden surfaces are. You're now perfectly equipped to start building.