Introduction
Hello! In our last lesson, we explored how to build value and create texture using the precise, linear techniques of hatching and cross-hatching. This gave you a powerful tool for creating crisp, graphic shading.
Today, we're shifting gears to explore a completely different approach to rendering: creating soft, smooth tonal transitions using blending tools. While hatching defines form with lines, blending does so with seamless fields of value. This technique is essential for rendering subjects with soft surfaces like skin, fabric, or out-of-focus backgrounds.
Your goal for this lesson is to learn how to apply blending techniques, primarily using a blending stump, to transform your pencil shading into smooth, continuous gradients.
Part 1: The Theory of Blending Tools
Before we start smudging graphite, it's important to understand the tools of the trade and why they are used. The most common tools for this job are blending stumps and tortillons.
Many beginners are tempted to use their fingers to blend. This is a common mistake that can ruin a drawing. Your skin contains natural oils that will mix with the graphite, creating a blotchy, greasy mark that is very difficult to erase or modify. Blending stumps are the professional solution to this problem.
Let's start by clarifying what these tools are and the difference between them.
Detailed Guide: How to Use a Blending Stump
This article from RapidFireArt provides a clear and concise introduction to blending stumps and tortillons. It will establish our core vocabulary.
Please read from the beginning of the article down to the heading 'Different Methods for How to Use a Blending Stump'. Focus on understanding the physical differences between a blending stump and a tortillon and their primary uses.
To summarize the key points:
- Blending Stump: A stick of tightly rolled soft paper with two pointed ends. It's dense and good for blending larger areas smoothly.
- Tortillon: A stick of tightly rolled paper that is hollow. It's pointier and more delicate, making it better for smaller, more precise areas.
- Why use them? They offer a clean, controlled way to smudge and spread graphite without introducing oils from your fingers.

Part 2: The Right Way to Blend
Here is the most important rule of blending: A blending stump is a tool for refining good shading, not for fixing bad shading.
If your initial pencil work is streaky, uneven, or has large gaps, the blending stump will only smear the mess and make it look blotchy. The key to successful blending is to first lay down a smooth, even layer of graphite, as you practiced in the lesson on controlling pencil pressure. The blending stump then works the graphite into the grain of the paper to create a seamless finish.
This video demonstrates the core techniques and the "hard truth" about blending.
How To Use A Blending Stump Properly (And How To Clean Them)
The Pencil Room Online offers a fantastic, no-nonsense guide to using a blending stump properly. Pay close attention to the initial setup and the different motions used.
Watch from the beginning to 02:50. Focus on three key stages: The Hard Truth (00:00 - 01:23): Internalize the idea that you need even shading before you start blending. Smoothing a Flat Area (01:23 - 02:08): Notice the light pressure and the back-and-forth or circular motions, similar to how you shade with a pencil. Blending Two Values (02:08 - 02:50): Observe how the artist works from the darker area towards the lighter area, reducing pressure along the way.
As you saw, the pressure and direction of your blending matter immensely. Always start with a very light touch. It's easier to add more blending than to undo over-blending. When blending a gradient, pulling graphite from the dark areas into the light areas is a key technique.
Another professional tip is to think about when you blend. Instead of drawing everything and blending it all at the end, try blending between your pencil layers.
Should You Use a Blending Stump?
This short clip from Drawing Explained discusses the timing of your blending and the specific motions to use for best results.
Watch from 00:35 to 01:56. Pay attention to two important concepts: Blending Motion (00:35 - 01:14): Note the advice to use individual strokes or continuous circular motions rather than harsh back-and-forth scrubbing. Blending in Layers (01:14 - 01:56): Understand the benefit of blending as part of the layering process, rather than as a final step.
Part 3: Practice Session (30 minutes)
Time to put theory into practice. For these exercises, you'll need your sketchbook, a few pencils (like an HB and a 2B), and a blending stump. If you don't have a blending stump, a Q-tip or a tightly rolled piece of paper can work as a substitute, though the results will differ.
Drill 1: Blending a Value Gradient
Your first task is to create a smooth gradient, applying the techniques from the videos.
- Lay Down Graphite: On your paper, create a rectangular bar of value that goes from dark to light. Use the side of your 2B pencil for the dark end and your HB for the lighter end. Focus on making your pencil strokes close together, but don't worry about making it perfectly smooth yet.
- Blend:
- Start with a clean blending stump.
- Using light pressure, begin blending in the darkest area. Use small circular motions to work the graphite into the paper.
- Gradually move towards the lighter end of the gradient, lifting your pressure as you go. Allow the graphite collected on the stump's tip to help you transition into the mid-tones.
- Clean your stump (we'll cover how in a moment) before blending the lightest areas to avoid making them too dark.
Your goal is to transform the pencil-stroke texture into a smooth, almost airbrushed, finish.
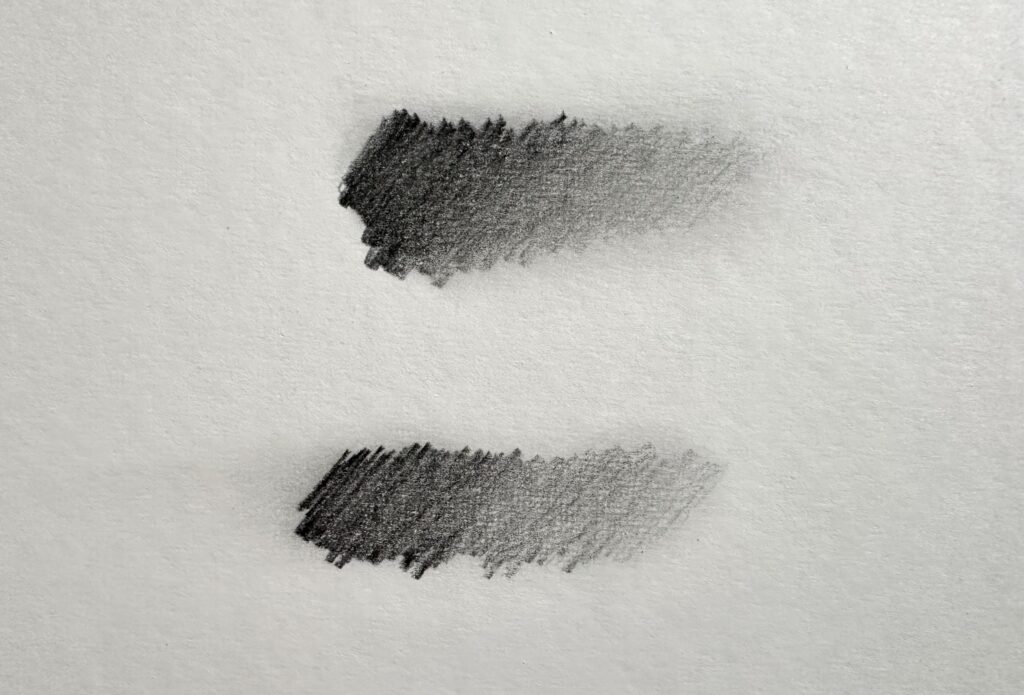
Tool Maintenance: How to Clean a Blending Stump
As you work, your stump will pick up graphite and become dirty. Using a dark, dirty stump on a light area will create a smudge. You need to keep your tools clean.
How To Use A Blending Stump Properly (And How To Clean Them)
Let's quickly go back to the first video to see how to clean your stumps.
Watch from 03:10 to 03:32. The two methods are: Quick Clean: Rubbing the stump on scrap paper. Deep Clean: Gently sanding the tip with fine-grade sandpaper or a nail file.
It's a good practice to have at least two stumps: one dedicated to dark values (charcoal, soft graphite) and one for light values.
Drill 2: Blending to Create Form
Now, let's apply this to a 3D object. Blending is excellent for creating the soft-turning shadows that describe a curved surface.
- Sketch a Sphere: Lightly draw a circle.
- Map the Shadows: Following the principles from Module 5, imagine a light source and lightly map out your core shadow and cast shadow.
- Shade with Pencil: Lay down your values with a pencil. Fill in the core shadow with a dark value and create a mid-tone between the core shadow and the highlight. Keep your pencil strokes following the contour of the sphere.
- Blend the Form Shadow:
- Use your blending stump to soften the transitions on the sphere itself (the form shadow).
- Work along the edge of the core shadow, pulling graphite into the mid-tones to create a very smooth gradient. This will make the sphere look round and three-dimensional.
- Be careful not to blend away your highlight! Leave the lightest part of the sphere as untouched white paper.
Conclusion
Excellent work today. You've now added a crucial set of techniques to your rendering arsenal. You understand not just how to create value with lines (hatching), but also how to create it with smooth, seamless tone.
Key Takeaways:
- Blending stumps and tortillons are paper tools used to create smooth gradients and soft textures. They are a clean alternative to using your fingers.
- Blending is a refinement step. It works best on top of evenly applied pencil shading, not as a fix for messy work.
- Use a light touch and controlled motions (circular or directional strokes) to work the graphite into the paper.
- Work from dark to light, and consider blending in between pencil layers for more control.
- Keep your tools clean using scrap paper or sandpaper to avoid muddying your drawing.
In our last few lessons, we've focused on adding graphite to the paper. But what about taking it away? In our next lesson, we will explore how to use a kneaded eraser to lift highlights and refine values, giving you even more control over your finished drawings.