Introduction
Hello! Welcome back.
In our last few lessons, we've focused entirely on additive drawing methods: adding graphite to the paper through layering, hatching, and blending to build up form and value. You learned to create crisp textures with lines and soft gradients with a blending stump.
Today, we're going to explore the opposite approach: subtractive drawing. We'll treat the eraser not as a tool for correcting mistakes, but as a primary drawing tool for shaping light. Your learning goal is to master using a kneaded eraser to lift out highlights and refine values, effectively drawing with light out of shadow. This is a crucial skill for achieving realism and a key technique in any artist's rendering toolbox.
Part 1: From Correction to Creation
Before we start, it's important to understand what makes a kneaded eraser different from the standard pink or white plastic erasers you might be used to. A kneaded eraser works by absorbing graphite particles rather than abrading the paper surface.
3 Effective Ways to Use a Kneaded Eraser for Realistic Drawing
To start, let's watch a short video from The Drawing Source that explains the unique properties of a kneaded eraser.
Watch from the beginning to 01:19. Pay attention to the three key factors that set a kneaded eraser apart: it leaves no residue, it can be cleaned, and most importantly, it can be shaped.
The ability to shape the eraser is what transforms it from a simple cleanup tool into a versatile instrument for rendering. This process of removing pigment to create the light areas of a drawing is known as subtractive drawing. Since you appreciate understanding the theory behind techniques, let's briefly define this concept.
Subtractive Drawing: Techniques, Tips, and Exercise
The article 'Subtractive Drawing' from Binge Drawing provides a great explanation of this core idea.
Please read the first two sections, 'First up, what exactly is subtractive drawing?' and 'How is Subtractive Drawing useful?'. This will frame the rest of our lesson.
As the article notes, subtractive drawing encourages you to see your drawing in terms of light shapes, not just shadow shapes. By covering an area in a mid-tone and then "carving out" the highlights, you can achieve incredibly soft, realistic effects that are difficult to create otherwise.
Part 2: Kneaded Eraser Techniques
Mastering the kneaded eraser comes down to three things: shaping it for the task, applying the right pressure and motion, and keeping it clean.
Step 1: Conditioning and Shaping
Just like warming up before exercise, you need to "condition" your eraser. A new kneaded eraser is often stiff. Kneading it in your hands warms it up, making it pliable and sticky, which is perfect for lifting graphite.
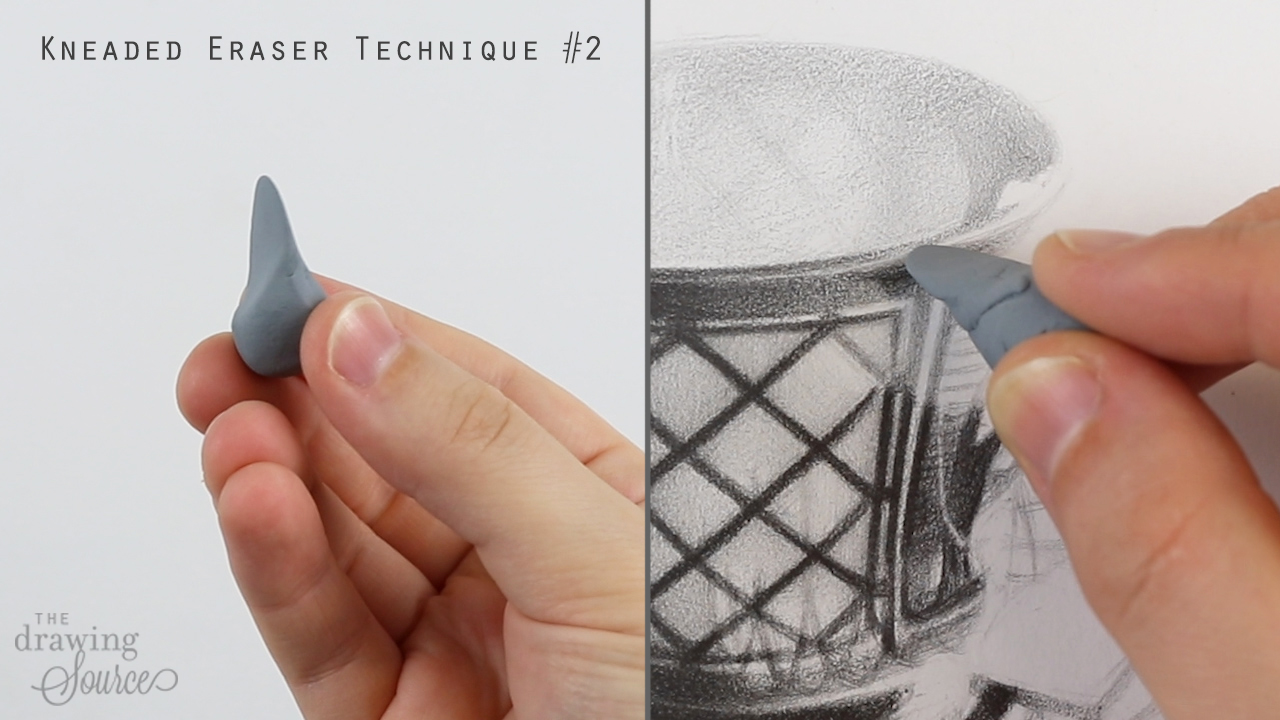
The real power comes from its malleability. You can shape it to be a broad tool for softening large areas or a precision instrument for tiny details.
How to Use a Kneaded Eraser: Step-by-Step Guide for Artists
The article 'How to Use a Kneaded Eraser' from drawing-pencils.com offers excellent, practical advice on shaping your eraser for specific tasks.
Read the section 'Step 2: Conditioning and Shaping the Eraser.' Focus on the 'three-step shaping routine' (Pinch, Flatten, Tip-out). This is a simple but powerful framework.
Step 2: Lifting and Refining
Once your eraser is shaped, you can perform two primary functions: lifting sharp highlights and refining broad values.
1. Lifting Precise Highlights: This is for creating bright, specific points of light, like the glint in an eye or the specular highlight on a metallic object.
- Shape: Pinch the eraser into a fine point or a sharp wedge.
- Technique: Use a gentle tapping or dabbing motion. Don't rub. Just press the tip onto the paper and lift straight up. The graphite will stick to the eraser, leaving a lighter spot behind.
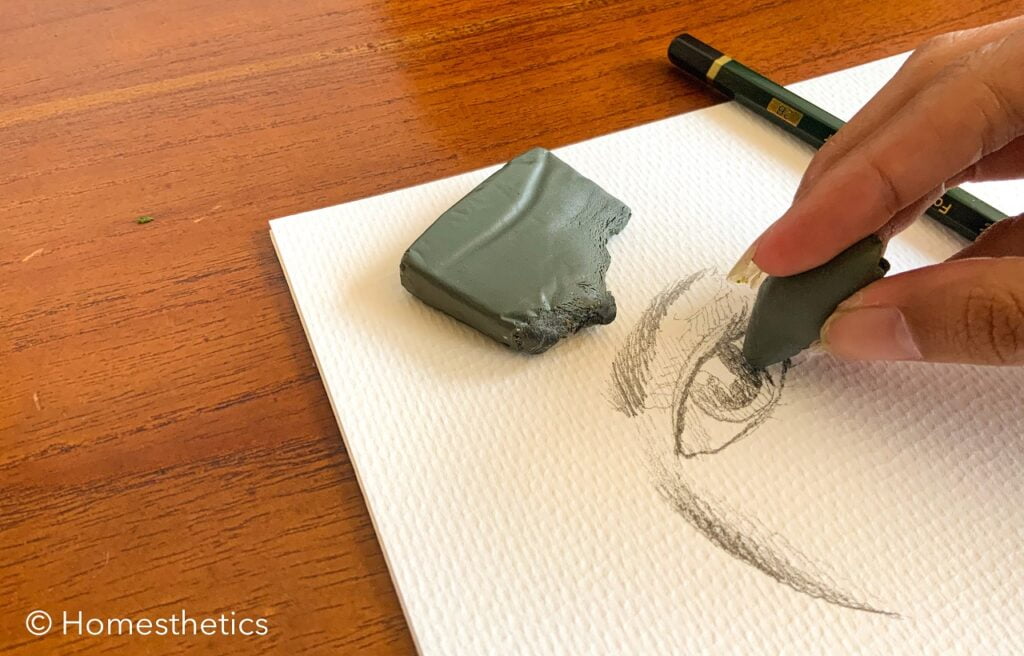
2. Refining and Softening Values: This is for gently lightening larger areas, smoothing transitions, or recovering areas that you've shaded too darkly.
- Shape: Flatten the eraser into a broad, smooth surface.
- Technique: Press the flat side onto your drawing and gently drag or blot it across the area. This lifts a thin, even layer of graphite, reducing the value without creating harsh edges.
This video demonstrates these techniques clearly.
3 Effective Ways to Use a Kneaded Eraser for Realistic Drawing
Let's return to the video from The Drawing Source to see these shaping and lifting techniques in action.
Watch from 01:19 to 02:45. Observe the three distinct techniques: The Point (01:19 - 01:48): For lifting small dots and refining details. The Sharp Edge (01:48 - 02:07): For creating or cleaning up crisp lines. The Flat Surface (02:07 - 02:45): For lightening broader areas.
Step 3: Maintenance
As your eraser picks up graphite, it gets dirty and less effective. To clean it, simply stretch and fold it over on itself several times. The graphite gets trapped inside, revealing a fresh surface.
Kneaded Erasers A Beginners Guide
This brief clip from the 'Kneaded Erasers A Beginners Guide' by Josue.With.Context clearly shows how to clean your eraser.
Watch from 03:09 to 03:32. The 'stretch and fold' method is all you need to know for routine cleaning.
Eventually, the eraser will become saturated and sticky. At that point, it's time to replace it.
Part 3: Practice Session (30 minutes)
Time to apply these concepts. Grab your sketchbook, pencils (HB, 2B), a blending stump, and your kneaded eraser.
Drill 1: The Value Scale Lift (10 minutes)
This drill will give you a feel for how the eraser behaves on different values.
- Create a Gradient: Draw a rectangular box and, using your pencils and blending stump, create a smooth value scale from black to light grey.
- Practice Lifting:
- Sharp Highlights: Pinch your eraser to a fine point. In the darkest part of your scale, tap the eraser firmly to pull out small, distinct white dots.
- Soft Highlights: In the mid-tone section, press and hold the pointed tip for a second before lifting. See how this creates a softer, less defined highlight.
- Value Reduction: Form the eraser into a flat wedge. Gently drag it over a portion of your mid-tones. Observe how it lightens the entire area evenly.
Drill 2: Subtractive Sphere (20 minutes)
This exercise puts everything together. Instead of drawing the shadows on a sphere, you're going to start with a field of grey and "pull" the light out with your eraser.
- Tone the Paper: Lightly sketch a circle. Then, using the side of your HB or 2B pencil, fill a square area around and including the circle with an even, light-to-medium grey tone. Use your blending stump to smooth it out into a consistent field of value.
- Establish the Light: Imagine a light source. Using a flattened piece of your kneaded eraser, gently blot the area of the sphere that is facing the light. This will create the broad shape of your main highlight area.
- Define the Highlight: Now, pinch your eraser to a sharp point. Within that lighter area, tap out the brightest specular highlight—the sharp glint of light on the sphere's surface.
- Model the Form: Use different shapes and pressures to lift out the subtle gradations of light on the sphere. A wider, rounded eraser shape can create soft transitions, while a sharper edge can define the boundary between light and shadow (the terminator).
- Refine (Optional): Once you have lifted the light areas, you can go back in with a sharp pencil to reinforce the core shadow and cast shadow for added contrast.
This process of working both subtractively (erasing) and additively (drawing) is fundamental to advanced rendering.
Conclusion
Fantastic work today. You have fundamentally expanded your drawing vocabulary by learning to think subtractively. The eraser is no longer just for mistakes; it is a powerful tool for creating light, form, and texture.
Key Takeaways:
- A kneaded eraser is a subtractive drawing tool that works by absorbing graphite.
- The key to its use is shaping it for the task: a point for sharp highlights, a wedge for lines, and a flat surface for broad lightening.
- The primary techniques are tapping/dabbing for precision and dragging/blotting for softening values.
- Subtractive drawing involves starting with a tone and "pulling out" the light, forcing you to see form in a new way.
In this module, we've covered hatching, blending, and now subtractive lifting. You have a versatile set of rendering tools at your disposal. In our next and final lesson for this module, we will focus on choosing the appropriate shading technique to match the texture and form of a subject, learning when to use lines, when to blend, and when to lift.