Introduction
Welcome to the next step in our drawing process! In the last two lessons, you completed the crucial analysis phase. You've learned how to deconstruct a reference object into its fundamental 3D forms, and you've practiced mapping its light and shadow patterns. Think of this as creating a detailed blueprint for a building—you have all the plans, but now it's time to lay the foundation.
Today's lesson is where we transition from thinking to doing. Our goal is to create a structural underdrawing that establishes accurate forms and proportions. This isn't the final, polished drawing. It's the carefully built "wireframe" or skeleton of your subject. Just as a web developer creates a clean HTML structure before adding CSS, or an engineer builds a solid framework before adding the facade, we will build a robust structural drawing that will support all the subsequent details and shading.
This stage is all about accuracy. Getting the forms and their relationships right now will make every following step easier and more effective.
1. The "Why" of Construction
Before we start, let's solidify why we build drawings this way. Many beginners try to start by drawing the final outlines (the contour lines) of an object. This often leads to frustration: proportions are off, the drawing doesn't fit on the page, or parts don't line up correctly.
The constructional approach solves these problems by building the drawing from the inside out, using simple, loose shapes. It's a more forgiving and efficient way to guarantee accuracy.
To see this principle explained, let's watch a short video.
The video "Drawing Basics - Construction" from Drawing & Painting - The Virtual Instructor provides an excellent analogy for this process. It explains what construction is and why it's a more effective method than starting with outlines.
Watch the video from the beginning until 02:47. Pay attention to: The analogy of building a house (00:45). Your structural underdrawing is the foundation and framing. The common problems with starting with contour lines (01:44). The benefits of construction: ensuring correct placement and improving speed and accuracy (02:25).
The key idea is to create a light, structural "underlayment" that you can easily adjust before committing to your final lines.
2. The Strategy: Working from Big to Small
The most effective strategy for creating a structural underdrawing is to work from big to small. This means you start by establishing the largest, most general shapes and then progressively break them down into smaller, more specific forms. This is a form of top-down design, ensuring your overall structure is sound before you get lost in the details.
- The Envelope: Start by capturing the entire object within a simple box or shape. This establishes its overall height, width, and position on the page.
- Major Forms: Break down the envelope into the largest component shapes (e.g., a coffee mug is a large cylinder for the body and a smaller C-shape for the handle).
- Secondary Forms: Refine those major forms by adding the next level of detail (e.g., the lip of the mug, the curve where the handle attaches).
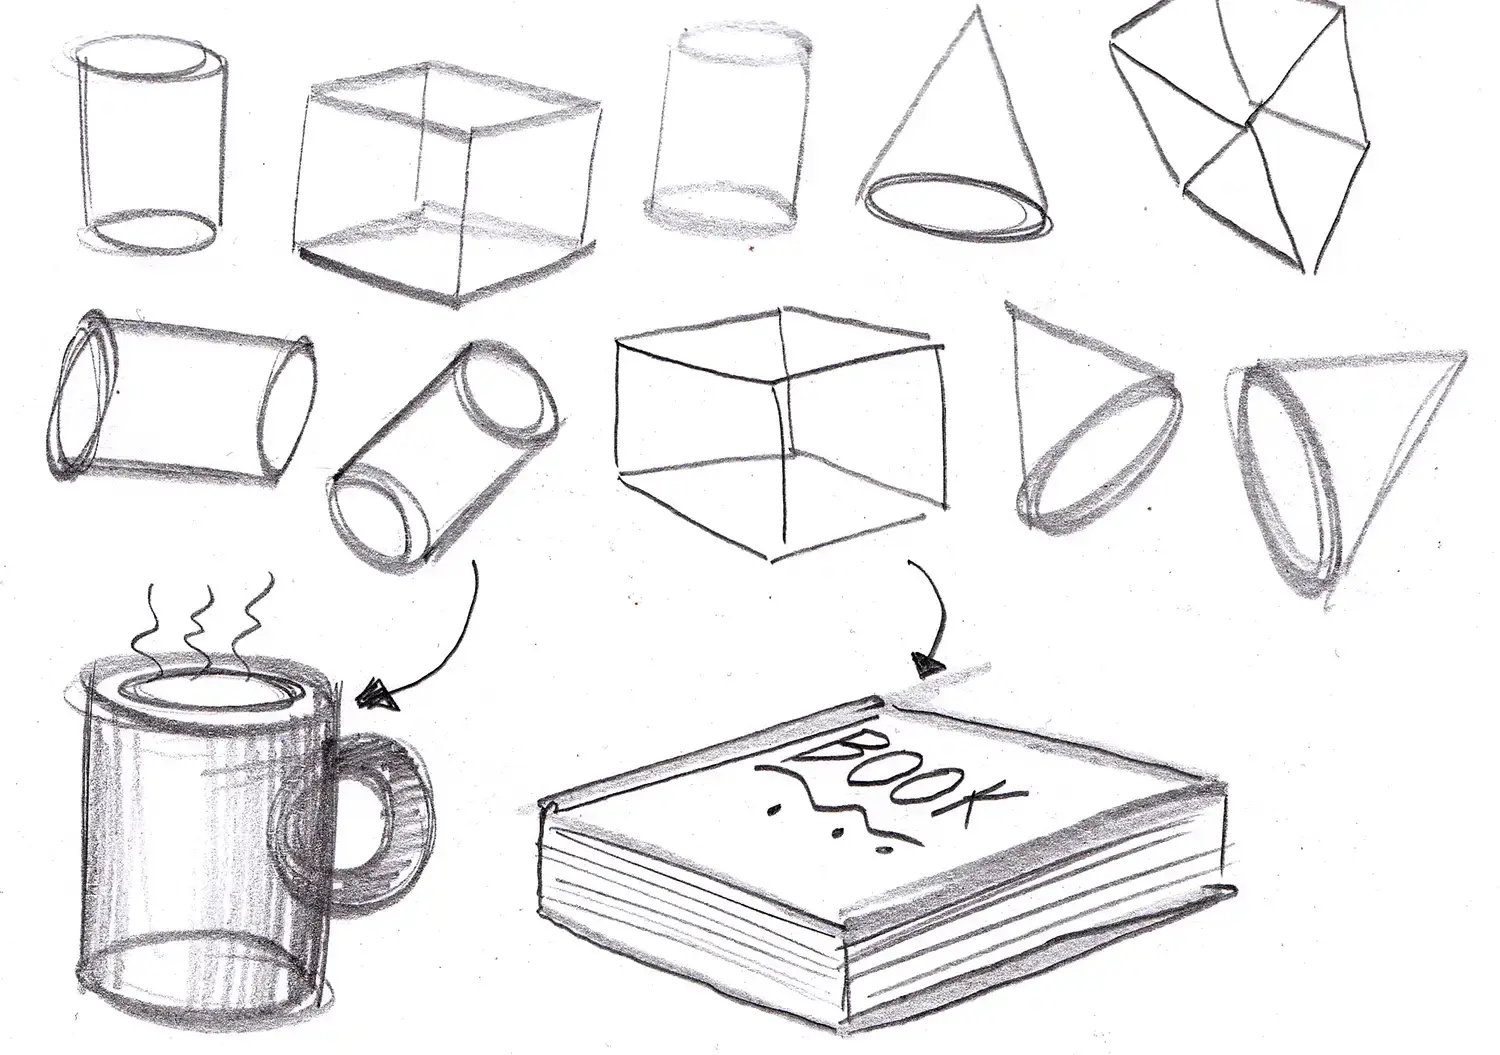
The following video from Proko explains this "big to small" workflow and introduces some key measurement techniques to help you maintain accuracy.
How to Draw Accurate Proportions
This segment from Proko's "How to Draw Accurate Proportions" clearly explains the 'big to small' principle and recaps measurement methods you've seen before.
Watch the video from 06:46 to 08:30. Focus on: The concept of starting with the biggest shape or 'envelope'. The process of breaking down large shapes into smaller ones (head -> eye sockets -> eyelids). How this method prevents common proportional errors, like a figure getting progressively smaller or running off the page.
By prioritizing the largest relationships first, you create a solid hierarchy that holds the entire drawing together.
3. Precision Tools for Proportion
While eyeballing and comparative measurement are your primary tools, sometimes you need a more precise method for placing details, especially on objects with geometric or symmetrical features. The Drawabox course offers a powerful technique for subdividing planes in perspective.
This method allows you to find the exact center of a plane or divide it into equal sections, which is invaluable for placing features accurately. Given your background, you may appreciate this systematic, almost algorithmic approach.
Lesson 6: Applying Construction to Everyday Objects
Let's explore a few techniques from Drawabox's "Lesson 6: Applying Construction to Everyday Objects." These are fantastic tools for adding precision to your underdrawings.
Please read the sections titled "Center of a plane," "Subdividing," and "Subdividing more." Focus on understanding how drawing diagonals can help you find the true center of a plane that's in perspective, and how you can use that center point to create an accurate grid.
Think of this as a function you can call whenever you need to, for example, place a button in the exact middle of a surface or draw a label that is centered on a bottle.
4. Practice Exercise: Constructing an Object
Estimated Time: 25-30 minutes
Now it's time to put all these concepts into practice. You will create a structural underdrawing of an everyday object from observation.
Your Task:
- Choose a Subject: Find an object near you that is composed of relatively simple geometric forms. Good examples include a computer mouse, a stapler, a spray bottle, a lamp, or a coffee mug.
- Analyze and Plan: Before drawing, look at your object. Mentally deconstruct it into its primary forms (cubes, cylinders, spheres, etc.). This is the analysis you've been practicing.
- Create the Underdrawing: On a clean sheet of paper, follow the constructional process.
- Step 1: The Envelope. Start with very light lines. Draw the simplest box that contains your entire object, paying attention to its overall height and width. Use the ghosting method for these lines.
- Step 2: Block-in Major Forms. Inside the envelope, sketch the largest primitive shapes that make up your object. Use the "drawing through" technique from Module 2 to help visualize them as solid 3D forms. Focus on their size and position relative to one another.
- Step 3: Subdivide and Refine. Begin adding the secondary forms. If a form is curved, block it in with straight lines first, then round it off. If you need to place a detail precisely, use the diagonal subdivision method you just learned.
- Step 4: Check and Correct. This is a crucial step. Step back from your drawing. Compare it to the object. Are the proportions correct? Use your pencil for comparative measurement (sighting) and check for vertical/horizontal alignments. Because your lines are light and loose, making corrections is easy at this stage.
Your final product should look like a "wireframe" of the object. It should clearly show the 3D structure and have accurate proportions, but without any shading or heavy, final lines. It's a drawing of structure, not surface.
For a great example of this process in action, you can re-watch the ketchup bottle demonstration from the first video (LINK) starting at 02:47.
Conclusion
Excellent work today. You have successfully bridged the gap between analyzing a subject and beginning to draw it. You've learned how to build a drawing from its core structure outward, ensuring a foundation of accuracy that will make all subsequent steps far more manageable.
Key Takeaways:
- A structural underdrawing is the foundational "wireframe" of your drawing, focusing on accurate form and proportion.
- Always work from big to small: establish the overall envelope first, then break it down into major forms, and finally add smaller details.
- Construction is key: Building with loose, simple shapes allows for easy corrections and guarantees better accuracy than starting with tight outlines.
- Use proportional tools like sighting, alignment, and subdivision to check and refine the accuracy of your constructed forms.
Preview of the Next Lesson:
Your underdrawing is the perfect skeleton, but it's still a bit messy with construction lines. In our next lesson, "Refine the underdrawing into a clean line art representation of the subject," we will learn how to go over this structural base, choose our final lines, and use line weight variation to create a clean, crisp, and compelling line drawing ready for the final rendering stages.