Welcome back! In our previous lesson, you successfully set up a complete Rust development environment. With the toolchain installed and your editor configured, you're now ready to move from preparation to practice.
This lesson focuses on Cargo, Rust's integrated build system and package manager. For anyone coming from Python or Swift, you can think of Cargo as a tool that combines the roles of pip, venv, and parts of your project runner, or the Swift Package Manager, but with even deeper integration into the ecosystem. We will use Cargo to create, build, and run your first Rust project, establishing a workflow that you will use throughout your Rust journey.
1. What is Cargo?
Before we start using it, let's clarify what Cargo is and why it's so central to Rust development. While you can use the Rust compiler (rustc) directly to compile single files, any project of realistic size or complexity is managed with Cargo. It is the official and universally adopted tool for handling a wide range of development tasks.
Cargo is responsible for:
- Creating new projects with a standard directory structure (
cargo new). - Building your code into an executable or a library (
cargo build). - Running your project in one step (
cargo run). - Managing dependencies (which Rust calls "crates") from the central
crates.iorepository. - Running tests, benchmarks, and generating documentation.
In short, Cargo automates the tedious aspects of project management, allowing you to focus on writing code. For a great overview of Cargo's role, the following article provides an excellent introduction.
Cargo Package Manager Deep Dive - DEV Community
This article from dev.to colorfully describes Cargo as "Rust's Swiss Army Knife" and provides a high-level view of its purpose and benefits.
Read the introduction and prerequisites sections, starting from the introduction and continuing through to the end of the prerequisites section. This will reinforce why Cargo is essential and confirm that your setup from the last lesson is ready.
2. Creating a New Project
Let's put Cargo to work. We'll create a new "Hello, world!" project, but this time, the "Cargo way." Open your terminal or the integrated terminal in VS Code (View -> Terminal). Navigate to the directory where you plan to store your projects.
The official Rust documentation, "The Rust Programming Language" book (often called "the book"), is the best resource for learning these fundamentals. We will refer to it frequently.
Hello, Cargo! - The Rust Programming Language
This chapter from the official Rust book is the definitive guide to creating and structuring a project with Cargo.
First, run the command shown in the text to create a new project: $ cargo new hello_cargo $ cd hello_cargo Then, read the section Creating a Project with Cargo. As you read, examine the files that Cargo generated in your hello_cargo directory. Pay close attention to the explanation of: Cargo.toml: The manifest file, written in TOML format. Note its structure with [package] and [dependencies] sections. This is analogous to Package.swift or pyproject.toml. src/main.rs: The location of your source code. Cargo enforces this standardized layout to keep projects organized.
As you can see, Cargo sets up a clean, conventional structure for you, including initializing a Git repository. This standardization is a hallmark of the Rust ecosystem and makes it easy to navigate any Rust project.
3. Building, Running, and Checking Your Project
Now that you have a Cargo-managed project, let's explore the main commands for compiling and running it. You will be using these commands constantly.
The video below provides a clear, practical demonstration of the build, run, and check cycle. Watching someone walk through the commands can help solidify your understanding.
Rust Tutorial #2 - Using Rust Tools (cargo, rustfmt)
This video by Tech With Tim visually demonstrates the core Cargo commands and their output.
Watch the following segments to see these commands in action: cargo build: This part shows how to compile the project. Notice the creation of the target directory and the Cargo.lock file. cargo run: This segment introduces the more convenient command that compiles and runs your code in one step. cargo check: Finally, this part explains the purpose of cargo check for faster feedback during development.
To reinforce this and add more detail, let's turn back to the official Rust book.
Hello, Cargo! - The Rust Programming Language
This text provides the formal explanation for the commands you just saw in the video, including the important distinction between debug and release builds.
Read the sections Building and Running a Cargo Project and Building for Release. As you read, try running the commands yourself in your hello_cargo project directory: cargo build ./target/debug/hello_cargo (or .\target\debug\hello_cargo.exe on Windows) cargo run Modify src/main.rs slightly (e.g., change the text in println!) and run cargo run again to see it recompile. cargo check cargo build --release and observe that the output is now in target/release.
Here's a summary of the key commands and concepts:
cargo build: Compiles your project.- Creates a
target/debug/directory for the output. - This is a debug build: it compiles faster and includes debugging information, but the resulting program runs slower.
- Creates a
cargo run: Compiles (if necessary) and then runs your project. It's smart enough to skip compilation if your code hasn't changed.cargo check: A lightweight command that checks if your code compiles without actually producing an executable. It's significantly faster thancargo buildand is perfect for getting quick feedback as you write code.cargo build --release: Compiles your project with optimizations.- Creates a
target/release/directory for the output. - This is a release build: it takes longer to compile, but the resulting program runs much faster. This is what you use when you're ready to ship your application.
- Creates a
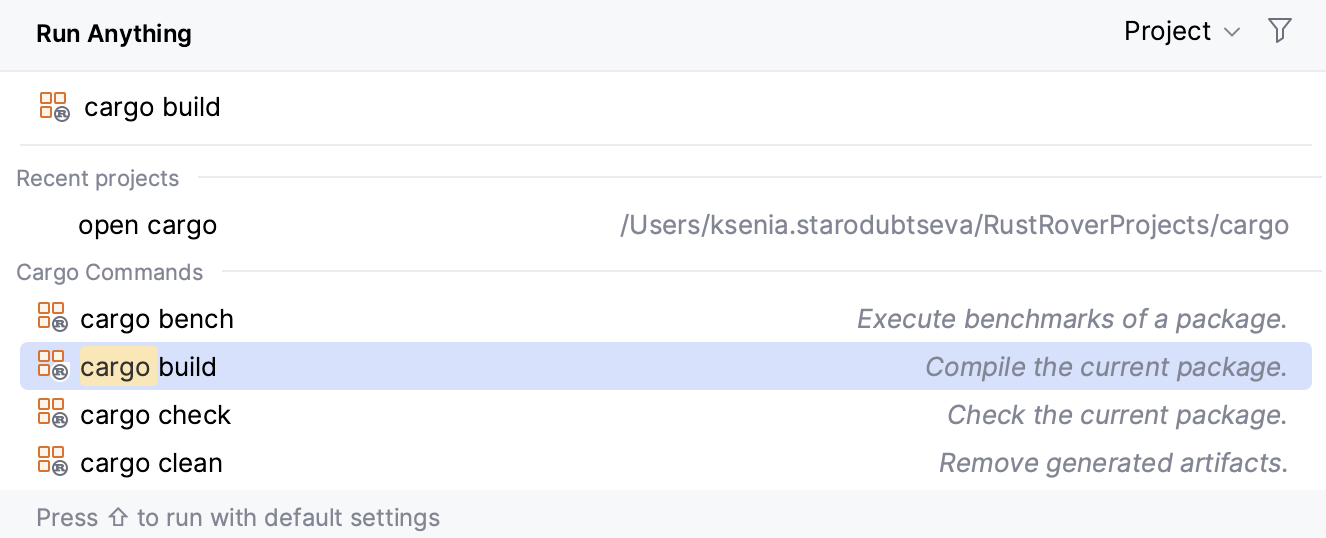
Modern IDEs integrate these commands directly into their user interface. For example, in JetBrains IDEs like RustRover or IntelliJ with the Rust plugin, the "Run Anything" dialog gives you quick access to these standard Cargo commands.
Conclusion
In this lesson, you've mastered the foundational workflow for managing Rust projects with Cargo. You now know how to create a standardized project structure and use the core commands to build, run, and check your code.
Key takeaways from today are:
- Cargo is the central tool for the entire lifecycle of a Rust project.
cargo newcreates a new project with a conventional layout (srcdirectory,Cargo.tomlfile).cargo buildcompiles your code, placing unoptimized debug builds intarget/debug/.cargo runis the convenient way to compile and execute your project during development.cargo checkprovides the fastest way to verify your code for correctness without a full build.cargo build --releaseis used to create an optimized executable for production, which goes intotarget/release/.
You are now fully equipped to start writing and experimenting with Rust code in a structured, professional way. In our next lesson, we will finally turn our full attention to the Rust language itself, starting with an analysis of the "Hello, World!" program and exploring how Rust's ahead-of-time compilation model influences its design.