Welcome to your first lesson in our journey to learn Rust! Today, we'll get your machine ready for development by installing the complete Rust toolchain and configuring a professional-grade code editor. This is the foundational step that enables everything else we'll do in this course. While you're already familiar with setting up development environments for languages like Python and Swift, we'll focus on what's unique about Rust's ecosystem and the powerful, integrated tooling it provides right out of the box.
Our goal is to install Rust, understand the core components of its toolchain, and set up Visual Studio Code with the essential extensions for a smooth and productive coding experience.
1. The Rust Toolchain: More Than Just a Compiler
Before we type any commands, let's get a high-level view of the Rust ecosystem. Unlike some languages where the compiler, package manager, and build tools are separate entities that you piece together, Rust provides a cohesive, integrated set of tools managed by a single utility: rustup.
The key players are:
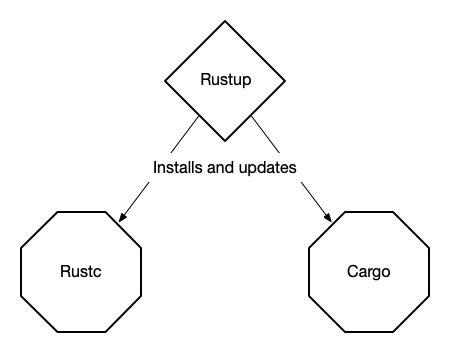
rustup: The Rust toolchain installer and manager. It lets you install, update, and switch between different versions of Rust (like stable, beta, and nightly).rustc: The Rust compiler. It takes your Rust source code and compiles it into a native executable.cargo: The Rust build tool and package manager. This is the star of the show. It handles project creation, dependency management (fromcrates.io, Rust's package registry), building, testing, and running your code. You can think of it as a super-powered combination of Python'spipand Swift's Package Manager.
This simple diagram illustrates the primary role of rustup:
When you use Cargo to build a project, it orchestrates a more complex process. It reads your project's configuration from a TOML file, fetches dependencies (called "crates"), and then invokes rustc to compile everything. The compiler, in turn, often uses the LLVM compiler infrastructure as its backend to generate optimized machine code.
This more detailed diagram shows the entire workflow:

2. Installing Rust with rustup
Now, let's get our hands dirty. The recommended way to install Rust is by using rustup. We'll start by consulting the official documentation.
This is the official installation page from rust-lang.org. It provides the most up-to-date commands for installing Rust on your operating system.
Please read the instructions relevant to your operating system. If you are on macOS or Linux, you will use the curl command. If you are on Windows, you will download the installer. Pay close attention to the section on Windows considerations or similar linker prerequisites for your OS. Rust compiles to native code and needs a system linker, which often comes with a C++ build environment. Not having this is a very common source of initial errors. While reading, also note the explanation of what rustup does and how it manages Rust's rapid release cycle. Finally, understand the importance of configuring the PATH, which the installer usually handles for you.
The installer will present you with a few choices. For a deeper understanding of what these options mean and the components being installed, the following video provides an excellent walkthrough.
Install the Rust Toolchain on an Ubuntu Linux Server 🦀
This video from Trevor Sullivan gives a clear explanation of the components included in the Rust toolchain and walks through the customization options in the installer.
First, watch the segment explaining the core components that rustup installs. This will familiarize you with tools like rustfmt (the auto-formatter) and clippy (a powerful linter to catch common mistakes). Next, watch the section that demonstrates the interactive installation. This covers concepts like the "host triple" (CPU architecture-vendor-OS), release channels (stable, beta, nightly), and installation profiles. While the default is almost always what you want, understanding these concepts is valuable.
After running the installer and following its instructions, you will have the full Rust toolchain on your system.
3. Verifying the Installation
The rustup installer will modify your system's PATH environment variable to include the location of the Rust tools (~/.cargo/bin on Linux/macOS and %USERPROFILE%\.cargo\bin on Windows). For this change to take effect, you must restart your terminal or command prompt.
Once you've opened a new terminal session, you can verify that everything is working by checking the versions of the installed tools:
rustc --version
cargo --version
You should see output indicating the version number and release date, for example: rustc 1.78.0 (9b00956e5 2024-04-29).
Rust has a 6-week release cycle, so new versions come out frequently. To keep your toolchain up-to-date, you can simply run the following command periodically:
rustup update
4. Configuring Your Development Environment: VS Code
While you can write Rust in any text editor, using a modern editor with language support will make you far more productive. We will use Visual Studio Code and the rust-analyzer extension, which is the officially recommended setup.
The following video provides a concise guide to getting VS Code perfectly configured for Rust development.
Ultimate VS Code setup for Rust development (2025)
This "Let's Get Rusty" video demonstrates the essential VS Code extensions for a first-class Rust development experience.
If you don't already have it, the video briefly shows how to install VS Code. The most important part is the walkthrough of the must-have extensions. Please watch this section carefully and install the extensions mentioned.
To summarize the key extensions and why you need them:
rust-analyzer: This is the core of your Rust IDE experience. It's a language server that provides real-time feedback, including code completion, inline errors, type hints, and navigation features like "go to definition". It makes writing Rust feel interactive and guided.CodeLLDB: This extension integrates the LLDB debugger into VS Code, allowing you to set breakpoints, step through your code, and inspect variables at runtime. This is indispensable for debugging.Even Better TOML: This provides syntax highlighting and validation forCargo.tomlfiles, which you'll be editing to manage your project's dependencies and metadata.
A common pitfall, especially on a fresh system, is a "linker not found" error during the first compilation. The official VS Code documentation has an excellent troubleshooting guide for this.
This section from the official VS Code documentation addresses the most common installation problem: linker errors. It's good to know where to find this information if you run into trouble.
Briefly review the Linker errors section. Note the solutions for Windows (installing MSVC Build Tools), macOS (installing Xcode command-line tools), and Linux (installing the build-essential package). You may have already done this as part of the rustup installation prerequisites, but this is a good reference.
Conclusion
Congratulations! You have successfully set up a complete, modern Rust development environment. You've not only installed the necessary tools but also understood the role of each component in the Rust ecosystem.
Here are the key takeaways from today's lesson:
- The Rust toolchain is managed by
rustup, which installs the compiler (rustc), the build tool/package manager (cargo), and other utilities. - Cargo is the central tool you will use to create, build, run, and manage dependencies for your Rust projects.
- A productive development environment for Rust consists of VS Code combined with the
rust-analyzerextension for powerful language support andCodeLLDBfor debugging.
With your environment now configured, you are ready to start writing code. In the next lesson, we will use Cargo to create our first project and write a "Hello, World!" program, diving into the commands and conventions you'll use every day as a Rust developer.