Hello! Welcome back.
In our last lesson, you took a crucial first step by assessing your generated images for visual consistency. You now have a curated collection of "vetted" assets where your characters look the same from one image to the next. This is the solid foundation we need. But a pile of consistent images isn't a story—it's a photo album.
Today, we'll bridge that gap by learning how to organize these images into a powerful narrative structure: the storyboard. A storyboard is the visual blueprint for your animation. By arranging your static images into a scene-by-scene sequence, you will transform them from a collection of assets into a coherent story, setting the stage for the animation process itself.
1. What is a Storyboard?
At its core, a storyboard is a sequence of drawings or images that visualizes a film, shot by shot. It's the crucial intermediate step between an idea and the final moving picture. For professional filmmakers, it’s a way to plan camera angles, compositions, and the flow of the story before filming begins.
For your AI animation project, the storyboard serves an even more critical purpose. It's not just a creative blueprint; it's your technical plan. This is where you'll decide:
- Which of your consistent images will be used for which shot.
- What kind of motion you want the AI to generate in that shot.
- How the shots will connect to tell your story.
This planning phase is essential for a 7-10 minute animation. It forces you to think through the entire narrative before you start the time-consuming process of generating video clips, saving you hours of rework down the line.
To get a clear idea of what a storyboard is and why it's so important in an AI context, watch the beginning of the following video.
How To Create AI Film Storyboards & Maintain Character Consistency
This video, "How To Create AI Film Storyboards," explains the role of storyboarding specifically for AI filmmaking.
Watch the introduction, from the beginning until the explanation of why a storyboard is essential for continuity and structure in AI films.
As you can see, a storyboard provides structure and ensures your final animation feels coherent rather than like a random sequence of clips.
2. The Anatomy of a Storyboard
A storyboard is more than just a series of pictures. Each image, or "panel," is typically accompanied by notes that provide crucial context for how that shot will function in the final animation.
Here are two examples of what storyboards can look like. The first shows a simple structure for a personal story, while the second is a more complex layout for a narrative scene.
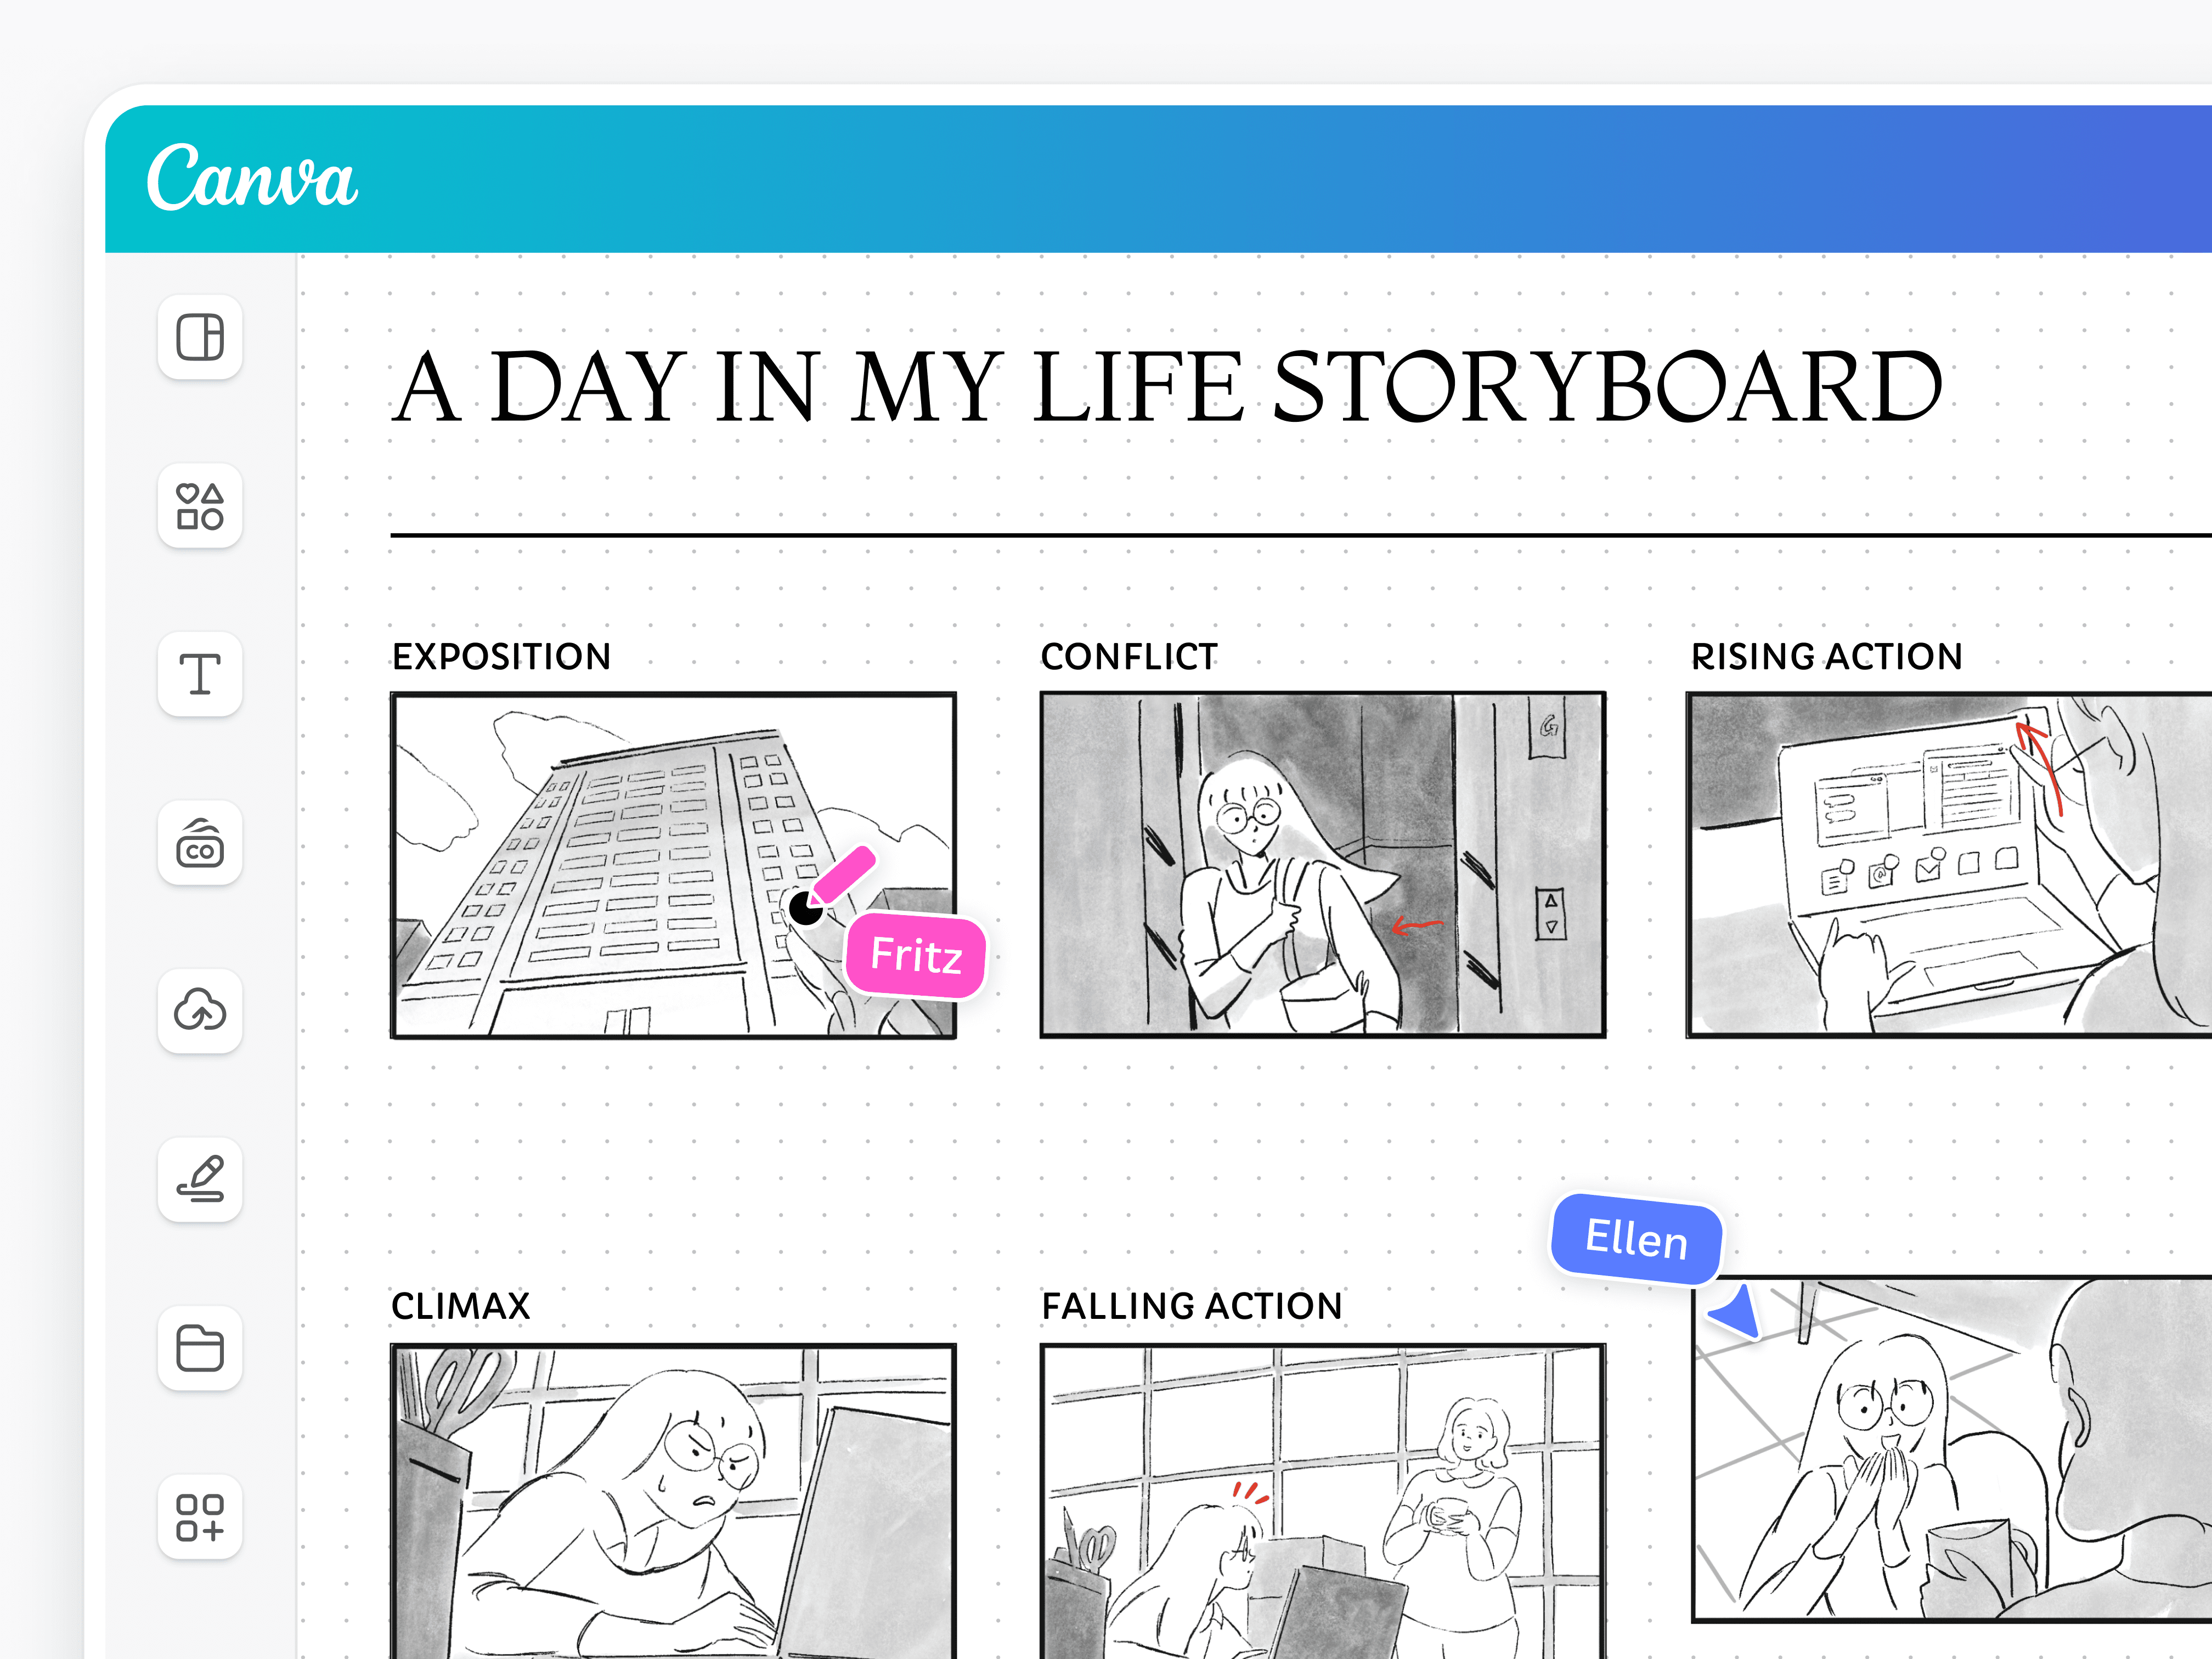

To build an effective storyboard for your project, you'll need to include a few key pieces of information for each of your images. Let's explore what those are.
How to Storyboard - Film School
This article from WeVideo's Film School provides a great breakdown of the essential information that accompanies each storyboard panel.
Please read the sections on the key elements to include. Focus on the descriptions of Shot information (like camera movement), Character movement, and Shot numbers.
Based on that reading and the needs of our AI workflow, here are the essential components for each panel of your storyboard:
- The Image: This is one of the consistent images you curated in the last lesson.
- Scene & Shot Number: A simple way to keep things organized (e.g., Scene 1, Shot 1; Scene 1, Shot 2). This is vital for managing a longer project.
- Action Description: A brief note on what you want to happen in this shot. This is the most important part for AI animation, as it's the direct precursor to the text prompts you will write later. Examples:
- "Character looks up from their book."
- "Camera zooms in on the character's face to show surprise."
- "The trees sway gently in the wind."
- Voiceover Cue: A short line or summary of the narration that will play over this shot. This directly connects your visuals to the audio component of your story.
Thinking through these elements for every shot will transform your storyboard into a detailed and actionable plan.
3. Practical Task: Build Your Storyboard
Now it's time to create the storyboard for your animation. You don't need any special software for this. A simple word processor, a slide presentation (like PowerPoint or Google Slides), or even just a text file and folders for your images will work perfectly. The goal is to organize your thoughts and your assets.
Follow these steps:
Step 1: Lay Out Your Narrative
Look at your collection of consistent images. Start by arranging them in the rough order of your story. Don't worry about perfection yet. Just get the basic sequence down: what happens first, what happens in the middle, and what happens at the end?
Step 2: Create a Panel for Each Shot
For each image in your sequence, create a "panel." If you're using a slide presentation, each slide can be a panel. If you're using a document, create a new section for each panel.
For each panel, include:
- The Image: Insert the image.
- Scene/Shot Number: Label it (e.g.,
SCENE 01 - SHOT 01). - Action Description: Write down the motion you envision for this shot. Be specific. "The character walks" is okay, but "The character slowly walks from left to right, looking tired" is much better. This is your first draft of your future animation prompt.
- Voiceover Cue: Write a placeholder for the narration. (e.g.,
VO: After days of searching, she finally found the entrance.)
Step 3: Review and Identify Gaps
Once you have arranged several shots, go through them in order. Imagine the action and read the voiceover cues. Does the story flow? Is anything confusing?
This is where the magic of storyboarding happens. You will likely discover gaps in your narrative—moments that need another shot to make sense. For example, you might have a shot of a character outside a door and the next shot is them inside the room. You might need an intermediate shot of the door opening. Make a note of these "missing" shots. You can either generate new images for them later or decide if you can tell the story without them.
The process of translating a script into a visual storyboard is a creative act. The following video offers excellent insights into how to think visually and choose the best shots to tell your story.
How to Write a Script & Storyboard for Animation
This video by TipTut, "How to Write a Script & Storyboard for Animation," demonstrates the thought process behind turning written ideas into visual shots.
Pay close attention to the sections where the creator discusses the storyboard template and, more importantly, the thought process of portraying information visually. Notice how he chooses different shot types (establishing shot, close-up) to convey specific information and emotion. Apply this thinking as you arrange your own images.
Conclusion
In this lesson, you've moved from having a collection of assets to creating a structured narrative plan. By organizing your consistent images into a scene-by-scene storyboard, you have built the visual and narrative backbone of your animation. This blueprint is not just a creative guide; it's a technical roadmap that will steer the AI generation process in the lessons to come.
Key Takeaways:
- A storyboard is a visual blueprint that organizes your animation shot by shot.
- In AI animation, it serves as both a creative plan and a technical guide for writing prompts.
- Each storyboard panel should contain the image, a shot number, a description of the intended action, and a cue for the voiceover.
- The process of storyboarding helps you identify narrative gaps and refine your story's flow before you commit to animation.
You now have a complete visual plan for your animation. The next logical step is to write the voiceover that will bring your story to life. In our next lesson, we will focus on writing a voiceover script that aligns perfectly with the scenes and timing you've just established in your storyboard.