Welcome back! In our previous lesson, we established the conceptual groundwork of the Microsoft Identity Platform, defining key components like app registrations, service principals, and tokens. Now, it's time to transition from theory to practice.
Today's lesson will guide you through the hands-on process of registering an application in Microsoft Entra ID (formerly Azure AD). Our specific goal is to configure it for the OAuth 2.0 authorization code flow, a cornerstone for securing web applications that need to authenticate users and access protected APIs. This practical skill is essential for the AZ-204 exam and for building secure, real-world .NET applications on Azure.
1. Understanding the Authorization Code Flow
Before we jump into the Azure portal, let's clarify the mechanics of the authorization code flow. This flow is designed for confidential clients—applications, like the ASP.NET Core web apps you build, that can run on a server and securely store a client secret.
The flow ensures that sensitive tokens are passed directly to the application's backend and are never exposed in the user's browser.

Here’s a high-level summary of the sequence:
- User Initiates Login: The user clicks a "Login" button in your web application.
- Redirect to Authorize Endpoint: Your app redirects the user to the Microsoft Identity Platform's
/authorizeendpoint. - User Authentication & Consent: The user signs in with their credentials and, if it's the first time, consents to the permissions your application is requesting.
- Redirect with Authorization Code: After successful login, the identity platform redirects the user back to your application's specified Redirect URI. A short-lived authorization code is included in this redirect as a query parameter.
- Exchange Code for Tokens: Your application's backend receives the authorization code. It then makes a secure, server-to-server request to the identity platform's
/tokenendpoint, sending the authorization code along with its own Client ID and Client Secret. - Receive Tokens: The identity platform validates the request and returns an ID token (verifying the user's identity) and an access token (authorizing access to a specific API).
Now, let's configure this in Azure.
2. Step 1: Registering Your Application in Microsoft Entra ID
The first step is to create an App Registration, which serves as the identity configuration for your application. For this exercise, we will register two applications:
- An API application (
OrdersAPI): The protected resource. - A Client application (
PostmanClient): The application that will call the API.
This two-app setup is a common real-world pattern and clearly separates the concerns of the resource being protected from the client accessing it.
Securing a .NET Web API with Microsoft Entra ID (Azure AD)
This blog post by Paddy provides a clear, step-by-step guide for registering both an API and a client application. It aligns perfectly with our goal for today.
Please read the section titled "Step 1 — Create and configure apps in Azure Portal". Follow the instructions to create two app registrations: Register the API (resource): Name it OrdersAPI. Pay close attention to the part where you Expose an API and add a scope named Orders.Read. This scope defines a specific permission that a client can request. Register the Client (caller): Name it PostmanClient. For this one, the critical step is adding a Redirect URI. Use the Postman callback URL: https://oauth.pstmn.io/v1/callback.
To see these steps in action, the following video demonstrates the creation of a new app registration.
Secure ASP.NET Web API with Microsoft Entra ID or Azure MSAL
This video from Deep Dive Dotnet, "Secure ASP.NET Web API with Microsoft Entra ID," walks through the app registration process in the portal.
Watch the segment from New app registration. This will reinforce the process you just read about, including giving the app a name and choosing the supported account types.
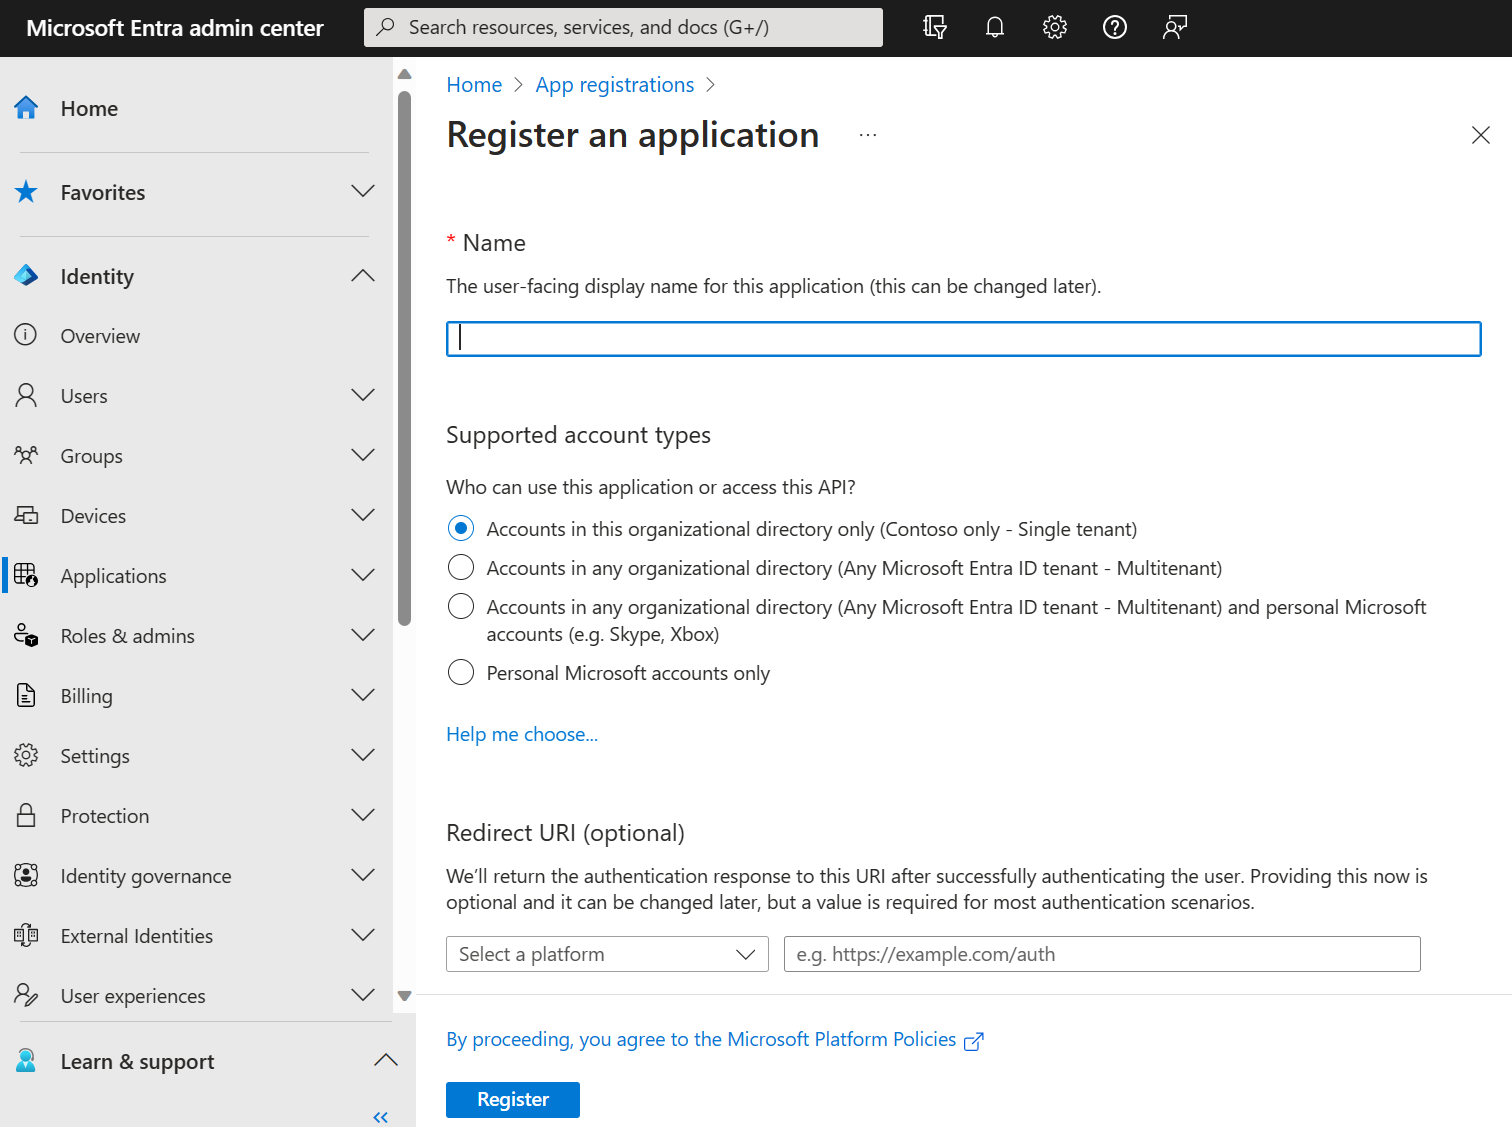
3. Step 2: Configuring Authentication Details
With the app registrations created, we need to configure the necessary credentials and permissions to make the authorization code flow work.
A. Create a Client Secret for the Client App
Your PostmanClient application needs a secret to prove its identity when it exchanges the authorization code for an access token.
- Navigate to your
PostmanClientapp registration in the Azure portal. - Go to the Certificates & secrets blade.
- Click New client secret, give it a description (e.g., "postman-secret"), and click Add.
- Crucially, copy the secret's "Value" immediately and save it somewhere secure. It will be hidden after you leave this page. In a real application, you would store this in a service like Azure Key Vault, which we'll cover in a later module.
The video below shows this process.
Secure ASP.NET Web API with Microsoft Entra ID or Azure MSAL
This clip demonstrates how to generate a client secret for your application.
Watch the short segment from Generate a client secret.
B. Grant API Permissions to the Client App
Your PostmanClient needs permission to call the OrdersAPI. You already added the permission in the reading exercise, but now you must grant consent.
- In your
PostmanClientapp registration, go to the API permissions blade. - You should see the
Orders.Readpermission you added forOrdersAPI. - Click the Grant admin consent for [Your Tenant] button and select Yes. This pre-consents the permission for all users in your tenant, which is convenient for development and for permissions that require administrator approval.
If you miss this step, you will encounter errors, as demonstrated in the following video. Understanding common failure points is just as important as knowing the correct steps.
Detailed Video - Microsoft Azure REST API Tutorial | Postman | Oauth2.0 Authorization Code Flow
This video, "Microsoft Azure REST API Tutorial," effectively demonstrates the error that occurs when permissions are missing or not consented, and then shows how to fix it.
Watch the section from Fixing permissions. It highlights the importance of adding API permissions (Azure Service Management in their example, OrdersAPI in ours) and granting admin consent.
4. Step 3: Testing the Flow with Postman
Now that everything is configured in Azure, you can use Postman to simulate the entire authorization code flow and acquire an access token.
Securing a .NET Web API with Microsoft Entra ID (Azure AD)
This section of the blog post provides the exact parameters you need to configure Postman.
Read the section titled "Step 3 — Get a token and test in Postman" and use the values from your app registrations to fill in the fields in Postman's Authorization tab.
Here is a summary of the configuration for Postman's "Authorization" tab:
- Type: OAuth 2.0
- Grant Type: Authorization Code (Postman might add "with PKCE"—that's fine)
- Callback URL:
https://oauth.pstmn.io/v1/callback(must match the Redirect URI in yourPostmanClientregistration) - Auth URL:
https://login.microsoftonline.com/{your-tenant-id}/oauth2/v2.0/authorize - Access Token URL:
https://login.microsoftonline.com/{your-tenant-id}/oauth2/v2.0/token- You can find your Tenant ID and these endpoint URLs on the Endpoints page of your app registration.
- Client ID: The Application (client) ID of your
PostmanClient. - Client Secret: The secret you created and saved for
PostmanClient. - Scope: The full scope URI from your
OrdersAPI. It will look likeapi://{api-client-id}/Orders.Read. You can find this on the Expose an API page of yourOrdersAPIapp registration.
Once configured, click Get New Access Token. Postman will open a browser window to the Microsoft login page. Sign in, and you will be redirected back to Postman, which will now have an access token ready to use. This successfully completes the authorization code flow.
Conclusion
In this lesson, you translated the abstract concepts of identity into concrete actions within the Azure portal. You now have the practical skills to register and configure applications for one of the most common and secure authentication flows.
Key takeaways from today's session:
- App Registration is the process of creating an identity for your application in Microsoft Entra ID.
- The Authorization Code Flow is a secure OAuth 2.0 grant type for confidential clients like web apps.
- Redirect URIs are a critical security feature, telling the identity provider where it is safe to send authorization codes.
- Client Secrets are used by confidential clients to authenticate themselves when exchanging a code for a token.
- Scopes and API Permissions define what a client application is allowed to do, while Admin Consent approves those permissions.
You've successfully configured the identity backend and tested it with Postman. In our next lesson, we will take the final step: implementing the OAuth 2.0 authorization code flow directly in a .NET application using the Microsoft Authentication Library (MSAL).