Hello! In our previous module, we built a complete event-driven solution, sending events with a producer application and reliably consuming them with a processor that used Azure Event Hubs. This architecture is powerful for scalable, decoupled systems.
Now, we're shifting our focus to another foundational pillar of modern cloud development: containerization. This first lesson in our new module will introduce you to the "why" and "how" of Docker. We'll start with the fundamental concepts—what a container is and the problem it solves—and then move to the practical skill of authoring a Dockerfile specifically for a .NET application. As a seasoned developer, you've likely encountered the "it works on my machine" problem, and this lesson will show you how Docker provides a definitive solution.
By the end of this lesson, you will understand the core workflow of Docker and be able to write an efficient, multi-stage Dockerfile to package one of your .NET applications into a portable, lightweight image.
1. What is Docker? The Core Concepts
Before we write any code, let's establish why containerization has become so central to software development and deployment. The primary problem it solves is environment inconsistency. A feature might work on your development machine but fail in staging or production due to differences in operating systems, installed libraries, or configurations.
Docker addresses this by packaging an application and all its dependencies—code, runtime, system tools, libraries, and settings—into a single, standardized unit called a container.
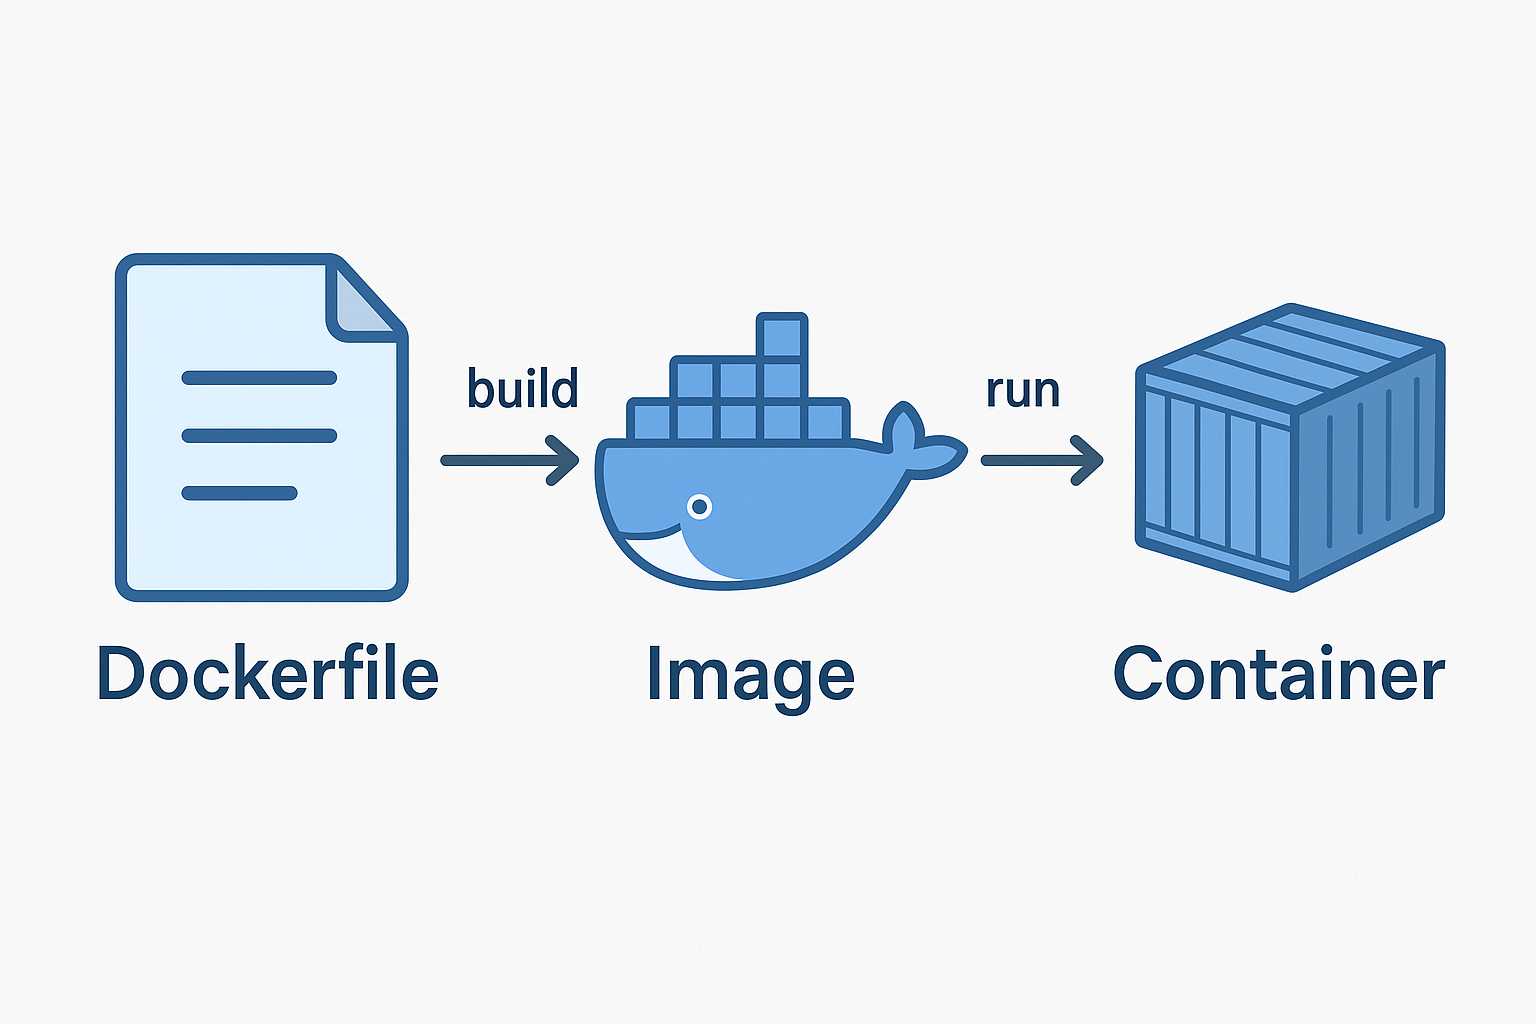
To understand how this works, there are three key components to know:
- Dockerfile: A text file that contains a set of instructions on how to build a Docker image. It's the blueprint for your containerized environment.
- Docker Image: A read-only, immutable template created from the Dockerfile. It contains the application and all its dependencies. Images are built in layers, which makes them efficient to store and distribute.
- Docker Container: A runnable, live instance of a Docker image. You can create, start, stop, move, and delete containers. It's the isolated process where your application actually runs.
This workflow is sequential: you write a Dockerfile to define the environment, build it into an Image, and then run that image to create one or more Containers.
The following short video provides a fast-paced and clear overview of these core concepts and the problem Docker solves.
Learn Docker in 7 Easy Steps - Full Beginner's Tutorial
This video from Fireship, "Learn Docker in 7 Easy Steps," offers a concise introduction to Docker's fundamental components.
Watch the initial segment from the core concepts. Focus on how the video explains the relationship between Dockerfiles, images, and containers as the solution to environment inconsistency.
2. Authoring a Dockerfile for a .NET Application
Now that you understand the concepts, let's focus on the Dockerfile. This file is where you, the developer, define every step required to get your application running.
A Dockerfile consists of a series of instructions. While we'll look at a .NET-specific example shortly, some of the most common instructions are:
| Instruction | Purpose |
|---|---|
FROM |
Specifies the base image to start from (e.g., a specific .NET SDK version). |
WORKDIR |
Sets the working directory for subsequent instructions inside the container. |
COPY |
Copies files and directories from your local machine into the container's filesystem. |
RUN |
Executes a command during the build process (e.g., dotnet restore). |
EXPOSE |
Informs Docker that the container listens on a specific network port at runtime. |
ENTRYPOINT |
Configures the container to run a specific executable when it starts. |
Optimizing with Multi-Stage Builds
A naive approach for a .NET app would be to copy the source code into a container with the .NET SDK, build it, and run it. The problem? The final image would contain the entire SDK, which is large and unnecessary for just running the application.
The best practice for compiled languages like .NET is a multi-stage build. This involves using multiple FROM instructions in a single Dockerfile.
- Build Stage: Starts from a base image containing the .NET SDK. In this stage, you copy your source code, restore dependencies (
dotnet restore), and publish the application (dotnet publish). This creates the optimized, compiled output. - Final Stage: Starts from a much smaller base image containing only the ASP.NET runtime. You then copy only the published artifacts from the build stage into this final, lean image.
This technique dramatically reduces the size of your final Docker image, making it faster to deploy and more secure by excluding build tools.

The following article from Microsoft Learn provides a comprehensive guide to containerizing a .NET application, including a detailed, line-by-line explanation of a multi-stage Dockerfile.
Containerize an app with Docker tutorial - .NET
This official guide walks you through creating a multi-stage Dockerfile for a .NET application.
Please read the section titled Create the Dockerfile. Focus on understanding the purpose of each line. Pay close attention to how it defines two stages: a build stage using the SDK and a final stage using the smaller aspnet runtime image. Note the COPY --from=build instruction, which is the key to this pattern.
The .dockerignore File
Similar to how .gitignore tells Git which files to ignore, a .dockerignore file tells Docker which files and folders to exclude from the build context. This is important for both performance and security. By excluding folders like bin and obj, you prevent local build artifacts from being sent to the Docker daemon and potentially overriding the work done inside the container. You would typically create this file in the same directory as your Dockerfile.
3. Building and Running the Container
Once your Dockerfile is ready, you use the Docker CLI to bring your application to life.
-
Build the Image: You run the
docker buildcommand from your terminal in the directory containing yourDockerfile. The-tflag is used to "tag" or name your image.# The -t flag names the image 'my-net-app' # The '.' specifies the current directory as the build context docker build -t my-net-app . -
Run the Container: After the image is built, you use the
docker runcommand to create and start a container from it. Since web applications need to be accessible, you use the-pflag to map a port from your local machine (the host) to a port inside the container.# Maps port 8080 on your machine to port 80 in the container # The --rm flag automatically removes the container when it exits docker run --rm -p 8080:80 my-net-appIf your .NET application was configured to listen on port 80, you could now access it at
http://localhost:8080on your machine.
The following video provides a practical, end-to-end demonstration of this process. It starts with a .NET project, creates a multi-stage Dockerfile, builds the image, and runs the container.
Dockerize Your .NET Application in 5 Minutes!
The video "Dockerize Your .NET Application in 5 Minutes!" by Amichai Mantinband is a step-by-step walkthrough of the entire process.
Watch the following sections to see the concepts put into practice: Creating the Dockerfile: The presenter authors a multi-stage Dockerfile for a .NET 8 application, explaining the build, publish, and final stages. Configuring the Run Stage: This part shows how to use the ASP.NET runtime image and set the ENTRYPOINT. Building and Running: Here, you'll see the docker build and docker run commands in action, including the crucial port mapping.
Conclusion
In this lesson, we've taken the first crucial step into the world of containerization. You've learned how Docker solves the persistent problem of environment inconsistency by packaging applications and their dependencies into portable images.
Here are the key takeaways:
- The core workflow:
Dockerfile->Image->Container. The Dockerfile is your blueprint, the image is the distributable package, and the container is the running application. - Dockerfile basics: You now know the purpose of key instructions like
FROM,WORKDIR,COPY,RUN, andENTRYPOINT. - Multi-stage builds are essential for .NET: This pattern is the standard for creating optimized, small, and secure images by separating build-time dependencies (the SDK) from runtime dependencies (the ASP.NET runtime).
- Building and running is straightforward: The
docker buildcommand creates your image, anddocker runstarts it as a container, with port mapping making it accessible.
You now have the fundamental knowledge to containerize a .NET application. In our next lesson, we will build on this by learning how to create an Azure Container Registry instance. This private registry will allow us to store our Docker images in Azure, preparing them for deployment to various Azure services.