Hello! In our last lesson, we established a solid understanding of the Azure API Management policy structure, breaking down the roles of the inbound, backend, outbound, and on-error sections. You learned how this framework allows you to intercept and modify API traffic at various stages.
Today, we will apply that knowledge to a crucial aspect of API governance. This lesson focuses on the learning outcome: Implement rate limiting and quota policies to control API usage. We will explore how to use policies in the inbound section to protect your backend services from being overwhelmed and to enforce different usage tiers for your consumers. This is a fundamental skill for building robust and commercially viable APIs.
1. Why Control API Usage? The Concepts of Rate Limiting and Throttling
Before we dive into the XML, it's important to understand the "why." Unrestricted access to an API can lead to several problems:
- Denial of Service: A single misbehaving or malicious client can flood your backend with requests, causing it to slow down or crash for all other users.
- Unpredictable Costs: In a cloud environment, excessive traffic can lead to spiraling costs for compute, database, and other resources.
- Unfair Usage: Without limits, a few heavy users could consume all available resources, degrading the experience for everyone else.
Rate limiting and throttling are the primary mechanisms to prevent these issues.
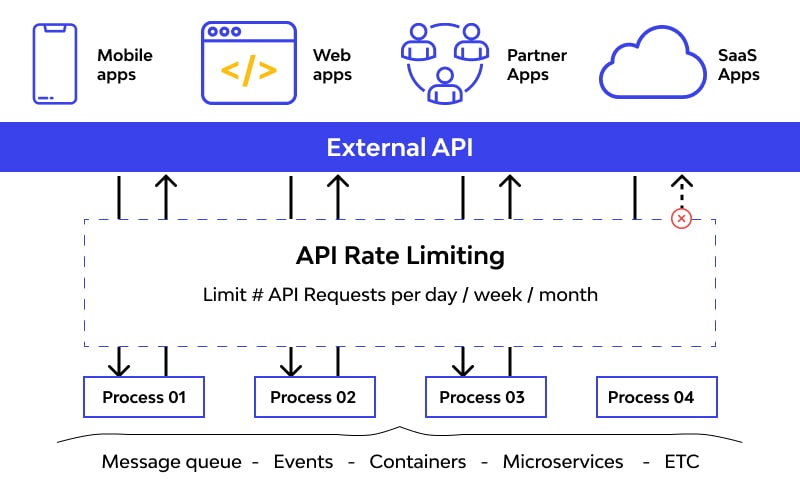
To get a clear definition of these concepts, let's watch a short video.
🔥 How Rate Limiting and Throttling Saves Your API Server From CRASHING!
This video from ByteMonk provides excellent, concise definitions of rate limiting and throttling and explains their distinct purposes.
Please watch these two short segments: Introduction to Rate Limiting and Throttling: This covers the basic definitions and the "why." Key Differences: This clarifies when to use each strategy.
As the video explained, the key distinction is:
- Rate Limiting: Enforces a strict cap. If a client exceeds the limit (e.g., 100 requests per minute), subsequent requests are rejected, typically with a
429 Too Many Requestsstatus code. - Throttling: Aims to smooth out traffic. It might delay excess requests instead of rejecting them outright, ensuring the backend receives requests at a steady, manageable pace.
In the context of Azure API Management, these terms are often used interchangeably, but the platform provides distinct policies for handling short-term bursts versus long-term usage caps.
2. Rate Limits vs. Quotas in Azure API Management
Azure APIM provides two primary policy types for controlling usage: one for short-term "rate limits" and another for long-term "quotas." Understanding this distinction is key to applying the correct policy.
Advanced Request Throttling with Azure API Management - Microsoft
This Microsoft Learn document is the official guide to the topic. It clearly explains how APIM distinguishes between rate limits and quotas.
Read the section "Rate limits and quotas" to understand their different purposes and implementation details within APIM. Pay attention to the use cases for each.
To summarize the key points from the reading:
| Policy Type | Purpose | Typical Timeframe | Use Case Example |
|---|---|---|---|
| Rate Limit | Protect against short, intense volume bursts. | Seconds or minutes | Prevent a client from sending 500 requests in 10 seconds. |
| Quota | Control call rates over a longer period. | Hours, days, or months | Limit a "Free" tier user to 10,000 calls per month. |
It's also worth noting that APIM uses different underlying algorithms for each. Rate limits are designed for rapid propagation across gateway nodes to stop spikes, while quota information is tracked over a longer term.
3. Implementing Usage Control Policies
Now, let's get practical. As we saw in the previous lesson, these policies are defined as XML snippets within the <inbound> section of your policy document.
The OneUptime blog post, "How to Implement Rate Limiting and Throttling in Azure API ...", provides excellent, real-world examples that we will walk through.
Basic Rate Limiting per Subscription
The simplest way to apply a rate limit is based on the subscription key sent with the request. This is achieved with the rate-limit policy.
How to Implement Rate Limiting and Throttling in Azure API ...
This article gives clear, practical examples of the policy XML.
Read the introduction, "Understanding the Two Throttling Policies," and the section "Setting Up Basic Rate Limiting Per Subscription."
The policy looks like this:
<policies>
    <inbound>
        <base />
        <rate-limit calls="100" renewal-period="60" />
    </inbound>
    ...
</policies>
calls="100": Allows 100 calls.renewal-period="60": Within a 60-second window.
This policy creates a separate counter for each subscription key.
Finer-Grained Control with rate-limit-by-key
While subscription-based limiting is useful, you often need more granular control. For example, what if multiple users are sharing a single subscription key but you want to limit each individual user? This is where the rate-limit-by-key policy comes in.
How to Implement Rate Limiting and Throttling in Azure API ...
This section of the article details the more flexible key-based policy.
Now, read the section "Rate Limiting by Custom Key." Focus on how the counter-key attribute is used.
This policy's power comes from the counter-key attribute, which accepts a C# policy expression to define what to count against. Your background in C# will make leveraging this feature straightforward.
Example 1: Rate Limit by Client IP Address
This is useful for APIs that allow unauthenticated access.
<rate-limit-by-key calls="10" renewal-period="60" counter-key="@(context.Request.IpAddress)" />
Here, each unique IP address gets its own counter of 10 calls per 60 seconds.
Example 2: Rate Limit by User Identity (JWT Claim)
In modern authenticated APIs, it's common to limit based on the user's identity contained within a JSON Web Token (JWT).
<rate-limit-by-key calls="100" renewal-period="3600" counter-key="@(context.Request.Headers.GetValueOrDefault("Authorization","").AsJwt()?.Subject)" />
This expression does the following:
- Gets the
Authorizationheader. - Parses it as a JWT object.
- Uses the token's
Subjectclaim (sub) as the unique key for the rate limit counter.
Combining Rate Limits and Quotas
For a complete solution, you'll often combine a short-term rate limit (for burst protection) with a long-term quota (for usage caps).
How to Implement Rate Limiting and Throttling in Azure API ...
This section shows how to layer both policy types.
Read "Combining Rate Limits and Quotas." Note the different response codes for each limit.
Here is a combined policy example:
<policies>
    <inbound>
        <base />
        <!-- Burst protection: 20 calls per minute -->
        <rate-limit-by-key calls="20" renewal-period="60" counter-key="@(context.Subscription.Id)" />
        <!-- Usage cap: 1,000,000 calls per month -->
        <quota-by-key calls="1000000" renewal-period="2592000" counter-key="@(context.Subscription.Id)" />
    </inbound>
    ...
</policies>
When a client exceeds the rate-limit-by-key, they get a 429 Too Many Requests. When they exhaust the quota-by-key, they receive a 403 Forbidden.
4. Advanced Scenario: Tiered Service Levels
You can use these policies to create different service tiers, a common monetization strategy. For example, a "Freemium" user gets a low rate limit, while a "Premium" user gets a much higher one. This is typically done by applying different policies to different Products in APIM.
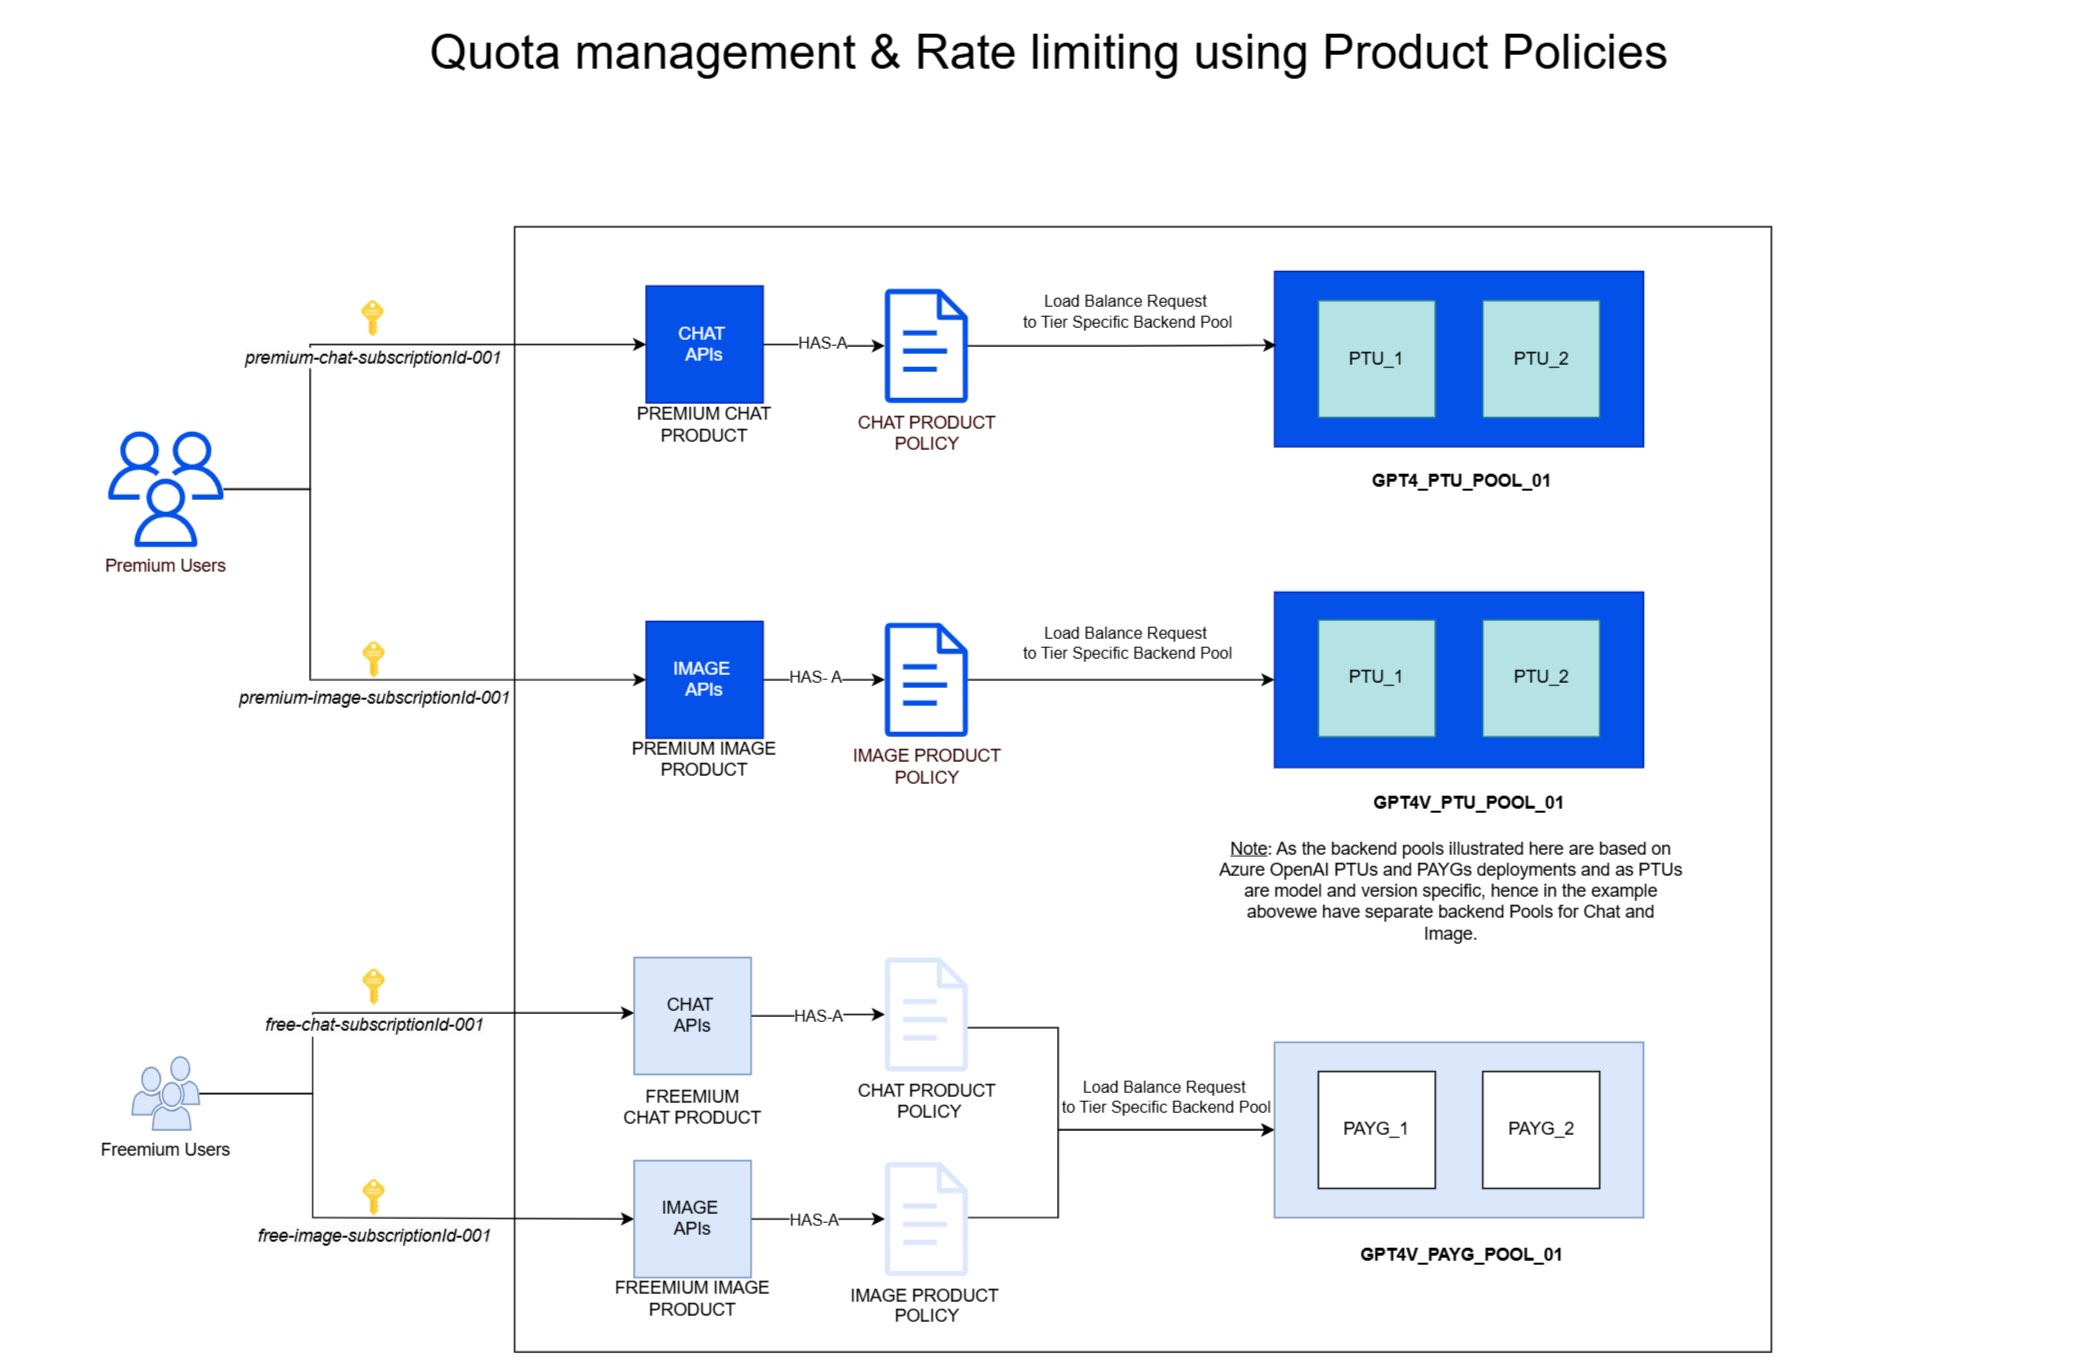
You could implement this with conditional logic inside a single policy document, as shown in the OneUptime article under "Tiered Rate Limiting Strategy," but applying policies at the Product scope is often a cleaner approach for managing tiers.
Conclusion
In this lesson, we moved from the theory of policy structure to the practical application of controlling API usage. You learned how to implement two of the most important policy types for API governance.
Key takeaways from today's lesson:
- Rate Limits vs. Quotas: Rate limits protect against short-term bursts, while quotas enforce long-term usage caps.
- Key-Based Control: The
rate-limit-by-keyandquota-by-keypolicies provide granular control by allowing you to define a counter key using a C# expression, such as the client's IP address or a JWT claim. - Inbound Implementation: Both rate limiting and quota policies are configured in the
<inbound>section to check usage before a request is sent to the backend. - Tiered Services: These policies are the building blocks for creating different service tiers (e.g., Free, Basic, Premium) by applying different limits to different consumer groups.
Now that we've covered how to control the frequency of API calls, our next lesson will focus on improving performance and modifying data in transit. We will explore how to implement caching and transformation policies, which are also critical for building high-performing and flexible APIs.