Hello! In the last lesson, we constructed the "engine" of our application: a high-performance loop that separates state updates from rendering. With this powerful foundation in place, our blank canvas is now ready to receive its first marks.
This lesson marks our entry into the core of 2D graphics with Skia. To draw anything—a line, a circle, a piece of text—we first need to describe how it should be drawn. What color is it? Is it a solid shape or just an outline? Are its edges sharp or smooth? Your learning goal for this session is to master the Skia object that answers all these questions: SkPaint. You will learn how to configure SkPaint objects for both filling and stroking shapes, with a crucial focus on anti-aliasing to ensure your whiteboard's output looks polished and professional.
The "How" of Drawing: SkPaint
In Skia, the SkCanvas is responsible for what to draw and where (e.g., "draw a rectangle at these coordinates"), but the SkPaint object specifies how to draw it. Think of it as your digital palette and set of brushes. It holds all the stylistic attributes like color, stroke thickness, and special effects.
This separation is a deliberate and high-performance design choice. Because SkPaint objects are lightweight, you can create many of them, each pre-configured for a specific purpose (e.g., one for drawing thin black lines, another for a thick red fill). This keeps the SkCanvas state minimal, making its own state-saving operations much faster.
This short introduction from the Skia documentation explains the design philosophy behind SkPaint.
Please read the entire introductory section, from the beginning of the text down to the first code block. Pay close attention to the distinction between SkCanvas and SkPaint and the performance implications of this design.
The Quest for Smoothness: Anti-Aliasing
When a continuous, mathematical shape like a line or curve is rendered onto a discrete grid of pixels, an artifact called aliasing can occur. You'll recognize it as jagged, "stair-stepped" edges. This happens because pixels are either fully "on" or "off," and can't perfectly represent the smooth edge.
Anti-aliasing is the technique used to combat this. It works by setting the pixels along the edge of a shape to intermediate colors, creating the illusion of a smoother transition from the shape to the background. For a high-quality drawing application, anti-aliasing is not a luxury; it's a necessity.

A visual comparison between an aliased, jagged 'A' and a smooth, anti-aliased 'A'. The difference in visual quality is stark.
In Skia, enabling this is as simple as a single method call on your SkPaint object:
SkPaint paint;
paint.setAntiAlias(true);
While anti-aliasing involves extra computation, the trade-off for visual quality is almost always worthwhile, especially on modern GPUs which are highly optimized for this.
Configuring Your Paint: Style and Color
Now let's get practical. Besides anti-aliasing, the most fundamental properties you'll set on a SkPaint are its style and color.
Fill vs. Stroke
There are two primary drawing styles:
- Fill: This colors the interior of the geometry.
- Stroke: This draws the outline of the geometry, like drawing with a pen.
You can even do both at once. These options are controlled by an enumeration, SkPaint::Style.
Setting the Paint
Let's turn to the official Skia documentation to see how these properties are set. Getting comfortable navigating these API references is a key skill for any systems developer.
The Skia API documentation provides the ground truth for every class and method. We will use it to find the methods for setting style and anti-aliasing.
In the documentation, locate the "Public Member Functions" list. Find and read the documentation for setAntiAlias. This confirms the method we just discussed. Next, find and read about setStyle. Note that it takes a SkPaint::Style enum value as its argument. Scroll down to the "Member Enumeration Documentation" and review the three possible values for the Style enum: kFill_Style, kStroke_Style, and kStrokeAndFill_Style.
With these methods, you can start building your paints. For example, to create a basic paint for drawing solid red circles:
#include <SkPaint.h>
#include <SkColor.h>

SkPaint fillPaint;
fillPaint.setAntiAlias(true);
fillPaint.setColor(SK_ColorRED); // Or use SkColorSetARGB(255, 255, 0, 0)
fillPaint.setStyle(SkPaint::kFill_Style);
Mastering the Stroke
For your whiteboard application, drawing strokes is paramount. Simply setting the style to kStroke_Style is just the beginning. To create beautiful, natural-looking lines, you need to control the finer properties of the stroke.
- Stroke Width: The most obvious property is the thickness of the line, set with
setStrokeWidth(float width). A width of0is a special "hairline" mode that always draws exactly one pixel wide, regardless of canvas scaling. - Stroke Cap: This determines the shape drawn at the beginning and end of an open path (a simple line). The options are
kButt_Cap(flat),kSquare_Cap(extends past the end), andkRound_Cap. For a natural, pen-like feel,kRound_Capis usually the best choice. - Stroke Join: This determines the shape used to connect two line segments at a corner. The options are
kMiter_Join(a sharp corner),kBevel_Join(a cut-off corner), andkRound_Join. Again,kRound_Joinprovides a smooth, fluid appearance ideal for drawing.
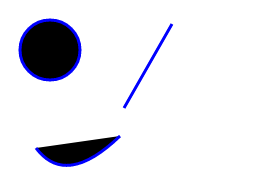
This image, rendered with Skia, shows shapes with smooth, anti-aliased outlines. Note the rounded corners and edges, which are achieved using round stroke caps and joins.
Let's return to the API documentation to see how to control these properties.
This reading will familiarize you with the API for controlling stroke appearance.
First, look in the "Public Types" section to see the definitions for the Cap and Join enumerations. Then, in the "Public Member Functions" list, find the methods that control stroke properties: setStrokeWidth setStrokeCap setStrokeJoin Read the description for each set function to understand what it does.
Now you have all the tools to create a sophisticated paint for drawing user strokes. Here is an example of a paint configured for a smooth, blue, 5-pixel-wide line:
#include <SkPaint.h>
#include <SkColor.h>

SkPaint strokePaint;
strokePaint.setAntiAlias(true);
strokePaint.setColor(SK_ColorBLUE);
strokePaint.setStyle(SkPaint::kStroke_Style);
strokePaint.setStrokeWidth(5.0f);
strokePaint.setStrokeCap(SkPaint::kRound_Cap);
strokePaint.setStrokeJoin(SkPaint::kRound_Join);
The following resource provides complete code examples that bring these concepts together.
These code snippets show how different SkPaint objects are configured and used to draw text and shapes with different styles.
Review the two code blocks on this page. The first one, for drawing text, clearly shows separate paints for filling (paint1) and stroking (paint2). The second example, for drawing shapes, also demonstrates switching between a default fill paint and a configured stroke paint.
Conclusion
In this lesson, you've taken the first and most critical step in rendering with Skia. You now understand the role of SkPaint as the lightweight state object that dictates the appearance of everything you draw. You know how crucial anti-aliasing is for visual quality and how to enable it. Most importantly for your project, you can now configure a paint to produce not just simple lines, but beautifully rendered strokes with specific widths, caps, and joins.
Key Takeaways:
SkPaintis a state object that describes how to draw. It's separate fromSkCanvas, which describes what to draw.- Always enable anti-aliasing with
paint.setAntiAlias(true);for high-quality graphics. - The primary drawing modes are
SkPaint::kFill_StyleandSkPaint::kStroke_Style, set withpaint.setStyle(). - For strokes, you can control the
setStrokeWidth(),setStrokeCap(), andsetStrokeJoin()to achieve a polished, natural look.
You are now equipped with the "brushes" for your application. In the next lesson, we will pick up our canvas and these brushes to finally render something tangible: you will learn to draw basic geometric primitives and complex paths using SkCanvas and SkPath.