Welcome to the first lesson of Module 4. In our last session, you took a crucial step in the iterative process of creation by identifying gaps in your project and planning targeted shoots to fill them. You now likely have a large, perhaps even overwhelming, collection of images—the raw material for your book. This lesson addresses the fundamental question: how do you begin to make sense of it all?
Today, we will focus on the essential curatorial skill of the initial edit. The goal is not to arrive at the final selection for your book, but to apply a structured, multi-pass method to systematically narrow your large body of work into a strong, manageable pool of candidates. Given your background in sculpture, you can think of this as processing your raw material: sorting the stone, discarding the unusable fragments, and preparing the viable blocks from which you will eventually carve your final piece.
The Editing Mindset: Objectivity and Distance
Before diving into the mechanics of editing, it's vital to adopt the right mindset. Editing your own work is one of the most difficult tasks a photographer faces. You have memories and emotional attachments to the images—you remember the effort it took to get a shot, or the feeling you had at that moment. A viewer, however, sees only the photograph itself. Achieving the necessary critical distance is paramount.
The video "How To Edit and Sequence Photo Projects & Books" features a conversation with publisher Noah Waldeck, who offers valuable insights into this challenge.
How To Edit and Sequence Photo Projects & Books (ft. Noah Waldeck)
This video offers a publisher's perspective on editing, emphasizing the psychological challenges and the importance of objectivity.
Please watch the segment from "even if you don't have someone like me". Pay close attention to the discussion on why editing your own work is so difficult due to personal associations and how gaining distance—either through time or by seeking feedback—is crucial for making objective decisions.
As Waldeck suggests, distance helps you become what photographer Steve Giovinco calls a "dispassionate observer." You must learn to evaluate the image for what it is, not for the story behind its creation.
The Multi-Pass Method: A Digital Workflow
Instead of making a single, high-stakes "in or out" decision for each photograph, a more effective strategy is to make multiple passes through your work, with each pass applying a progressively higher standard. This methodical approach helps you manage a large volume of images without getting overwhelmed and ensures a more consistent and thoughtful selection.
A clear, practical guide to this process is outlined in Steve Giovinco's article, which details a star-rating system within Adobe Bridge.
How To Edit Photographs into a Book or Exhibition Portfolio
This article provides a real-world, step-by-step digital workflow for culling thousands of images down to a final selection.
First, read the section Be Methodical and Intuitive to understand the overall philosophy. Then, focus on the core of the method in the section titled Rate Photographs in Rounds. This is the central technique for this lesson. Study the descriptions for each star rating and the example of how 3,500 photos were progressively reduced.
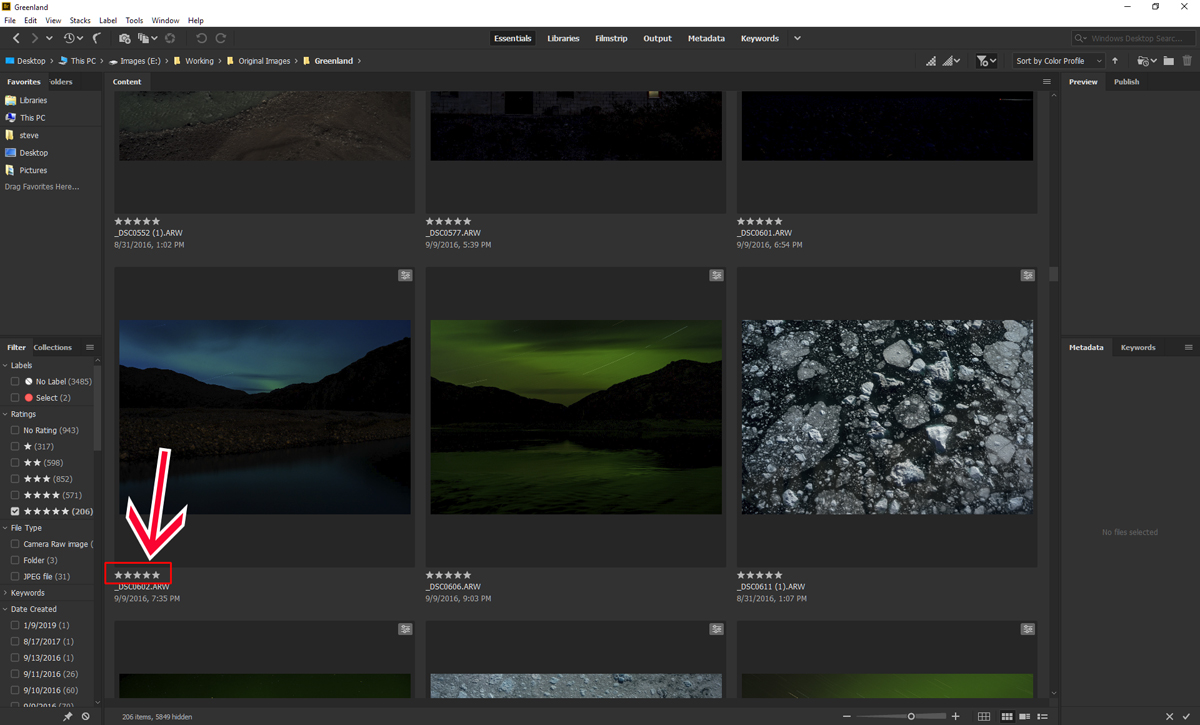
The logic of this system is to start broad and progressively narrow your focus:
- 1-Star Pass: The first look. The goal is to quickly filter out the obvious failures—images that are out of focus, poorly exposed, or clear mistakes. Be generous here; if an image has any redeeming quality, give it a star and move on.
- 2-Star Pass: Now, looking only at the 1-star images, you raise the bar. An image might be technically fine, but is it interesting? Does it have potential?
- 3-Star Pass & Beyond: You continue this process, with each round demanding more from the photograph. A 3-star image is a "good" image. A 4-star is a "great" image and a strong contender. A 5-star is what you believe to be an exceptional, unmissable photograph.
A Tactile Alternative: The Physical Edit
While a digital workflow is efficient, the physical act of handling prints can provide a different, equally valuable kind of understanding. Arranging, stacking, and comparing prints on a table or wall connects with the tangible nature of your sculpture and design practice.

Many photographers rely on this physical interaction. In the following short video, acclaimed photographer Gregory Halpern shares his personal, long-term method for editing and sequencing.
Gregory Halpern: how I sequence images
This video from MACK Books provides a glimpse into the physical, iterative editing process of a master photographer.
Watch the first two minutes, from Halpern's explanation of his system. Note how he lives with the images over a long period, first as small cutouts and then as 8x10 prints, allowing the strongest images to prove their staying power.
Halpern's method is an artistic practice in itself. For a more project-oriented approach to physical editing, the article "How to Edit a Documentary Photo Story" offers a practical starting point.
How to Edit a Documentary Photo Story - Blind Magazine
This article from Blind Magazine complements the digital workflow with a hands-on, print-based editing methodology.
Read the section titled Organize and edit down your images. The key takeaway here is the process: printing a wide edit of 100 or so photos, laying them out, and then categorizing and culling them physically.
Often, a hybrid approach is most effective. You might use the digital star-rating system for the initial broad cull and then print your 3-star and 4-star selections to work with them physically for the finer edits.
A Crucial Warning: The Value of the "Rough Edit"
As you go through this process, it can be tempting to be ruthless and cut your selection down to only the most dramatic, "loudest" images. This is a common mistake. A photo book relies on rhythm and pacing; it needs quiet moments, transitional images, and subtle details to balance the "greatest hits."
In the video with Noah Waldeck, he makes a critical point about not over-editing in the initial stages.
How To Edit and Sequence Photo Projects & Books (ft. Noah Waldeck)
This segment provides a crucial piece of advice to counterbalance the impulse to cut too many images too soon.
Watch the segment from "What about, again...". The key concept here is the "rough edit." Waldeck advises against editing down too much before thinking about the sequence, because you might cut softer, subtler images that are essential for the book's rhythm.
Your goal at this stage is not to produce the final, definitive selection. It is to create a strong, flexible pool of candidates—your "rough edit." It is better to keep an image you are unsure about than to prematurely discard a photo that might later prove to be the perfect connective tissue in a sequence.
Your Turn: Applying the Multi-Pass Edit
Now it's time to apply these methods to your own project. This exercise will take all the work you've shot—both your initial images and those from your targeted "gap-filling" shoots—and distill it into your primary pool of candidates.
- Gather and Organize: Create a single folder on your computer containing every photograph you consider part of this project.
- The First Pass (The Big Cull): Using Adobe Bridge, Lightroom, or a similar program with a rating system, go through every single image. Assign a 1-star rating to any photo that is technically acceptable and has any potential at all. The goal is only to eliminate the clear failures.
- The Second Pass: Filter your view to show only the 1-star images. Review this selection and promote the ones that feel more interesting or compelling to 2 stars. These are images that have some promise.
- The Third Pass (The Rough Edit): Now, filter to show only the 2-star images. This is a more critical pass. Review these images and promote the ones that you feel are genuinely "good" photographs that align with your project to 3 stars.
- Assess Your Pool: At the end of this process, your collection of 3-star (and any 4- or 5-star images you may have identified) constitutes your "rough edit." This pool of candidates should be significantly smaller than your starting collection, but still larger than a final book edit (perhaps in the range of 80-150 images).
- (Optional but Recommended) Go Physical: Export your "rough edit" (all images rated 3-stars or higher) and have them printed as inexpensive 4x6" prints. Spend some time laying them out, stacking them, and living with them, as suggested in the resources.
Conclusion
You have now learned a structured, methodical process for navigating the difficult first phase of curatorial editing. By using a multi-pass system, either digitally with star ratings or physically with prints, you can move from a dauntingly large collection of images to a manageable and high-quality pool of candidates. This "rough edit" is the foundation for the more nuanced work to come. You've successfully filtered your raw material, and now you're ready to begin the finer selection.
In our next lesson, we will build directly on this work. With your pool of candidates established, we will explore the specific criteria—conceptual relevance, visual quality, and narrative potential—that you will use to make the final selections for your book.