Introduction
In the previous lesson, you prepared your Postman collection and environment for submission by exporting them as JSON files. This completes the local testing and documentation phase of our project.
Now, we move to the deployment phase. The goal is to make your API accessible on the public internet. The first, non-negotiable step in any modern deployment workflow is getting your code into a version control system hosted on a platform like GitHub. This lesson will walk you through the exact, repeatable sequence of commands to push your project to a new GitHub repository. This is a foundational skill for deployment, collaboration, and a mandatory part of your final submission.
Step 1: Prepare Your Project with .gitignore
Before you upload your code, you must tell Git to ignore certain files and folders. This is critical for security and for keeping your repository lightweight. The two most important things to ignore in a Node.js project are:
node_modules/: This folder contains all your project's dependencies. It can be massive and should never be stored in version control. Hosting services will automatically install these dependencies based on yourpackage.jsonfile..env: This file contains your secret keys, like database connection strings. Committing this file to a public repository is a major security vulnerability.
You specify these exclusions in a file named .gitignore.
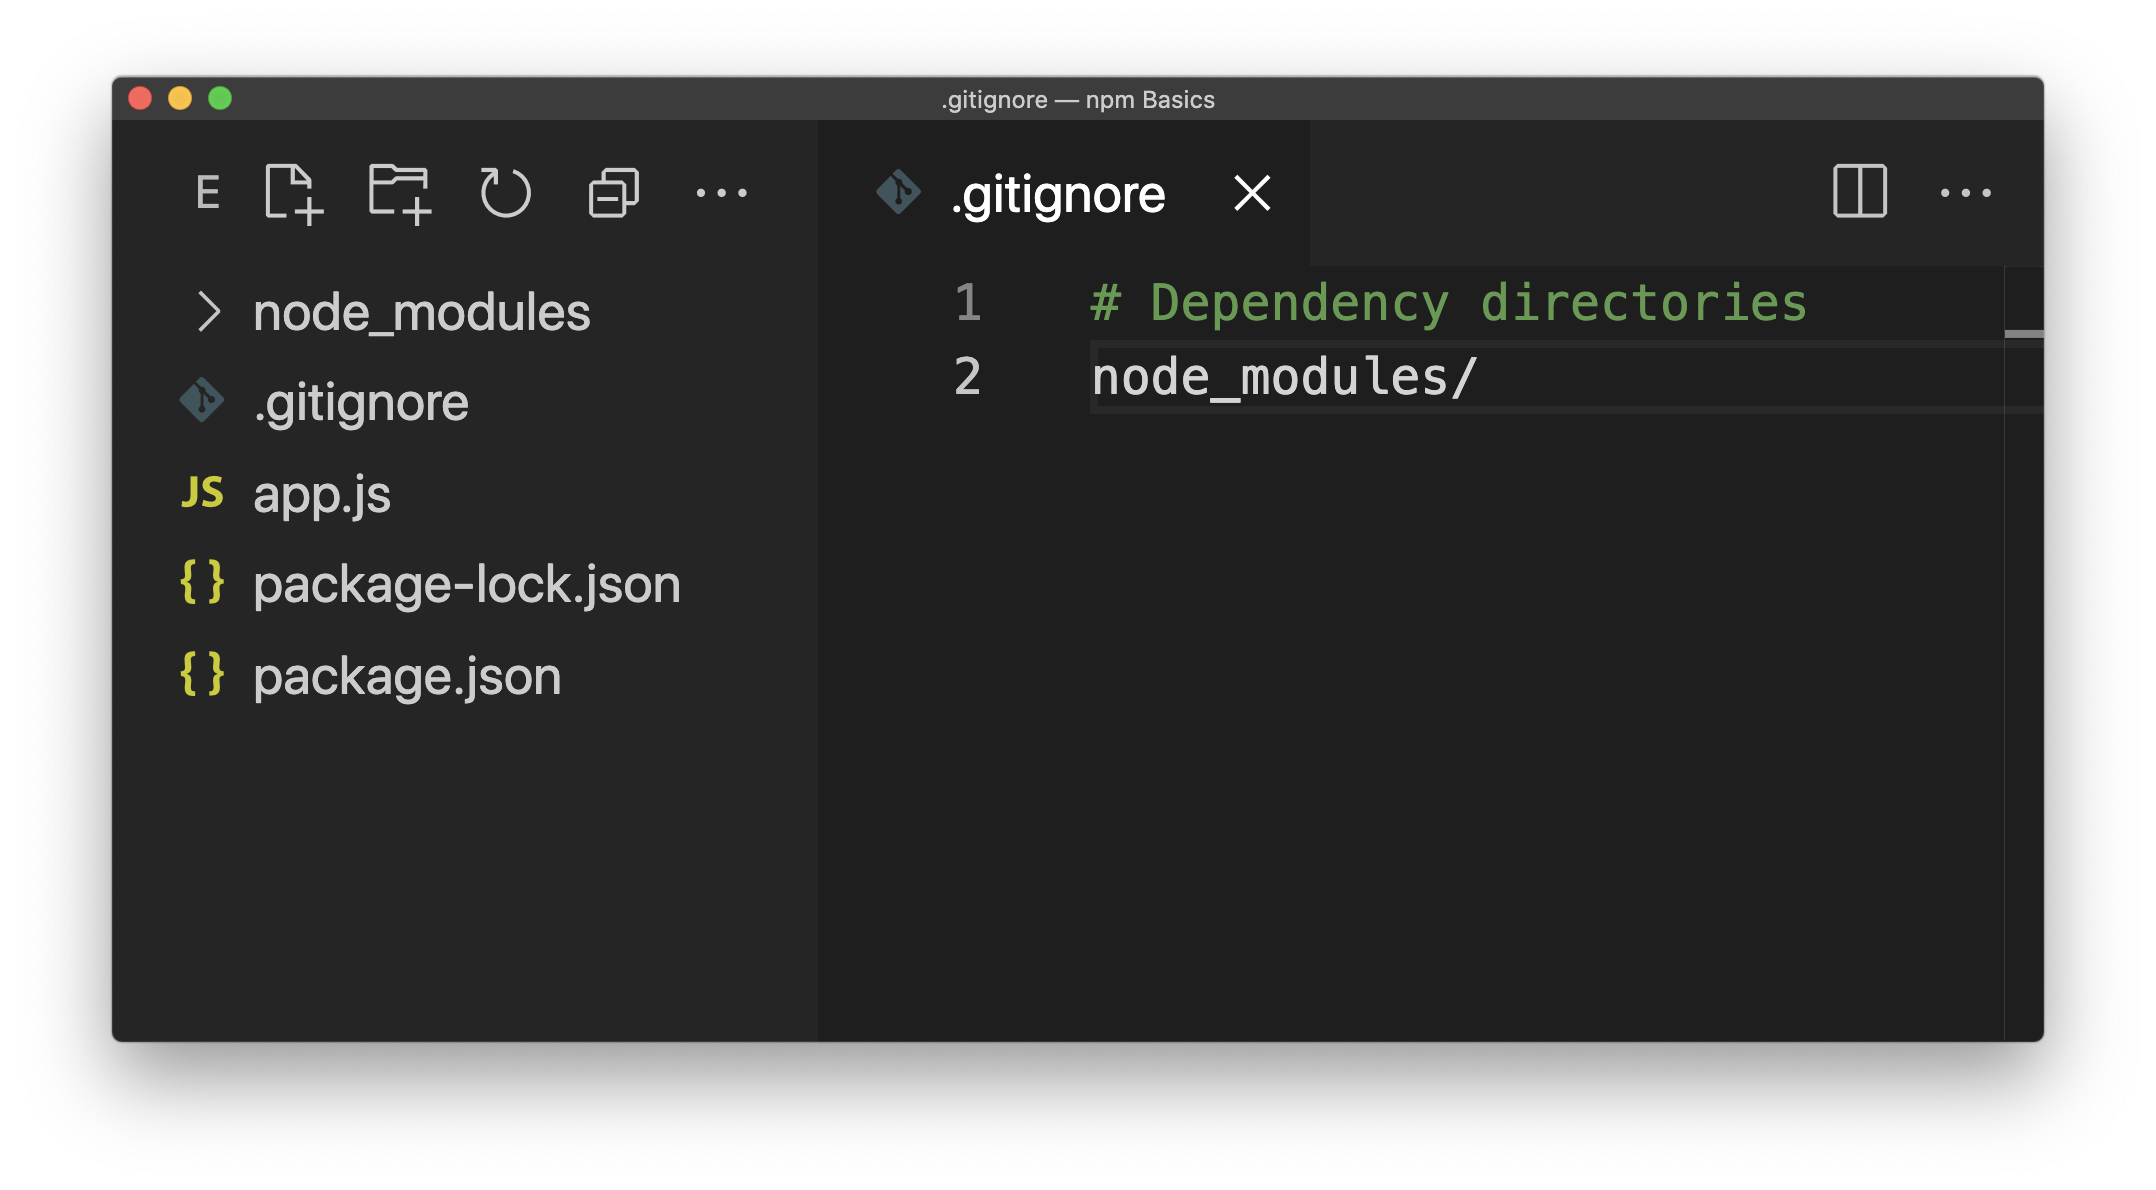
Your Task:
In the root directory of your project, create a new file named .gitignore and add the following lines to it:
# Dependencies
node_modules/


# Environment variables
.env
This simple action is a professional standard that you must follow in the exam and in any real-world project.
Step 2: Push Your Project to GitHub
The process of pushing an existing local project to a new GitHub repository involves a precise sequence of commands. Memorize this sequence.
Action 1: Create a New Repository on GitHub
First, you need a destination for your code.
- Log in to your GitHub account.
- In the top-right corner, click the
+icon and select New repository. - Give your repository a name (e.g.,
backend-api-exam). - Ensure the repository is set to Public.
- Crucially, do not initialize it with a
README,.gitignore, or license. We are providing our own. - Click Create repository.
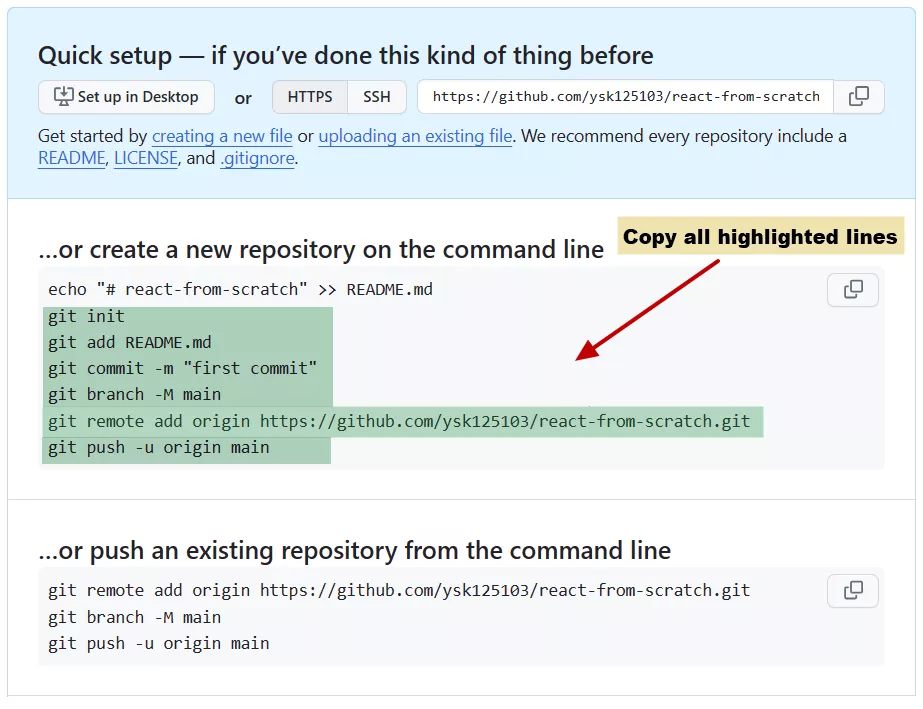
You will be taken to a page that looks like this, which provides the exact commands you'll need.
Action 2: Run the Git Command Sequence
Now, open your terminal in the root directory of your project and execute the following commands in order.
-
Initialize a Git repository: This creates a hidden
.gitfolder in your project to track changes.git init -
Add all files to staging: This prepares all your files (except those in
.gitignore) for a commit.git add . -
Commit the files: This saves a snapshot of your project in the local Git history.
git commit -m "Initial commit" -
Set the primary branch name to
main: This is the modern standard for the default branch.git branch -M main -
Add the remote repository: This command links your local repository to the one you created on GitHub. Copy the HTTPS URL from your repository's page on GitHub.
git remote add origin <YOUR_REPOSITORY_URL>For example:
git remote add origin https://github.com/your-username/backend-api-exam.git -
Push your code: This uploads your committed code from your local
mainbranch to theoriginremote (GitHub).git push -u origin main
For a visual walkthrough of this entire process, you can watch this video.
How to Deploy a Node/Express App to Render | Node/Express Render Deployment
This video from Arpan Neupane demonstrates the complete workflow for a Node/Express application, including creating the .gitignore file and executing the Git commands.
Watch from 01:50 to 03:15. This segment covers creating the GitHub repository, initializing Git locally, creating the .gitignore file, and running the add, commit, and push commands.
Reference and Review
The process involves several distinct steps. For a detailed written guide that you can refer back to, review the following article. It breaks down each command and provides a helpful summary.
Step-by-Step Guide to Push a New Project to GitHub
The article 'Step-by-Step Guide to Push a New Project to GitHub' provides a clear, structured explanation of the entire workflow. Use it to solidify your understanding of the command sequence.
Read through the following sections to reinforce what you've just done: 'STEP 1 — Initialize Git', 'STEP 2 — Create a .gitignore File', 'STEP 4 — Add and Commit', and 'STEP 5' through 'STEP 8' which cover creating the remote repo, connecting it, and pushing. Pay special attention to the 'Summary' at the end, as it's an excellent cheat sheet.
Practical Exercise
It's time to execute.
- Ensure you have created the
.gitignorefile in your project's root directory withnode_modules/and.envinside. - Go to GitHub and create a new, empty public repository.
- Open your terminal, navigate to your project's root folder, and run the six Git commands listed in Action 2 above, making sure to use your own repository URL.
- After the
git pushcommand completes, refresh your GitHub repository page in the browser. You should see all your project files (package.json, yoursrcorroutesfolders, etc.), but not thenode_modulesfolder or the.envfile.
Completing this exercise successfully is a major milestone and a prerequisite for the next lesson.
Conclusion
You have now successfully placed your project under version control and hosted it on GitHub. This is not just a requirement for the exam submission; it is the gateway to automated testing, collaboration, and modern deployment practices.
Key Takeaways:
- Always create a
.gitignorefile to excludenode_modules/and.envfrom your repository. - The workflow to push an existing project is a fixed sequence:
git init,git add .,git commit,git branch -M main,git remote add, andgit push. - A GitHub repository is the source from which deployment platforms will pull your code.
Next Up:
With your code now hosted and accessible, we are ready for the final step: deploying it to a live web server. In the next lesson, you will link your GitHub repository to a hosting platform like Render, configure your production environment, and bring your API to life on the internet.