Introduction
In the last lesson, you professionalized your API testing workflow by creating a Postman environment and using the {{baseUrl}} variable. This ensures your collection is clean, maintainable, and not dependent on hardcoded URLs.
This lesson covers the final, crucial step in your Postman workflow: exporting the collection. The goal is to produce a single JSON file that contains all the requests you've built. For the exam, this file is a key deliverable that allows an examiner to import and run your entire test suite with a few clicks.
We will cover the simple, mechanical steps to export your collection, which is a required skill for packaging your submission correctly.
Exporting Your Postman Collection
Exporting a collection is a straightforward process. The result is a standard JSON file that can be shared, version-controlled, or used with command-line tools like Newman.
Let's walk through the exact steps.
Step-by-Step Guide
- Locate Your Collection: In the Postman sidebar on the left, find the API collection you have been working on.
- Open the 'More Actions' Menu: Hover over your collection name and click the three dots (
...) that appear to its right. This opens a dropdown menu with various options. - Select 'Export': From this menu, choose the Export option.

- Choose the Format and Export: A dialog box will appear. You will be given a choice of export format, typically
Collection v2.1. This is the modern standard, so you can leave it as the default. Click the Export button.
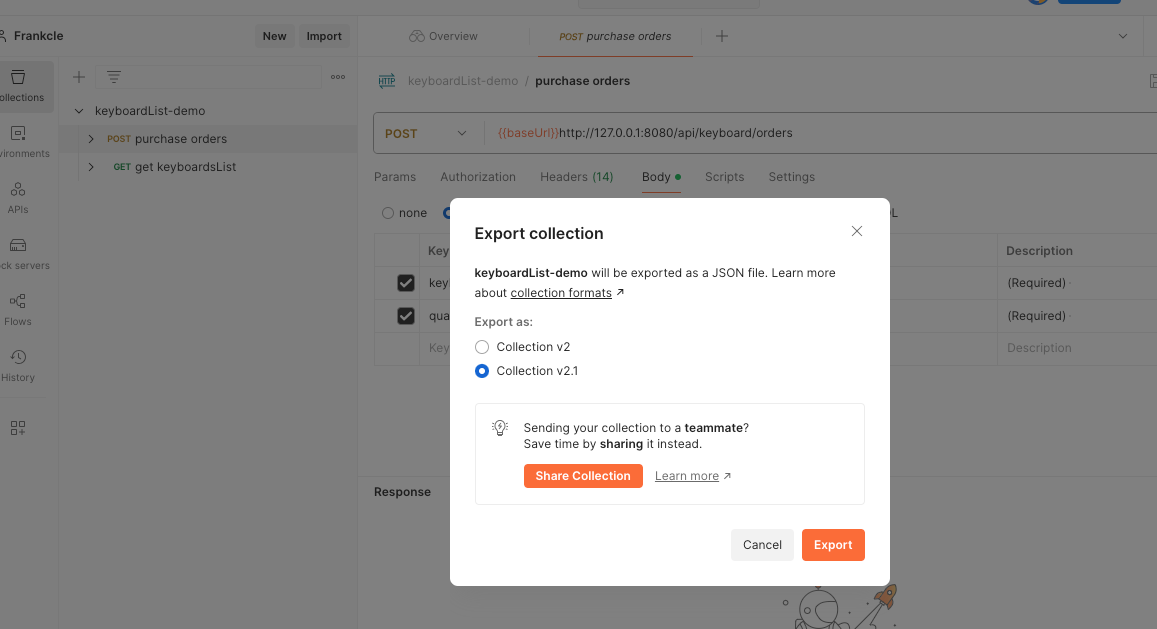
- Save the JSON File: Your system's file save dialog will open. Choose a location for the file, name it appropriately (e.g.,
api-collection.json), and save it.
This process is very quick. For a live demonstration, watch the following short video clip.
How to Share Postman Collections in Seconds (Export + Import JSON Tutorial)
This brief video from Super SQA demonstrates the export process in less than 30 seconds. It will give you a quick visual confirmation of the steps.
Watch from 00:37 to 00:58. The video shows clicking the three dots, selecting export, and saving the resulting JSON file.
A Note on Exporting Environments
Just as you export your collection, you will almost always need to export your environment as well. This allows anyone who imports your collection to also import the {{baseUrl}} variable it depends on. The process is nearly identical.
The official Postman documentation provides a clear, concise guide for exporting both collections and environments. Take a moment to review it.
Read the two main sections: 'Export collections' and 'Export environments'. Notice how the process for exporting an environment is the same as for a collection: you navigate to the 'Environments' tab, click the three dots, and select 'Export'.
To export your environment:
- Click the Environments tab in the left sidebar.
- Click the three dots (
...) next to yourLocal Developmentenvironment. - Select Export.
- Save the resulting JSON file (e.g.,
environment.json).
Practical Exercise: Prepare Your Submission Files
Now it's time to put this into practice. This is a direct simulation of what you'll need to do in the exam.
- Navigate to your API collection in Postman and export it. Save the file in the root directory of your project with the name
collection.json. - Navigate to your
Local Developmentenvironment. Export it and save the file in the root directory of your project asenvironment.json.
After this, you should have these two new files alongside your package.json and other source files. These are critical artifacts for your final submission.
Conclusion
You have now mastered the final piece of the Postman workflow for this course. Exporting your collection and environment is a simple but non-negotiable step for submitting your project for evaluation.
Key Takeaways:
- Collections are exported to a single, portable JSON file via the 'More Actions' (
...) -> Export menu. - The standard export format is
Collection v2.1. - You must also export your Environment to provide the necessary variables (like
{{baseUrl}}) for your collection to work correctly. - These exported JSON files are essential deliverables for your exam submission.
Next Up:
With the API fully built, documented, tested, and packaged, we are ready for the final and most exciting phase: deployment. In the next module, you will learn how to get your application running on a live server on the internet. We'll start by pushing your code to a GitHub repository, which is the first step toward continuous integration and deployment.