Introduction
In the previous lesson, you successfully pushed your project to a GitHub repository, creating a clean, version-controlled source for your code. This was the essential groundwork for what comes next: bringing your API to life on the public internet.
This lesson focuses on the deployment process itself. You will connect your GitHub repository to a cloud hosting platform, which will automatically pull your code, build it, and run it on a live server. By the end of this lesson, you will have created a live web service for your API, linked directly to your code on GitHub. We'll explore two popular, exam-friendly platforms: Render and Railway. You only need to choose one.
Pre-flight Check: Configure Your Server for Deployment
Before we deploy, we need to make one critical adjustment to your main server file (likely app.js or index.js).
Hosting platforms like Render and Railway assign a port to your application automatically. Your code must listen on the port provided by the platform's environment. You can access this through process.env.PORT.
To handle both local development (e.g., on port 3001) and production deployment, update the line where you start your server:
// Find this line in your main server file:
// app.listen(3001, () => { ... });

// And change it to this:
const PORT = process.env.PORT || 3001;

app.listen(PORT, () => {
  console.log(`Server is running on port ${PORT}`);
});
This code tells your app: "Use the port defined by the hosting environment, but if it's not defined (i.e., we're running locally), default to port 3001."
Your Task:
- Make this change in your server file.
- Commit and push this update to your GitHub repository before proceeding.
git add .
git commit -m "feat: configure dynamic port for deployment"
git push
Step 1: Choose Your Deployment Platform
Both Render and Railway are excellent choices for deploying Node.js applications. They connect directly to GitHub and offer generous free tiers. The core concepts are identical. For the exam, being proficient with one is all you need.
- Render: Very explicit and structured. You define each step clearly (build command, start command). Great for understanding the process.
- Railway: Highly automated. It often infers settings for you, leading to a faster initial setup.
Review the options below and pick the one that feels more intuitive to you.
Path A: Deploying with Render
Render provides a step-by-step interface for configuring your web service.
Action 1: Sign Up and Create a Web Service
First, create a Render account and link it to GitHub. Then, you'll create a "Web Service" which will host your API.
This guide from The Full-Stack Blog walks you through setting up a Render account and creating your first web service. It's a perfect text-based reference for the process.
First, read the 'Account Setup' section to sign up for Render using your GitHub account. Then, follow the steps in the 'Create a Render App' section. Stop when you get to the part about environment variables; we will handle those in the next lesson.
Action 2: Configure and Deploy
This video provides a concise visual walkthrough of the configuration process you just read about. It shows exactly where to input the required commands.
How to Deploy MERN (React Node Express Mongo) App to Render for Free
Watch this short clip from Andy's Tech Tutorials to see the Render dashboard in action. It covers creating the service, connecting the repo, and setting the build/start commands.
Watch from 00:31 to 02:09. Focus on these key configuration steps: Connect Repository: Selecting your project from the GitHub list. Name: Giving your service a unique name. Root Directory: Leave this blank if your package.json is in the root of the repository. Build Command: Set this to npm install. Start Command: Set this to npm start (this relies on the "start": "node app.js" script in your package.json).
Your Task (Render):
- Sign up for Render with your GitHub account.
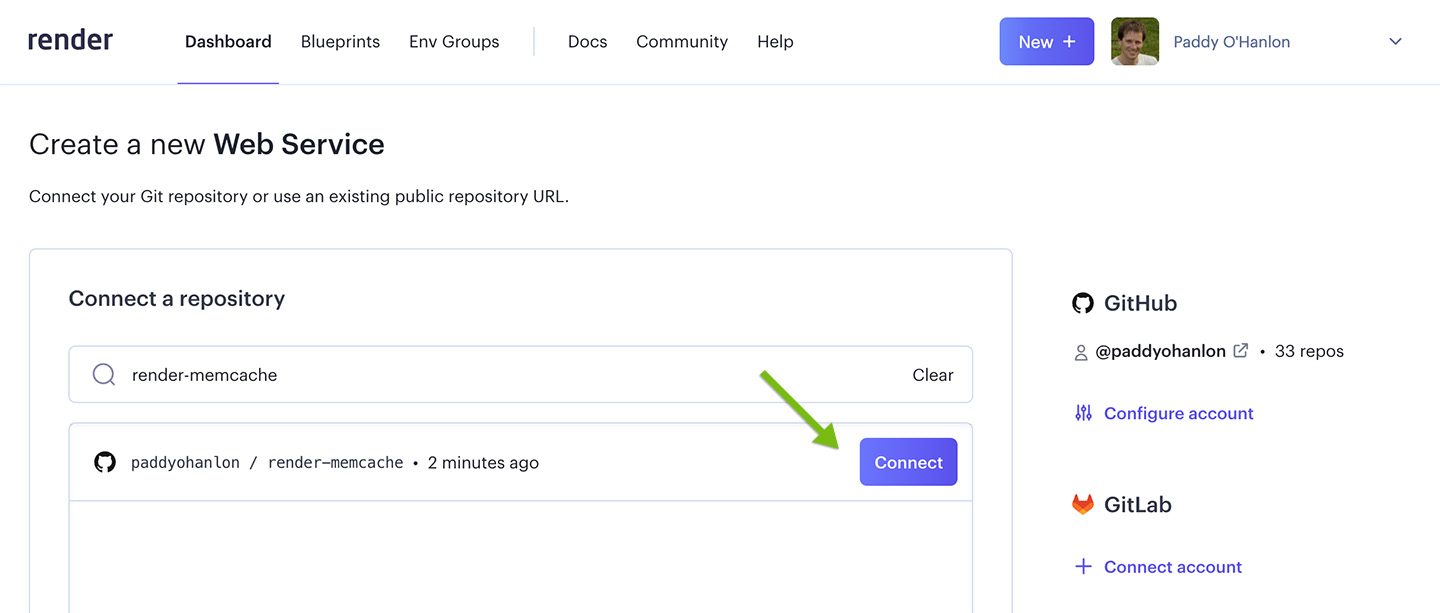
- On the dashboard, click New + > Web Service.
- Select your API's GitHub repository and click Connect.
- On the configuration screen:
- Give your service a unique Name (e.g.,
my-api-exam-service). - Ensure the Region is close to you.
- Set the Build Command to
npm install. - Verify the Start Command is
npm start. - Select the Free instance type.
- Give your service a unique Name (e.g.,
- Do not add any environment variables yet.
- Scroll down and click Create Web Service.
You will be taken to a log screen where you can watch your deployment happen in real-time.
Path B: Deploying with Railway
Railway streamlines deployment with a "deploy first, configure later" philosophy.
Action 1: Sign Up and Deploy from GitHub
You'll start by creating a new project on Railway and immediately linking it to your GitHub repository.
Deploy an Express App | Railway Guides
The official Railway documentation provides a direct guide for deploying from a GitHub repository. Follow these steps to get started.
Read the section titled 'Deploy from a GitHub repo'. Follow steps 1 and 2 to create a new project and select your GitHub repository. We will handle variables and databases later, so you can stop there for now.
Action 2: Watch the Magic Happen
This video demonstrates the Railway workflow. Notice how quickly it starts building once the repository is selected.
How to Deploy MERN (MongoDB Express React Node) App on Railway
This clip from Andy's Tech Tutorials shows the Railway deployment process. It's a great visual guide to complement the documentation.
Watch from 00:12 to 01:00. This section covers signing in, starting a new project, authorizing GitHub, and selecting the repository. This is all you need to do to kick off the first deployment.
Your Task (Railway):
- Sign up for Railway with your GitHub account.
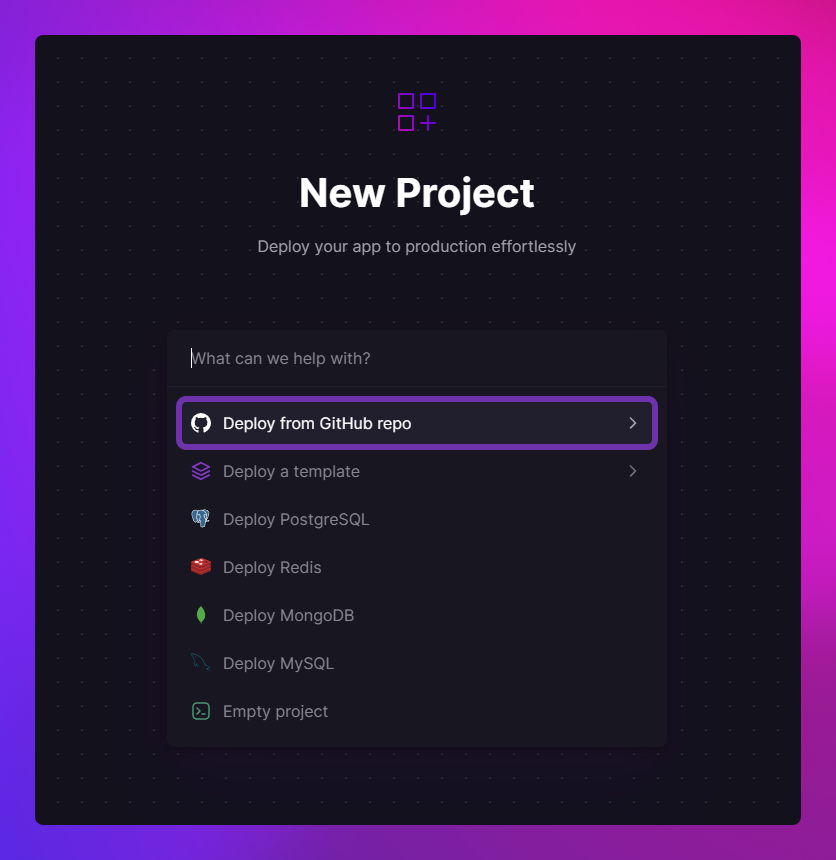
- On the dashboard, click New Project.
- Select Deploy from GitHub repo.
- Configure access to your GitHub account if prompted.
- Select your API's GitHub repository from the list.
- Railway will immediately start building and deploying your project. You can click on the new service block to view the deployment logs.
What to Expect: An Expected "Failure"
After you initiate the deployment on either platform, the build will likely succeed (npm install will run), but the deployment will then fail or enter a "crash loop."
You will see errors in the logs like:
MongoParseError: Invalid connection stringCannot connect to database- The server continuously restarting.
This is expected and is a good sign! It means the platform has successfully pulled your code and tried to run it. The failure is happening because your deployed application has no idea how to connect to your MongoDB database. The MONGO_URI it needs is in your local .env file, which you correctly did not push to GitHub.
Conclusion
You have successfully linked your code to a live hosting environment. The platform is now set up to automatically redeploy your application every time you push a new commit to your main branch. Although the app is currently crashing, you've completed the foundational step of deployment.
Key Takeaways:
- Modern hosting platforms like Render and Railway deploy directly from a GitHub repository.
- Your application must be configured to use
process.env.PORTto run correctly in a hosted environment. - The deployment process involves specifying a build command (
npm install) and a start command (npm start). - It is normal for the first deployment to fail if it depends on environment variables that have not been configured yet.
Next Up:
In the next lesson, we will fix the crash. You will learn how to securely provide your MONGO_URI and any other necessary secrets to the production environment using the hosting platform's dashboard, allowing your application to connect to the database and run successfully.