Introduction
In the previous lesson, you defined the itemSchema, establishing a clear blueprint for the data in your application. That schema acts as a set of rules for what an "item" should look like, including required fields and data types.
This lesson is the critical next step: converting that blueprint into a functional tool. You will learn how to create and export a Mongoose Model from your schema. A model is an object that Mongoose provides, equipped with all the methods needed to create, read, update, and delete documents in your MongoDB collection. Think of the schema as the architectural drawing and the model as the construction company that uses the drawing to build and manage houses. This is a quick but essential step before we can build our API endpoints.
1. From Schema to Model
The process of creating a model is straightforward. You use the mongoose.model() function, which takes two primary arguments:
- The singular name of the model as a string (e.g.,
'Item'). - The schema object you want to use (e.g.,
itemSchema).
Mongoose has an important convention: it will automatically create a MongoDB collection for your model using the plural, lowercase version of the model name.
- Model Name:
'Item'→ Collection Name:'items' - Model Name:
'User'→ Collection Name:'users'
This convention simplifies development, as you don't need to manually link your model to a collection name.
2. Implementing and Exporting the Model
The standard practice in a professional Node.js project is to define the schema and export the model from the same file. This keeps your data definitions self-contained and easy to manage.
Action: Update src/models/Item.js
Open the src/models/Item.js file you created in the last lesson. You will add just two lines of code to create the model and export it so it can be used elsewhere in your application.
Add the following lines to the bottom of the file:
// Create the model from the schema
const Item = mongoose.model('Item', itemSchema);

// Export the model so it can be used in other files
module.exports = Item;
For clarity, your complete src/models/Item.js file should now look like this:
const mongoose = require('mongoose');
const Schema = mongoose.Schema;

// Define the schema for our 'Item' collection
const itemSchema = new Schema({
    name: {
        type: String,
        required: true
    },
    quantity: {
        type: Number,
        required: true,
        default: 1
    },
    isPriority: {
        type: Boolean,
        default: false
    },
    createdAt: {
        type: Date,
        default: Date.now
    }
});

// Create and export the model
module.exports = mongoose.model('Item', itemSchema);
Note: We've combined the creation and export into a single, concise line, which is a common pattern.
This single module.exports line accomplishes the learning outcome: you have created a Mongoose model named Item based on itemSchema and made it available for other parts of your app to require.
3. Reinforcing the Pattern
This "one model per file" structure is a fundamental best practice. The following reading from the MDN docs explicitly describes and recommends this approach.
Express Tutorial Part 3: Using a Database (with Mongoose)
The MDN Web Docs provide a clear explanation for why we structure our model files this way. Reading this will solidify your understanding of this professional convention.
Read the short section titled 'One schema/model per file'. Notice how their example code is structured exactly like our Item.js file: require mongoose, define schema, and then export the compiled model.
To see this pattern in action again, watch the following short video clip. It demonstrates the exact same process of creating and exporting a model from a schema.
How to create MongoDB Schemas and Data Models | Node.js Tutorials for Beginners
This clip from Dave Gray's tutorial series provides a clear, practical demonstration of creating and exporting a Mongoose model.
Watch from 04:24 to 05:32. Pay close attention to how module.exports is used and the explanation of how Mongoose derives the collection name ('employee' becomes 'employees').
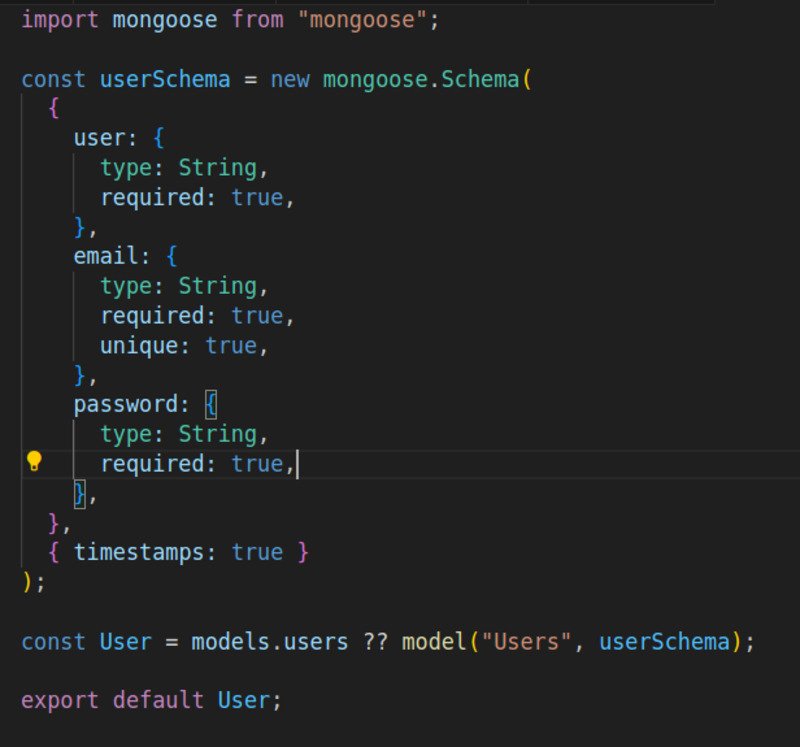
Finally, take a look at the image below. It shows a complete model file for a 'User'. This is a perfect visual summary of what you've just built: a self-contained file that defines a schema and exports a ready-to-use model.
Conclusion
You have successfully "compiled" your schema into a powerful Mongoose model. This model is now your primary interface for all interactions with the items collection in your MongoDB database.
Key Takeaways:
- A Mongoose model is created from a schema using
mongoose.model('ModelName', schemaObject). - The model provides the methods for all CRUD (Create, Read, Update, Delete) operations.
- By convention, Mongoose maps a singular model name (e.g.,
'Item') to a plural, lowercase database collection name (e.g.,'items'). - The best practice is to define the schema and export the model from a single file within your
modelsdirectory (e.g.,models/Item.js).
With your Item model now ready and exported, you are finally prepared to build the API routes that will use it to manage data.
Next Up: In the next lesson, you will create an Express Router. This will allow you to define the URL paths for your API (like /api/items) and begin implementing the logic for handling incoming requests.