Introduction
In the last lesson, you created and exported the Item model, which is now your primary tool for interacting with the items collection in MongoDB. You have the "what" (the data structure) and the "how" (the model to manage it). Now, it's time to build the "where"—the API endpoints (URLs) that will expose this functionality to the outside world.
This lesson focuses on organizing your API routes cleanly. Instead of adding every endpoint directly to your main app.js file, which quickly becomes unmanageable, you will use Express Router. You will learn to create a dedicated router for your Item resource and "mount" it on a base path like /api/items in your main application file. This practice is fundamental for building scalable and maintainable backend services.
1. The Need for Separate Route Files
As an application grows, you might add more resources beyond just "items"—perhaps "users," "orders," or "reviews." Defining all the GET, POST, PUT, and DELETE routes for every resource in a single app.js file leads to what's often called "spaghetti code." It's difficult to read, debug, and maintain.
The solution is to group related routes into their own files. Express provides a dedicated mini-app called express.Router for this exact purpose.
Watch this short segment to see a demonstration of a cluttered main file and understand why separating routes is a critical best practice.
ExpressJS Routes Tutorial - Separating Routes into Different Files
The video 'ExpressJS Routes Tutorial' by PedroTech clearly illustrates the problem of defining all routes in one file and introduces the concept of using a separate routes folder.
Watch from 00:36 to 04:16. The presenter shows a messy index.js with routes for both 'users' and 'comments' and explains why this is a bad practice you must avoid in professional development.
2. Implementation: Creating and Mounting Your Router
The process involves three distinct steps:
- Create a dedicated file for your resource's routes.
- Define the router logic within that file.
- Import and mount the router in your main
app.js.
Let's implement this for our Item resource.
Step 1: Create the Router File
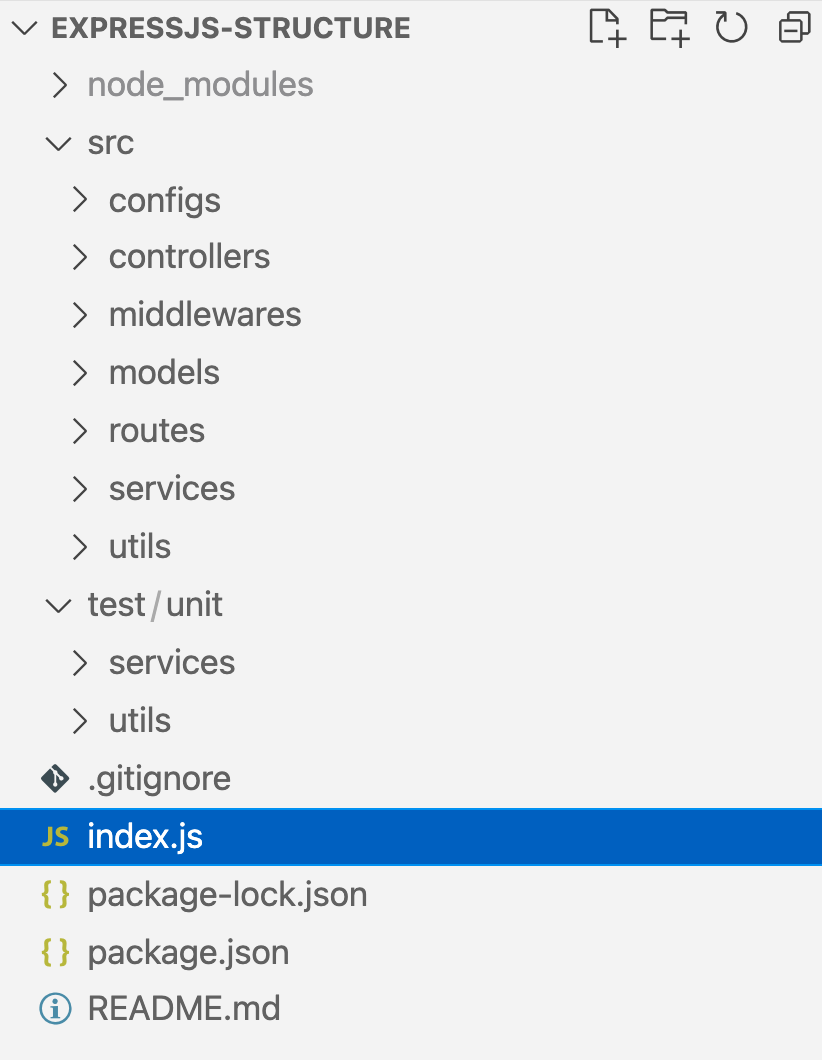
In the src/ directory, you should already have a routes folder from our initial project setup. Inside this folder, create a new file named item.routes.js.
This follows the standard project structure, keeping your code organized by concern.
Step 2: Define the Router Logic
Now, open src/routes/item.routes.js and add the following code. This sets up the router, adds a single placeholder route for testing, and exports the router so it can be used by your main app.
const express = require('express');
const router = express.Router();

// @route   GET /api/items
// @desc    A test route to make sure our router is working
// @access  Public
router.get('/', (req, res) => {
    res.send('Items route is working!');
});

module.exports = router;
Key points here:
express.Router()creates a new router object.- We define routes on
router(e.g.,router.get()) instead ofapp. - The path is just
'/'. The full/api/itemspath will be configured in the next step. module.exports = router;makes this router available to be imported elsewhere.
Step 3: Mount the Router in app.js
Finally, open your main application file (app.js or index.js). You need to tell your Express app to use the router you just created for any requests that come in under a specific path.
- Import the router at the top of the file with your other
requirestatements. - Mount it using
app.use()before yourapp.listen()call.
Add these two lines to your app.js:
// At the top, with other imports
const itemRoutes = require('./src/routes/item.routes.js');

// ... other app.use() middleware ...

// Mount the router
app.use('/api/items', itemRoutes);

// ... app.listen() ...
The line app.use('/api/items', itemRoutes); is the crucial connection. It instructs Express: "For any request whose path begins with /api/items, pass the request over to the itemRoutes router to handle it."
This means the router.get('/') inside item.routes.js now effectively handles requests to GET /api/items.
3. Reinforcing the Pattern
This three-step pattern—create file, define router, mount router—is the standard way to manage routes in Express. To solidify your understanding, review these resources which show the exact same pattern.
First, let's see it in another video demonstration.
ExpressJS Routes Tutorial - Separating Routes into Different Files
The same video from PedroTech now shows the complete solution: creating the router, exporting it, and mounting it with app.use().
Watch from 04:16 to 09:40. This covers the entire implementation flow: creating the routes folder and files, defining the router with express.Router(), exporting it, and finally importing and mounting it in index.js using app.use().
Next, for a quick textual reference, this article breaks down the process into the same three steps with clear code examples. This is an excellent guide to bookmark for quick reference during your exam.
Express Routes: A Guide to Building Scalable Node.js APIs
The article 'Express Routes: A Guide to Building Scalable Node.js APIs' from BrowserStack provides a concise, text-based summary of exactly what we just did.
Read the section titled 'Setting Up Express Router'. It outlines the same three steps: 'Create a Router File', 'Import the Router in the Main App', and 'Mount the Router'. This reinforces the pattern with another clear example.
Finally, the official Express.js documentation itself confirms this is the intended approach.
The official Express documentation shows the 'express.Router' class is the designated tool for creating modular, mountable route handlers.
Skim the section titled 'express.Router'. Notice how their birds.js example is conceptually identical to our item.routes.js. They create a router, define routes, export it, and then load it in the main app with app.use('/birds', birds).
4. Verify Your Work
With the code in place, it's time to test it.
- Make sure your MongoDB connection is running.
- Start your server from the terminal (e.g.,
npm startornode app.js). - Open your web browser or Postman and make a GET request to
http://localhost:5001/api/items(or whatever port you are using).
You should see the message: Items route is working!
This confirms that your main app correctly routed the request to your new item.routes.js file.
Conclusion
You have successfully refactored your application to use Express Router, a critical step for building a clean and scalable API. You've isolated the routing logic for your Item resource into its own file and connected it to your main application.
Key Takeaways:
- Separation of Concerns: Route definitions should live in their own files inside a
routesdirectory, not in the mainapp.js. express.Router(): This is the factory function for creating a new router object, which acts as a "mini-app" for handling a group of related routes.app.use('/base-path', router): This is how you mount a router in your main application, telling Express to delegate any requests matching the base path to that router.
Next Up:
With the router in place, the foundation is set. In the following lessons, you will replace the placeholder route with the actual CRUD (Create, Read, Update, Delete) logic, starting with the endpoint to fetch all items from the database.