Introduction
In our previous lesson, we explored the theoretical underpinnings of multi-file C projects. You learned about the separation of declarations in header files (.h) and definitions in source files (.c), the role of the linker in combining object files, and the critical concept of the Application Binary Interface (ABI) that makes it all work. We also saw how make can automate this complex build process.
Today, we move from theory to practice. This lesson is a hands-on workshop where you will refactor the inventory management system—which we've built up over several modules—from a single, monolithic file into a clean, modular, multi-file project. This process is fundamental for any serious software development, as it lays the groundwork for creating larger, more maintainable, and collaborative projects. By the end, you'll have a professional project structure and a powerful Makefile to manage it.
Step 1: Decomposing the Project into Logical Modules
As a project grows, keeping all the code in a single .c file becomes unwieldy. It's difficult to navigate, and any small change forces a complete recompile of the entire program. The solution is to break the code into logical, self-contained modules.
For our inventory project, we can identify a few distinct areas of functionality:
- Item: The definition of an
Itemand functions to create or display it. - Inventory: The logic for managing the collection of items (adding, removing, etc.).
- Main: The main program entry point and game loop.
This suggests a natural three-module structure: item, inventory, and main. Each module will consist of a header file for its public interface and a source file for its implementation.
Header Files (.h): The Public Interface
A header file defines the "contract" that a module offers to the rest of the program. It contains:
structandenumdefinitions.- Function declarations (prototypes).
- Header guards to prevent errors from multiple inclusions.
Let's start by creating the header files for our item and inventory modules.
item.h
#ifndef ITEM_H
#define ITEM_H

// Represents a single item in the game
typedef struct {
    char name[50];
    int value;
    float weight;
} Item;

// (Add declarations for any functions specific to an Item, e.g., create_item, display_item)


#endif // ITEM_H
inventory.h
#ifndef INVENTORY_H
#define INVENTORY_H


#include "item.h" // The Inventory needs to know what an Item is

// (Declarations for inventory management functions, e.g., add_to_inventory, display_inventory)
// This will likely operate on an array of Items or a pointer to one.


#endif // INVENTORY_H
Notice that inventory.h includes item.h. This establishes a dependency: the inventory module depends on the item module.
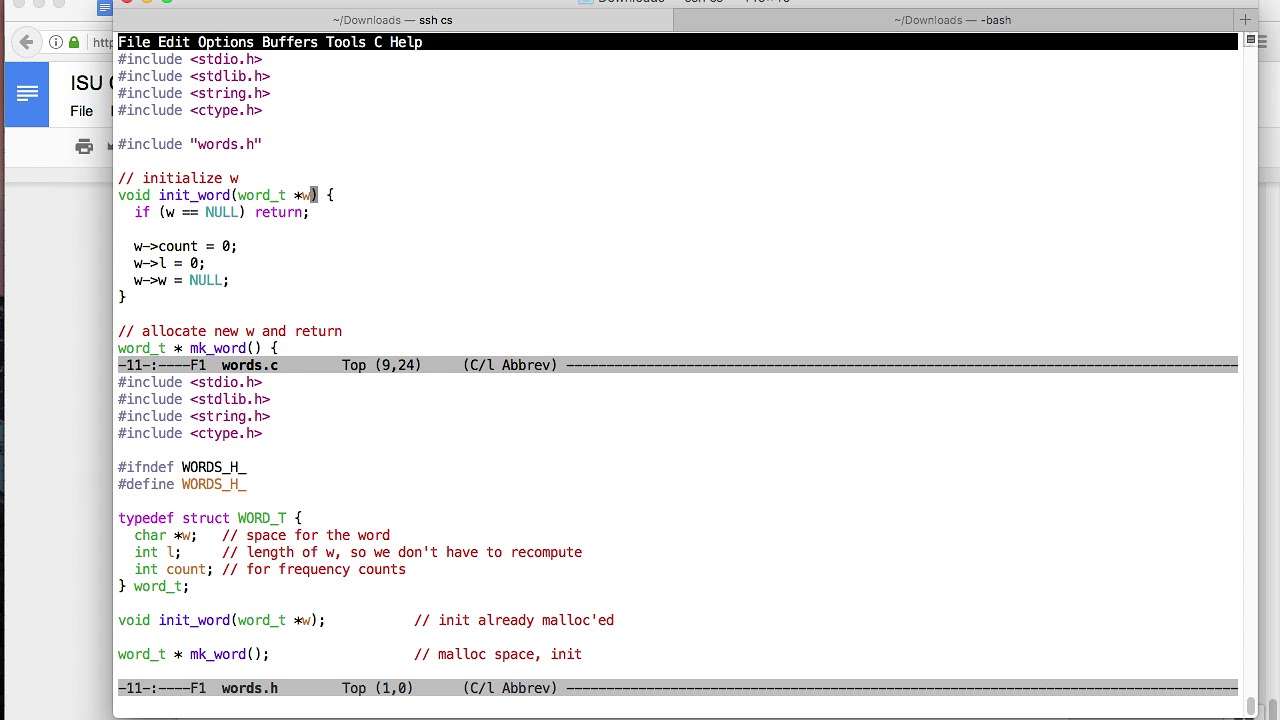
Source Files (.c): The Implementation
The source file contains the actual "meat" of the functions declared in its corresponding header.
item.cwill contain the definitions of functions that operate onItemstructs.inventory.cwill contain the definitions for functions that manage the inventory.main.cwill contain yourmainfunction and the primary game loop.
Each .c file must include its own header file (e.g., inventory.c includes "inventory.h") and any other headers it needs to do its job.
Your task now is to create these files and move the relevant code from your single-file project into them.
- Create
item.handinventory.has shown above. - Create
item.c,inventory.c, andmain.c. - Cut and paste the
structdefinitions, function declarations, and function definitions from your old project file into the appropriate new files.
Step 2: Compiling and Linking with a Makefile
With our code now spread across multiple files, we need a way to compile them into object files (.o) and then link those object files into a single executable.
Manually, the command would be something like:gcc -Wall -Wextra -g -o game main.c inventory.c item.c
This recompiles everything every time. A Makefile automates this and makes it efficient by only recompiling what has changed.
Let's begin with a simple, explicit Makefile.
# Makefile for the inventory game

CC = gcc
CFLAGS = -Wall -Wextra -g


# The final executable
TARGET = game


# The object files needed to build the target
OBJECTS = main.o inventory.o item.o

all: $(TARGET)

$(TARGET): $(OBJECTS)
	$(CC) $(CFLAGS) -o $(TARGET) $(OBJECTS)

main.o: main.c inventory.h item.h
	$(CC) $(CFLAGS) -c main.c

inventory.o: inventory.c inventory.h item.h
	$(CC) $(CFLAGS) -c inventory.c

item.o: item.c item.h
	$(CC) $(CFLAGS) -c item.c

clean:
	rm -f *.o $(TARGET)
Create a file named Makefile in your project directory and add this content. Let's break down the rules:
- The
game: main.o inventory.o item.orule tellsmakethat to buildgame, it first needs to ensuremain.o,inventory.o, anditem.oare up to date. - The
main.o: main.c inventory.h item.hrule tellsmakethat to buildmain.o, it needsmain.c. Ifinventory.horitem.hchanges,main.omust be rebuilt becausemain.cincludes them and its code might be affected. - The
-cflag tellsgccto compile the source file into an object file but not to link it yet.
Now, you can simply run make in your terminal to build the project, and make clean to remove the generated files.

To reinforce these concepts, you can review the following lecture notes, which provide another complete example of a multi-file project and its Makefile.
Lecture 13: Multifile C Management
This section from the University of Washington provides a concise, complete example of a multi-file C project.
Review the example starting from the slide titled "Example" near the end of the document, which shows the speak.c, shout.c, main.c, their headers, and the final Makefile. You can find this by looking for the code snippet shout.c implementation. This reinforces the structure we are building.
Step 3: Improving Project Structure with Subdirectories
Our project is now modular, but all the files—source, headers, objects, and the executable—are jumbled in one directory. Professional projects use a more organized directory structure, typically:
src/for all source (.c) and header (.h) files.obj/for all intermediate object (.o) files.bin/for the final executable.
Let's refactor our project into this structure. The following video provides an excellent walkthrough of this exact process.
More Tips for Setting up a Programming Project: Subdirectories and Structure
The video "More Tips for Setting up a Programming Project" by Jacob Sorber will guide us through this refactoring.
First, watch from Organizing with subdirectories to understand the motivation and to see how the src, obj, and bin directories are created. Go ahead and create these directories in your project and move your .c and .h files into src/. Next, watch from Updating the Makefile. This part demonstrates how to modify the Makefile to work with the new directory structure by adding the directory paths to the rules.
After following the video, your Makefile will be functional, but it requires manually listing every file path. This becomes tedious as the project grows. We can make it far more powerful and scalable.
Step 4: A Scalable Makefile with Variables and Functions
The final step is to refactor our Makefile to be generic and automatic. Instead of listing every file, we will use make's built-in functions to discover our source files and generate the corresponding build rules.
This next segment of the video demonstrates this powerful technique.
More Tips for Setting up a Programming Project: Subdirectories and Structure
Let's continue with the same video to create our final, scalable Makefile.
Watch from Refactoring the Makefile. Pay close attention to how the author uses: Variables for directory names (SRCDIR, OBJDIR, BINDIR). The wildcard function to automatically find all .c files in the src directory. The patsubst (pattern substitution) function to generate a list of object file paths from the source file list. An updated pattern rule ($(OBJDIR)/%.o: $(SRCDIR)/%.c) to define how to build any object file from its corresponding source file.
By applying these techniques, you can arrive at a Makefile that looks something like this:
CC = gcc
CFLAGS = -Wall -Wextra -g

SRCDIR = src
OBJDIR = obj
BINDIR = bin


# Add include path for headers in src/
CFLAGS += -I$(SRCDIR)

TARGET = $(BINDIR)/game


# Find all .c files in SRCDIR
SOURCES = $(wildcard $(SRCDIR)/*.c)


# Create a list of .o files in OBJDIR corresponding to the .c files
OBJECTS = $(patsubst $(SRCDIR)/%.c, $(OBJDIR)/%.o, $(SOURCES))

.PHONY: all clean

all: $(TARGET)

$(TARGET): $(OBJECTS)
	@mkdir -p $(BINDIR)
	$(CC) $(CFLAGS) -o $@ $^
	@echo "Build complete: $(TARGET)"

$(OBJDIR)/%.o: $(SRCDIR)/%.c
	@mkdir -p $(OBJDIR)
	$(CC) $(CFLAGS) -c $< -o $@

clean:
	@rm -rf $(OBJDIR) $(BINDIR)
	@echo "Cleaned build artifacts."
A few key points about this final version:
CFLAGS += -I$(SRCDIR): This is crucial. It tellsgccto look inside thesrc/directory for any headers you#include "...". Without this, the compile would fail..PHONY: all clean: This tellsmakethatallandcleanare not actual files to be built, but just names for recipes of commands.- The
@symbol before commands likemkdirandechosuppresses the command from being printed to the console, making the output cleaner.
With this structure, you can now add new .c and .h files to your src directory, and the Makefile will automatically incorporate them into the build without needing any modifications.
Conclusion
Congratulations! You have successfully transformed a single-file script into a well-structured, modular C project. This is a significant milestone that moves you from hobbyist scripting towards professional software engineering practices.
Key Takeaways:
- Modularity: Decomposing a large program into smaller, logical modules (
.c/.hpairs) makes the code easier to understand, maintain, and reuse. - Project Structure: Organizing files into
src,obj, andbindirectories keeps the project clean and separates source code from build artifacts. - Automation with Make: A scalable
Makefilecompletely automates the build process. It efficiently recompiles only what's necessary and can automatically adapt to new source files added to the project.
You now possess the practical skills to manage a C project of growing complexity. This structure will serve as the foundation for all the features we will add to our game, and for the capstone project to come.
In our next lesson, we will explore how our debugging workflow changes with this new multi-file setup. You will learn to use GDB to navigate and set breakpoints across different source files, a vital skill for debugging real-world applications.