Introduction
Welcome back to building your 4G security test lab. In the last two lessons, you installed the necessary software components: srsRAN (providing our software-defined base station and phone) and Open5GS (our 4G core network). Right now, they are like two separate devices on your computer that are powered on but completely unaware of each other.
Today's goal is to bridge that gap. Your learning outcome is to create basic configuration files for srsENB and Open5GS to establish a private LTE network. We will configure the key parameters that allow your base station (srsENB) to connect to and register with your core network (Open5GS).
Think of this process as connecting a new Wi-Fi access point to your main internet router. You have to configure the access point with the router's IP address and ensure network settings like the network name (SSID) are set up correctly. For us, the "access point" is srsENB, the "router" is the Open5GS core, and instead of an SSID, we'll use a cellular network identifier called a PLMN ID.
By the end of this lesson, your base station and core network will be configured to communicate, forming the foundational link of your private LTE network.
The eNodeB-to-Core Connection: The S1 Interface
Before editing files, let's visualize the connection we're trying to build. The link between a 4G base station (eNodeB or eNB) and the Evolved Packet Core (EPC) is called the S1 interface. It has two parts:
- S1-MME: The control plane connection between the eNB and the Mobility Management Entity (MME). It's used for all signaling, like attaching a user to the network, authentication, and managing mobility. Since you're familiar with IP networking, you might find it interesting that this connection uses the Stream Control Transmission Protocol (SCTP), not TCP or UDP, for its reliability and message-oriented features.
- S1-U: The user plane connection between the eNB and the Serving Gateway (SGW). This is the tunnel through which your actual data (e.g., web browsing traffic) flows.
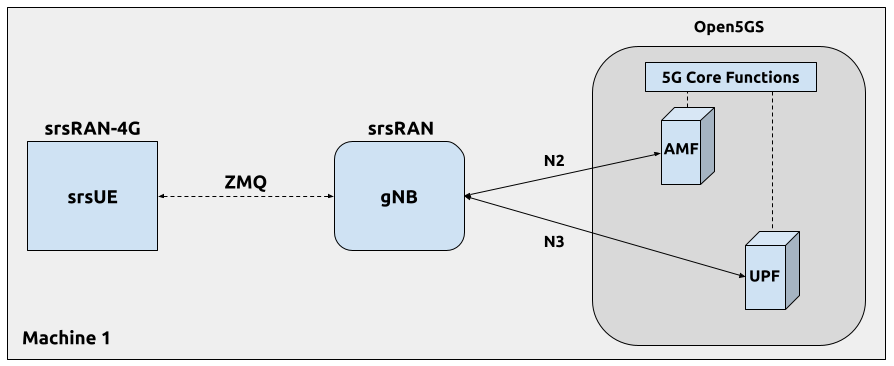
To make this S1 connection work, three key parameters must be consistent between the eNB and the MME:
- PLMN ID (Public Land Mobile Network ID): This is the globally unique identifier for a mobile network, composed of a Mobile Country Code (MCC) and a Mobile Network Code (MNC). Your
srsENBwill broadcast this ID, and yourOpen5GSMME must be configured to manage a network with this specific ID. - Tracking Area Code (TAC): A numerical code that identifies a group of base stations. It's used to manage the location of idle devices efficiently. The eNB and MME must agree on the TAC for the area the eNB serves.
- IP Connectivity: The
srsENBprocess needs to know the IP address and port of theOpen5GSMME to establish the S1-MME connection.
Our task is to set these parameters correctly in the configuration files for both software suites.
Step 1: Configuring Open5GS (The Core Network)
First, we'll configure the "brain" of our network, Open5GS. The configuration files are written in YAML format and are located in /etc/open5gs/. We are primarily interested in mme.yaml.
Out of the box, Open5GS is configured to use loopback addresses (127.0.0.x), which is perfect for our single-machine setup. However, we need to define the PLMN ID and TAC for our private network. We will use a PLMN designated for private networks to avoid any potential conflict with commercial networks. A common choice is MCC 999 and MNC 70.
The following guide provides a clear walkthrough of the essential configuration changes.
The Open5GS Quickstart guide clearly explains how to configure the core network components. We'll focus on the section for setting up a 4G core.
Read the section titled '4. Configure Open5GS', focusing on the subsection 'Setup a 4G/ 5G NSA Core'. Pay close attention to the example modification of /etc/open5gs/mme.yaml. Note how it sets the mcc, mnc, and tac.
Now, let's apply these changes.
-
Open the MME configuration file in a text editor with root privileges:
sudo nano /etc/open5gs/mme.yaml -
Locate the
mme:section, and within it, theplmn_id:list. The default configuration might have an example PLMN. We will change it to our private network ID. Modify themccandmncvalues. -
Further down in the same
plmn_identry, find thetac:. We will set this to1.
Your plmn_id section should look like this:
  plmn_id:


    # MMEGI (MCC+MNC+MMEGI) is composed of PLMN ID and MME Group ID.
    # The MMEGI identifies the MME within a MME pool area.
    - id:
        mcc: 999  # Modified
        mnc: 70   # Modified


      # List of TACs under this MMEGI
      # TAC is a 16-bit value.
      tac: 1      # Modified
-
Check the
s1ap:section. The default address should be127.0.0.2. This is the IP addresssrsENBwill need to connect to. We can leave this as is. -
Save the file and exit the editor (in
nano, pressCtrl+X, thenY, thenEnter). -
For the changes to take effect, you must restart the Open5GS MME service:
sudo systemctl restart open5gs-mmed
Your core network is now configured to manage a private network with PLMN 999-70 and TAC 1.
Step 2: Configuring srsRAN (The Base Station)
Next, we configure srsENB to match the core network settings. The srsRAN configuration files are typically copied from examples into a user-specific directory, ~/.config/srsran/.
Let's create this directory and copy the default configuration files into it.
mkdir -p ~/.config/srsran
cp /usr/local/share/srsran/config/enb.conf.example ~/.config/srsran/enb.conf
cp /usr/local/share/srsran/config/rr.conf.example ~/.config/srsran/rr.conf
Note: The exact path to the example files may vary slightly depending on your installation prefix. /usr/local/share/srsran/config/ is a common location for source builds.
Now, we'll edit these files. The "Your First LTE" guide from Open5GS provides an excellent reference for this.
This tutorial shows the corresponding changes needed on the srsRAN side to match the Open5GS configuration.
Read the section '2. srsRAN' under 'Configuration & Running'. Focus on the diffs shown for enb.conf and rr.conf. This shows exactly which lines to change for the mcc, mnc, mme_addr, tac, and dl_earfcn.
Let's make the edits.
-
Edit
enb.conf: Open the file~/.config/srsran/enb.confin a text editor.nano ~/.config/srsran/enb.confFind the
[enb]section and make these three changes to match Open5GS:mcc = 999mnc = 70mme_addr = 127.0.0.2(This must match thes1apaddress inmme.yaml)
-
Edit
rr.conf: Open~/.config/srsran/rr.conf.nano ~/.config/srsran/rr.confFind the
cell_listwithin the[rr]section. Here, you need to:- Set
tac = 1to match the TAC inmme.yaml. - Set the
dl_earfcn. This number specifies the exact downlink frequency channel. The value determines the band your eNB will operate in. A value of2850is a good choice as it falls into Band 7, which is commonly supported by SDRs and phones.dl_earfcn = 2850
- Set
The following video clip shows a similar process of editing the enb.conf file. Although the presenter is using srsRAN's own EPC, the parameters being changed (mcc, mnc, dl_earfcn) are identical.
DragonOS FocalX Detecting Cell Simulators: DIY Kit & Proof of Concept with srsRAN and RayHunter
This video shows the practical steps of editing the srsRAN eNB configuration file. Observe which parameters the presenter changes.
Watch from 03:02 to 03:42. You will see the presenter modifying the MCC, MNC, and downlink_uarfcn in the enb.conf file, reinforcing the changes we just made.
With these files saved, your srsENB is now configured to announce the correct network ID and connect to your Open5GS MME.
A Note on Subscriber Data
We have now aligned the network components. However, for a phone to actually connect and get service, one final piece is needed: a subscriber profile.
The full authentication process requires three elements to be in sync:
- Network Configuration:
srsENBandOpen5GSagree on the PLMN ID. (✓ We did this). - SIM Card: A physical or virtual SIM card programmed with a unique identity (IMSI) and a secret key (
K). - Core Network Database (HSS): The Open5GS HSS must have a database entry for that same IMSI, containing the same secret key.
When a phone tries to connect, the MME will query the HSS for the user's credentials. If the user doesn't exist in the HSS, the authentication will fail. We will tackle programming the SIM card and adding the subscriber to the HSS in the next two lessons.
Conclusion
Great work today. You've moved from having two separate software packages to having a configured, interconnected system. You've edited the essential configuration files to bridge the gap between your radio access network (srsENB) and your core network (Open5GS).
Key Takeaways:
- The S1 interface is the critical link between an eNodeB and the core network.
- For a successful S1 connection, the PLMN ID (MCC/MNC), Tracking Area Code (TAC), and MME IP address must be consistent between
srsENBandOpen5GS. Open5GScore network components are configured via YAML files in/etc/open5gs/, withmme.yamlbeing key for our setup.srsRANcomponents are configured via files in~/.config/srsran/, primarilyenb.confandrr.conf.- A functioning network requires both network component configuration and matching subscriber data on the SIM and in the HSS.
Preview of the Next Lesson:
Our network infrastructure is now configured, but it has no users. In the next lesson, you will create a user by programming a test SIM card with a custom IMSI and key using pySim. This will give our software-defined phone (srsUE) the identity and credentials it needs to attempt to join our private network.