Hello! Welcome to the third lesson in our final module on system orchestration.
In the last lesson, we created the Framework class, a central orchestrator that initializes and connects all our system components based on a configuration file. This was a crucial step in transforming our collection of scripts into a cohesive, maintainable application.
Today, we'll leverage that design to implement one of the most vital features of any trading system. Our learning outcome is to implement a "paper trading" mode that simulates order fills without sending them to the broker. This allows for risk-free testing of strategies, rapid iteration, and development without needing a constant connection to the brokerage.
1. Two Flavors of Paper Trading
Before we dive in, it's useful to distinguish between two common approaches to paper trading:
- Broker-Simulated: You send orders to your broker's paper trading account (like the one provided by Interactive Brokers). The broker's servers handle the simulation. This is realistic but requires a live connection and is subject to the broker's simulation rules.
- Self-Hosted Simulation: You build a simulator within your own framework. It intercepts orders before they go to a broker and simulates the fill based on incoming market data. This is what we will build today. It's faster, more flexible for backtesting, and allows your system to run completely offline if you're using historical data.
The video below demonstrates the first approach, using Interactive Brokers' TWS paper trading account. Notice the use of an execute_trades flag to switch trading on and off—a simple but effective pattern.
Build a Python Trading Bot for Algorithmic Trading Using AI | Full Tutorial
Watch this segment from 'Build a Python Trading Bot for Algorithmic Trading' by Ryan O'Connell to see how a system can be toggled between a non-trading and a trading mode using a boolean flag. This illustrates the concept of controlling execution flow.
Watch from 29:04 to 34:46. Pay attention to how the execute_trades variable is changed from False to True to enable live order submission to the IB paper trading account. We will implement a more sophisticated version of this idea.
2. The Configuration Switch
Our Framework class is already designed to be configuration-driven. We can use this to create a clean switch between live and paper trading.
First, let's update our config.yaml to include a new setting:
# config.yaml

# ... other sections

framework:
  mode: 'paper' # or 'live'

# ... rest of the config
Next, we'll modify the _initialize_components method in our Framework class. It will read this mode and conditionally instantiate the correct execution handler. This is a powerful application of the design we established in the last lesson.
# In framework.py, inside the Framework class

    def _initialize_components(self):
        """Instantiates and connects all trading components."""
        print("Initializing components...")
        mode = self.config['framework'].get('mode', 'live') # Default to 'live' if not specified
        print(f"Framework running in '{mode}' mode.")

        # --- Data Handler ---
        self.data_handler = IBKRDataHandler(...)

        # --- Strategies ---
        self.strategies = [...]

        # --- Execution Handler ---
        if mode == 'live':
            self.execution_handler = IBKRExecutionHandler(
                event_queue=self.event_queue,
                config=self.config['execution_handler']
            )
        elif mode == 'paper':
            # We will create this class next!
            self.execution_handler = SimulatedExecutionHandler(
                event_queue=self.event_queue,
                data_handler=self.data_handler, # The simulator needs market data!
                config=self.config['execution_handler']
            )
        else:
            raise ValueError(f"Unsupported framework mode: {mode}")
Notice a key difference: the SimulatedExecutionHandler requires access to the data_handler. This is because to simulate a fill, it needs to know the current market price, which is the responsibility of the data handler.
3. Designing the SimulatedExecutionHandler
The SimulatedExecutionHandler must conform to the same interface as our IBKRExecutionHandler. It will receive SignalEvents from the queue, but instead of constructing and placing an order with a broker, it will simulate the fill and place a FillEvent back onto the queue.
To keep our design clean and professional, we'll adopt a concept used in institutional trading platforms: the Fill Model.
The QuantConnect documentation on 'Trade Fills' provides an excellent overview of this concept. A Fill Model is an object whose sole responsibility is to determine the price, quantity, and timing of an order fill, simulating the behavior of a real brokerage.
Read the 'Introduction' and 'Model Structure' sections. This will help you understand that a Fill Model is a modular component that encapsulates the logic for how different order types are filled. We will implement a simple version of this.
Our SimulatedExecutionHandler will own a fill model. When it receives a signal, it will:
- Generate an
OrderEvent. - Pass this order to its fill model.
- The fill model will use current market data to decide if the order is filled and at what price.
- If filled, the model returns a
FillEvent. - The
SimulatedExecutionHandlerthen puts thisFillEventonto the main event queue.
This architecture is highly extensible. You can start with a simple fill model and later swap it for a more complex one that simulates slippage or partial fills, without changing the SimulatedExecutionHandler itself.
The video below demonstrates a very simple, self-contained paper trading loop. While its implementation is basic, the core logic is what we will formalize: check data, decide on a trade, and simulate the result internally.
How To Build a Simple SIMULATED Cryptocurrency Live Trading Bot with Python [PAPER TRADING]
This clip from 'How To Build a Simple SIMULATED Cryptocurrency Live Trading Bot' by Algovibes shows the essential logic of a paper trading bot. It pulls data, checks conditions, and simulates trades by updating internal state variables.
Watch from 14:44 to 21:08. Observe how the script tracks whether it is 'in a position' with a boolean and stores a 'buy_price'. This is the essence of simulation. Our event-driven system will make this more robust, but the principle is the same.
4. Implementing a Simple ImmediateFillModel
Let's build a basic SimulatedExecutionHandler and its associated fill model. Our first model will be an ImmediateFillModel, which assumes market orders fill instantly at the current bid/ask price.
First, the SimulatedExecutionHandler:
# In a new file, e.g., execution/simulated.py

import asyncio
from event import SignalEvent, OrderEvent, FillEvent

class SimulatedExecutionHandler:
    """
    A simulated execution handler that processes signals, simulates order
    fills, and generates FillEvents without connecting to a broker.
    """
    def __init__(self, event_queue, data_handler, config):
        self.event_queue = event_queue
        self.data_handler = data_handler
        self.fill_model = ImmediateFillModel(self.data_handler)
        print("SimulatedExecutionHandler initialized.")

    async def on_signal(self, signal_event: SignalEvent):
        """
        Handles a SignalEvent by creating an OrderEvent and simulating its fill.
        """
        # In a real system, you'd generate a more detailed order
        order = OrderEvent(
            symbol=signal_event.symbol,
            quantity=signal_event.quantity,
            direction=signal_event.direction
        )

        # Simulate the fill
        fill_event = self.fill_model.simulate_fill(order)

        if fill_event:
            print(f"SIMULATED FILL: {fill_event.direction} {fill_event.quantity} {fill_event.symbol} @ {fill_event.fill_price}")
            await self.event_queue.put(fill_event)

    async def run(self):
        # The simulated handler doesn't need a persistent connection,
        # so its run() method might be empty or just log that it's active.
        print("SimulatedExecutionHandler is running.")
        # In a more complex simulator, this could be a loop processing order updates.
        while True:
            await asyncio.sleep(1)

    async def disconnect(self):
        print("SimulatedExecutionHandler disconnected.")
Now, the ImmediateFillModel. This is where the core simulation logic resides. For credit spreads, accurately simulating the fill price by "crossing the spread" is critical.
# In the same file or a separate fill_models.py

class ImmediateFillModel:
    """
    A simple fill model that assumes immediate fills at the current
    bid (for sells) or ask (for buys).
    """
    def __init__(self, data_handler):
        self.data_handler = data_handler

    def simulate_fill(self, order_event: OrderEvent) -> FillEvent:
        """
        Simulates a fill for a given order.
        For options spreads, this requires fetching prices for multiple legs.
        """
        # For simplicity, let's assume order_event.symbol is a tuple for spreads
        # e.g., ('SPX-20231215-5200-P', 'SPX-20231215-5190-P')

        # This is a simplified example for a bull put spread (sell high-strike, buy low-strike)
        # A robust implementation would handle various strategies and order types.

        if order_event.direction == "SELL_SPREAD": # Selling a bull put spread for a credit
            short_put_symbol, long_put_symbol = order_event.symbol

            short_put_price_data = self.data_handler.get_latest_price(short_put_symbol)
            long_put_price_data = self.data_handler.get_latest_price(long_put_symbol)

            if not short_put_price_data or not long_put_price_data:
                print(f"WARN: No market data to simulate fill for {order_event.symbol}")
                return None

            # Sell the short put at the BID
            credit_from_short = short_put_price_data['bid']
            # Buy the long put at the ASK
            debit_for_long = long_put_price_data['ask']

            net_credit = credit_from_short - debit_for_long
            fill_price_per_spread = net_credit * 100 # Standard option multiplier

            return FillEvent(
                symbol=order_event.symbol,
                quantity=order_event.quantity,
                direction=order_event.direction,
                fill_price=fill_price_per_spread,
                commission=2.00 # Example commission
            )

        # TODO: Implement logic for 'BUY_SPREAD' (e.g., closing the position)
        # TODO: Implement logic for bear call spreads

        return None
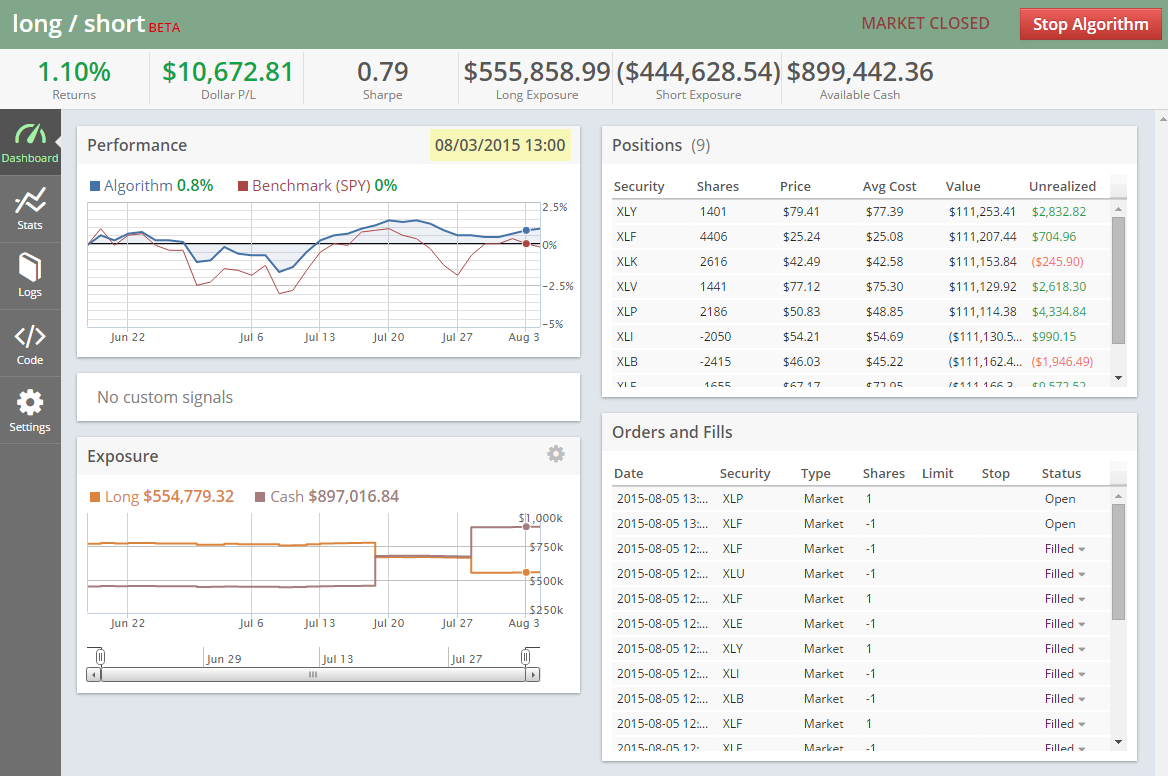
When this FillEvent is processed, your strategy's on_fill method will update its state, just as if a real trade had occurred. This creates a complete, self-contained feedback loop, perfect for testing. The output would be a series of fill confirmations, similar to what you'd see on a real trading platform dashboard.
Test your understanding!
You are implementing the simulation for a bear call spread (sell a call, buy a higher-strike call). Your SignalEvent is to SELL_SPREAD. The market data is:
- Short Call (lower strike): Bid=2.10, Ask=2.15
- Long Call (higher strike): Bid=1.10, Ask=1.15
To realistically simulate selling this spread for a credit, which prices do you use and what is the net credit per share?
Show answer
To sell the spread, you:
- Sell the short call, so you get the Bid price: $2.10.
- Buy the long call, so you pay the Ask price: $1.15.
The net credit is the difference: $2.10 - $1.15 = $0.95 per share. The FillEvent would reflect this price.
Conclusion
In this lesson, we successfully added a critical piece of infrastructure to our trading framework: a self-hosted paper trading mode. By leveraging our configuration-driven design, we can easily switch between live execution and safe, fast simulation.
Key Takeaways:
- A paper trading mode can be implemented via a configuration flag (
mode: 'paper') that conditionally loads aSimulatedExecutionHandler. - The
SimulatedExecutionHandlerintercepts order signals and uses a Fill Model to simulate their execution based on live market data. - A simple
ImmediateFillModelprovides a solid starting point by simulating fills at the current bid/ask prices, which is essential for realistically modeling transaction costs like the bid-ask spread. - This design creates a complete, internal feedback loop (
Signal->Order->Fill), allowing the entire system to run and be tested without any external brokerage connection or financial risk.
Preview of the Next Lesson:
Our framework is now powerful, but it runs silently in the background. How do we interact with it? In our next lesson, we will develop a command-line interface (CLI) to start, stop, and monitor the trading system's status. This will give us the hands-on control needed to manage our trading bot effectively.