Hello! Welcome to the penultimate lesson of our course. We are now in the final stages of bringing our entire trading system together.
In our last session, we implemented a crucial feature: a "paper trading" mode. This allows our Framework class to run its logic, generate signals, and simulate order fills without any financial risk, all driven by a simple switch in our configuration file. Our system can now operate in both a simulated and a (soon-to-be-activated) live environment.
However, a running system isn't very useful if you can't control or observe it. This lesson addresses that gap. Our learning outcome is to develop a command-line interface (CLI) to start, stop, and monitor the trading system's status. A CLI is the professional standard for managing server-side applications like ours, enabling automation, remote operation, and scriptable control.
1. Choosing the Right Tool for the Job: argparse vs. click
Python's standard library includes the argparse module for creating CLIs. It's capable but can become verbose, especially when dealing with nested commands (like git status or docker ps).
For a more modern, efficient, and developer-friendly experience, we will use Click. It's a third-party library that uses decorators to make CLI development intuitive and scalable. Its design encourages creating composable, well-structured applications, which is exactly what we need.
To get a sense of Click's elegance, you can contrast it with the more procedural style of argparse. While you don't need to study argparse in detail, the first few minutes of the anthonywritescode video on argparse (resource ID LINK) illustrate its boilerplate structure, which Click largely eliminates.
2. Structuring Your CLI Application
We'll build our CLI around three primary commands: start, stop, and monitor. Click's "groups" are perfect for this. A group is a special command that can have other commands attached to it.
Build AWESOME CLIs With Click in Python
To understand the fundamentals of Click, watch this excellent video by ArjanCodes. It will walk you through setting up a project and defining commands, arguments, and options using decorators.
Watch from 02:42 to 15:22. This covers: Setting up a project with an entry point. The core concepts of commands, arguments, and options. How to use click.group to create a main command that can have subcommands attached to it. This is the exact pattern we will use.
Making It a Real Command
Instead of running our script like python cli.py start, we want to create a proper, installable command named tradesys (or similar) that you can run from anywhere in your terminal. This is achieved by defining an entry point in your project's pyproject.toml file.
The process involves organizing your project files and defining metadata, including the script that the tradesys command should execute.
Click and Python: Build Extensible and Composable CLI ...
This Real Python article provides a comprehensive guide to Click, including how to package your application. We'll focus on the section that explains setting up a pyproject.toml file.
Read the section titled 'Preparing a Click App for Installation and Use'. Pay close attention to the project layout and the contents of the pyproject.toml file, especially the [project.scripts] table. This is the key to turning our Python script into a real command-line tool.
Following this structure, we'll create a cli.py file for our main commands.
# cli.py
import click
import asyncio

# We will import our main Framework class from a different module
# from framework import Framework

@click.group()
def cli():
    """
    A command-line interface for managing the options trading framework.
    """
    pass

@cli.command()
@click.option('--config', default='config.yaml', help='Path to the configuration file.')
def start(config):
    """Initializes and starts the trading framework."""
    click.echo(f"Starting framework with config: {config}")
    # In the next step, we will add the logic to run the framework.

    # framework = Framework(config_path=config)
    # try:
    #     asyncio.run(framework.run())
    # except KeyboardInterrupt:
    #     click.echo("\nCaught interrupt signal. Shutting down...")
    #     asyncio.run(framework.shutdown())


@cli.command()
def stop():
    """Signals the running framework to perform a graceful shutdown."""
    click.echo("Sending shutdown signal to framework...")
    # Logic to signal a shutdown will be added here.


@cli.command()
def monitor():
    """Displays a live status of the trading framework."""
    click.echo("Launching live monitoring dashboard...")
    # Logic for the monitoring dashboard will be added here.


if __name__ == '__main__':
    cli()
3. Implementing start and stop
The start command is our entry point to launch the system. The stop command needs a way to communicate with the process started by start. A full-blown inter-process communication (IPC) system using sockets or signals can be complex. We'll use a simpler, robust, and OS-agnostic method: a signal file.
startcommand: It will instantiate and run theFramework. The framework's main event loop will be modified to periodically check for the existence of a specific file (e.g.,.stop_request).stopcommand: Its only job is to create this.stop_requestfile.
Let's refine our implementation.
start command logic (in cli.py):
The start command will simply launch the framework. We'll assume the Framework class is updated to handle the stop signal file and KeyboardInterrupt (Ctrl+C).
# In cli.py, inside the 'start' function
from framework import Framework # Assuming your main class is here

# Load config, instantiate framework, etc.
framework = Framework(config_path=config)
try:
    # This will block until the framework exits
    asyncio.run(framework.run())
except KeyboardInterrupt:
    click.echo("\nCtrl+C detected. Initiating graceful shutdown...")
    # The graceful shutdown logic itself will be the focus of our next lesson
    # asyncio.run(framework.shutdown())
finally:
    click.echo("Framework has been shut down.")
stop command logic (in cli.py):
This command is very simple. It just creates an empty file.
# In cli.py, inside the 'stop' function
from pathlib import Path

STOP_FILE = Path(".stop_request")

if not STOP_FILE.exists():
    STOP_FILE.touch()
    click.echo("Shutdown signal sent. The framework will stop after the current event cycle.")
else:
    click.echo("Shutdown signal has already been sent.")
The Framework.run() method would then need a small addition to its main loop:
# In framework.py, inside the Framework.run() async method
...
while True:
    if self.stop_requested_file.exists():
        print("Stop file detected. Initiating shutdown...")
        break # Exit the main loop

    # ... existing event processing logic ...
...
# Call the full shutdown procedure after the loop
await self.shutdown()
self.stop_requested_file.unlink(missing_ok=True) # Clean up the file
4. Building a Live Monitoring Dashboard with rich
The monitor command should provide a real-time view of the system. A simple print statement won't do; we want a professional, continuously updating dashboard that stays in one place in the terminal. The rich library is perfect for this.

Specifically, we'll use rich.Live to create a display that automatically refreshes.
The rich documentation on 'Live Display' explains how to create terminal UIs that update in place. This is the core mechanism for our monitoring tool.
Read the 'Basic usage' and 'Updating the renderable' sections. Understand how Live is used as a context manager and how you can either update the content of a renderable (like a table) or replace it entirely with the live.update() method.
To make this work, we need a way for the monitor command to get status information from the running framework. Again, we can use a simple file-based approach. The Framework will periodically write its state (positions, P&L, system status) to a status.json file. The monitor command will read this file in a loop and use rich to display it.
Framework update (in framework.py):
Add a method to periodically dump status.
# In Framework class
import json

async def _dump_status(self):
    while True:
        status_data = {
            'timestamp': datetime.utcnow().isoformat(),
            'mode': self.mode,
            'positions': self.portfolio.get_positions_summary(), # Assume portfolio has such a method
            'pnl': self.portfolio.get_current_pnl()
        }
        with open('status.json', 'w') as f:
            json.dump(status_data, f, indent=4)

        await asyncio.sleep(5) # Update every 5 seconds

# This task would be started in the Framework.run() method
# asyncio.create_task(self._dump_status())
monitor command implementation (in cli.py):
This command reads the status file and renders it.
# In cli.py, add these imports
import time
import json
from rich.live import Live
from rich.table import Table
from rich.console import Console

# In the 'monitor' function
def generate_table(status_data: dict) -> Table:
    """Generate a Rich table from status data."""
    table = Table(title="Trading Framework Status")
    table.add_column("Metric", style="cyan")
    table.add_column("Value", style="magenta")

    table.add_row("Timestamp", status_data.get('timestamp', 'N/A'))
    table.add_row("Mode", status_data.get('mode', 'N/A'))
    table.add_row("Overall P&L", f"${status_data.get('pnl', 0.0):.2f}")

    # Display positions
    positions = status_data.get('positions', {})
    if positions:
        pos_table = Table(title="Open Positions")
        pos_table.add_column("Symbol")
        pos_table.add_column("Quantity")
        pos_table.add_column("Avg Price")
        for symbol, pos in positions.items():
            pos_table.add_row(symbol, str(pos['quantity']), f"${pos['avg_price']:.2f}")

        # We can't directly embed a table, so we'll just format it as a string for simplicity
        # A more advanced layout would use rich.Layout
        table.add_row("Positions", str(positions))
    else:
        table.add_row("Positions", "No open positions")

    return table

with Live(generate_table({}), refresh_per_second=1, screen=True) as live:
    while True:
        try:
            with open('status.json', 'r') as f:
                data = json.load(f)
            live.update(generate_table(data))
            time.sleep(1)
        except FileNotFoundError:
            live.update(Table(title="Waiting for status.json..."))
            time.sleep(1)
        except json.JSONDecodeError:
            live.update(Table(title="Error reading status.json..."))
            time.sleep(1)
        except KeyboardInterrupt:
            break
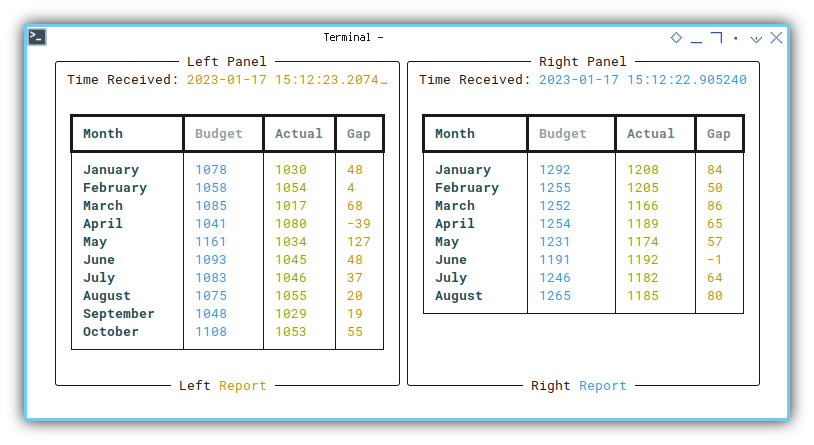
This will produce a beautiful, full-screen dashboard that updates in real-time, giving you an immediate, professional view into your system's health.
Test your understanding!
You want to add a new command tradesys config show to your CLI. Using the concepts from click, how would you structure your code to achieve this? You have a main cli group.
Show answer
You would create another click.group() for config and attach it to the main cli group. Then, you'd add a show command to the config group.
# In cli.py

@click.group()
def cli():
    pass

# Create the new group
@click.group()
def config():
    """Commands for managing configuration."""
    pass

# Attach the command to the new group
@config.command()
def show():
    """Displays the current configuration."""
    click.echo("Showing config...")
    # Logic to read and print config.yaml

# Attach the new group to the main cli group
cli.add_command(config)

# ... other commands like start, stop ...
This demonstrates the composable nature of click for building complex CLIs.
Conclusion
In this lesson, you've built the command and control center for your trading framework. By creating a CLI, you've transformed a collection of Python scripts into a manageable, professional application.
Key Takeaways:
- Click provides a powerful and elegant way to build structured CLIs using decorators for commands, options, and groups.
- Packaging your application with a
pyproject.tomlfile creates an installable command, making your tool easy to use. - A CLI with
start,stop, andmonitorcommands provides the essential lifecycle management for an automated system. - Simple file-based signaling (
.stop_request,status.json) is a robust and platform-independent way to handle communication between separate command invocations. - The
richlibrary can be used to create sophisticated, live-updating monitoring dashboards directly in the terminal.
Preview of the Final Lesson:
Our CLI can now send a shutdown signal. In our final lesson, we will implement the other side of that contract: a graceful shutdown procedure to manage pending orders and open positions safely upon exit. This is the last step in making our trading system "foolproof."