Introduction
Hello! Congratulations on completing your first major project, from initial sculpting to a final, thoughtful critique. You've built a strong foundation in the direct, hands-on manipulation of digital clay, a process very similar to physical sculpture.
Now, we're shifting gears to explore a different, but equally powerful, side of 3D creation. This new module, "Hard-Surface Foundations with Modifiers," is dedicated to building the clean, precise forms needed for the mechanical and architectural objects you're interested in.
Today's lesson introduces the core concept that makes this possible. The learning outcome is to explain the concept of non-destructive modeling using the modifier stack. We'll explore a new way of working in Blender that is less like carving stone and more like following a recipe—a recipe you can change at any time.
1. A New Way of Working: Destructive vs. Non-Destructive
So far, your work in Sculpt Mode has been what we call a destructive workflow. When you use the Clay Strips brush to add form or the Scrape brush to plane a surface, you are directly changing the mesh's vertices. Like chipping away at a block of marble, the change is permanent. You can undo it, but you can't easily tweak the fourth brush stroke you made after you've made a hundred more.
For hard-surface modeling, we often use a non-destructive workflow. This approach involves giving Blender a set of instructions (like "mirror this," "thicken this," "smooth this") that it applies to your base mesh on the fly. You never touch the final geometry directly; you just edit the instructions or the simple base mesh, and the complex final result updates automatically.
To start, let's get a clear definition of this concept. The following article provides a great overview.
How modifiers work in Blender, an overview
The article 'How modifiers work in Blender, an overview' from Artisticrender.com provides a solid introduction to the topic. It clearly contrasts the traditional modeling you're familiar with against this new, non-destructive approach.
Please read the first section of the article, down to (but not including) 'How do Blenders modifier stack work?'. Focus on the distinction it makes between the destructive workflow of Edit Mode and the non-destructive workflow that modifiers enable.
This non-destructive power comes from Modifiers. They are found in the Properties panel, under the tab with a blue wrench icon.
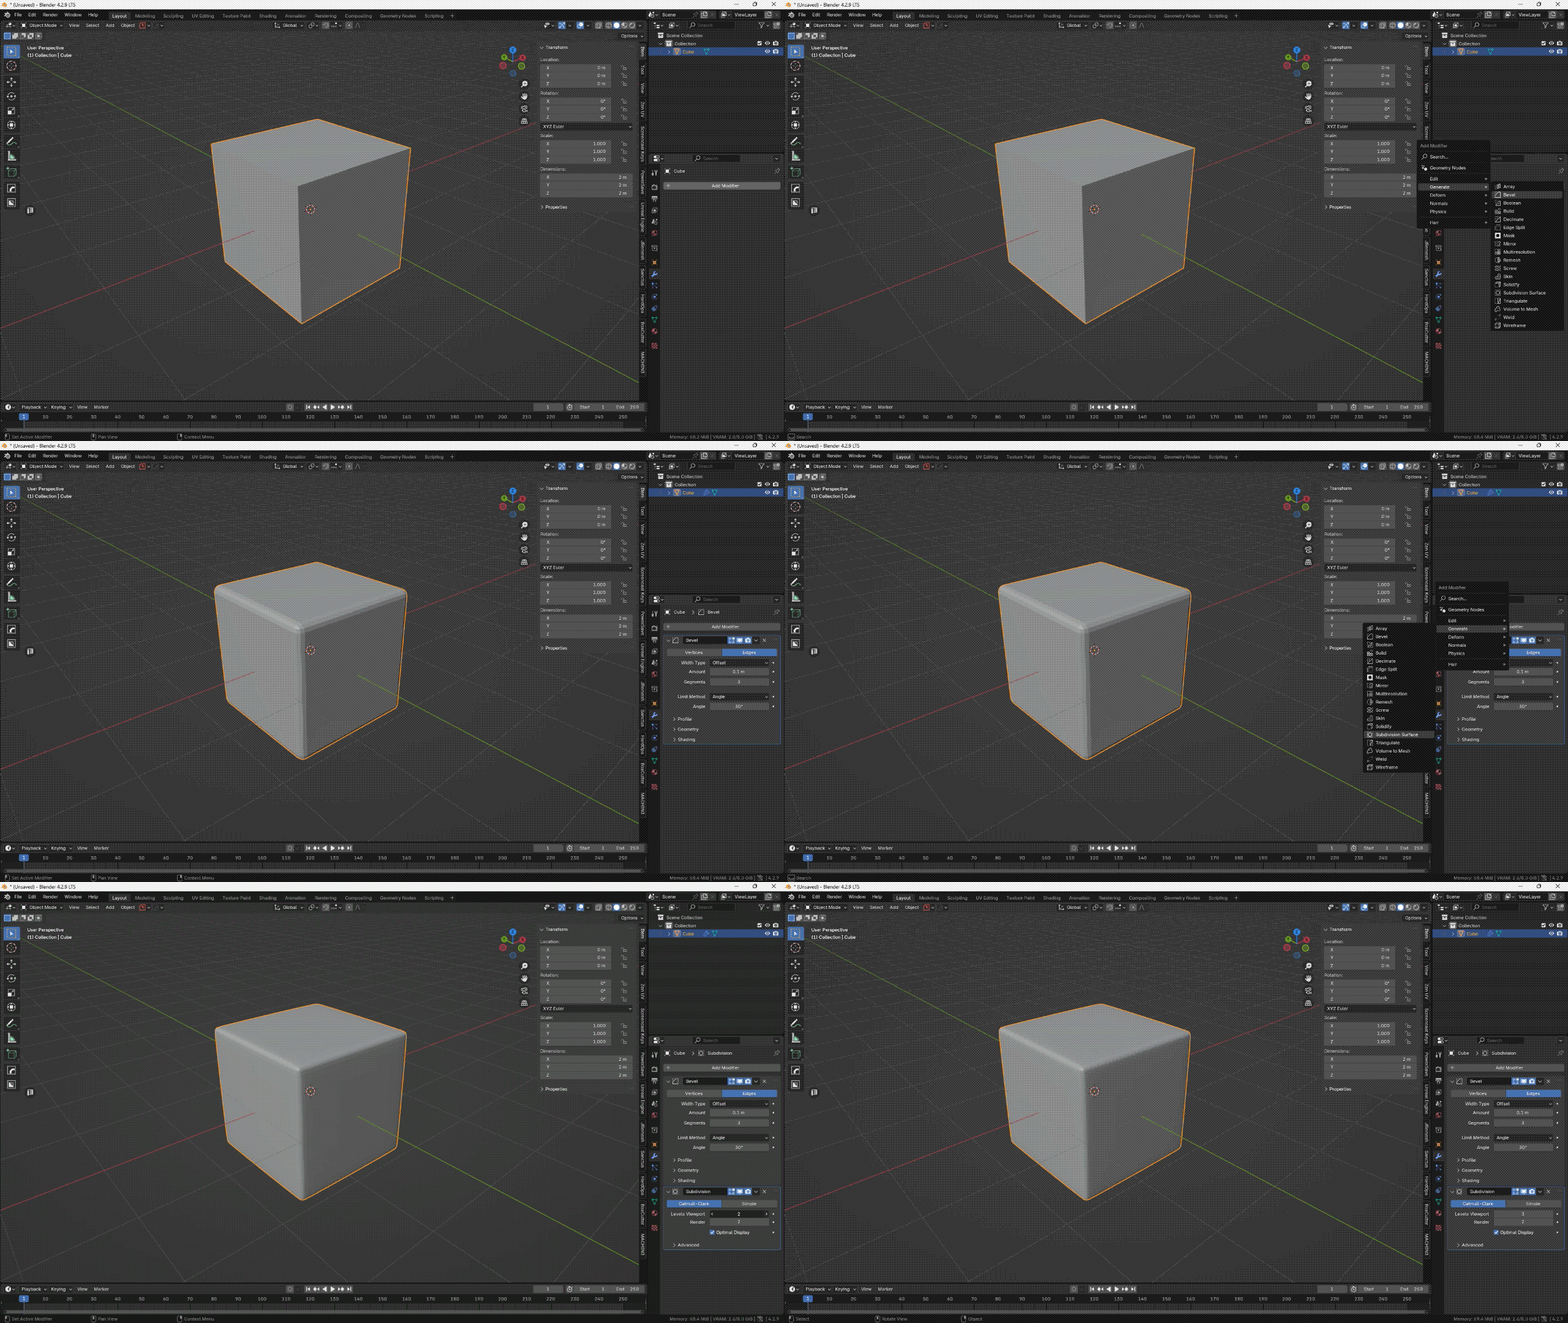
Let's also hear it explained in this introductory video.
Modifiers for Beginners (Blender Tutorial)
The video 'Modifiers for Beginners' by Ryan King Art offers a clear, practical introduction to what modifiers are and why they're so useful.
Watch the first 30 seconds of the video, where the creator introduces the concept of modifiers and their non-destructive nature.
2. The Modifier Stack: A Recipe for Your Model
You can add multiple modifiers to a single object. They are organized in a list called the modifier stack. Blender processes this list from top to bottom. This is the "recipe" metaphor: the first instruction is at the top, the second instruction is applied to the result of the first, and so on.
The order of these instructions is critically important. Changing the order can dramatically change the final result.
The official Blender Manual has a very clear, concise explanation of this.
Introduction to Modifiers - Blender Manual
The Blender Manual is the definitive source of information. This section explains the modifier stack and uses a classic example to show why order matters.
Please read the section titled 'The Modifier Stack'. Pay close attention to the two images comparing the results of applying a Mirror and a Subdivision Surface modifier in a different order.
Seeing this in action makes the concept click. The next video segment demonstrates exactly what the Blender Manual described, and then shows how you can build up very complex shapes by stacking multiple modifiers.
Modifiers for Beginners (Blender Tutorial)
Let's return to the 'Modifiers for Beginners' video. These segments clearly demonstrate the importance of stack order and the power of combining modifiers.
Please watch the following three segments from the video: Reorganizing the Stack (09:13 - 09:58): This shows you the mechanics of reordering modifiers. Stack Order Example (44:05 - 45:34): This is a live demonstration of the Mirror/Subdivision example. Watch how dragging the modifier up or down completely changes the object's form. Stacking Multiple Modifiers (42:12 - 44:15): This shows how you can combine several modifiers (Mirror, Subdivide, Wireframe) to create an intricate result that would be very difficult to model by hand.

Hands-On: Test the Stack Order
Let's make this tangible.
- Open Blender and add a standard UV Sphere (
Shift + A> Mesh > UV Sphere). - Go to the Modifier Properties (blue wrench icon).
- Click
Add Modifierand choose Subdivision Surface (under the "Generate" column). This will make the sphere smoother. You can see the original cage in Edit Mode (Tabkey). - Now, add a second modifier: Displace.
- In the Displace modifier's settings, click
+ Newto create a new texture. - Click the icon at the far right of the texture slot (looks like two sliders) to go to the Texture Properties.
- Change the
Typefrom 'Image or Movie' to 'Clouds'. - Go back to the Modifier Properties. Your sphere should now look bumpy.
- Now, in the modifier stack, use the grid of dots on the top-right of the Displace modifier to drag it above the Subdivision Surface modifier.
Notice the difference?
- When Subdivision is first, you create a very smooth, high-resolution sphere and then displace it. The bumps are fine and detailed.
- When Displace is first, you displace the original low-resolution sphere, creating large, blocky bumps, and then you smooth out that blocky result.
Feel free to experiment with the Strength on the Displace modifier or the Levels Viewport on the Subdivision modifier in both stack orders to see how they interact.
3. Making it Permanent: Applying a Modifier
The non-destructive workflow is flexible, but sometimes you need to "bake" the results into actual geometry. For example, you might want to start sculpting on a complex shape you've created with modifiers. This action is called applying a modifier.
When you apply a modifier, its effects become permanent, the modifier is removed from the stack, and the object's base mesh is updated. You are converting the procedural recipe into a destructible piece of digital clay.
Modifiers for Beginners (Blender Tutorial)
The final concept for today is 'applying'. This last clip from the 'Modifiers for Beginners' video explains how and why you would do this.
Watch the segment on applying modifiers (10:20 - 11:23). Notice that to apply a modifier, you must be in Object Mode, and that after applying it, the geometry is real and can be edited or sculpted on directly.
Applying modifiers is a one-way street. It's best to save it for when you are absolutely sure you are done with the procedural stage of your design. A common professional workflow is to keep a version of your file with the modifiers active, and then save a separate version where you apply them to continue with sculpting or texturing.
Conclusion
In this lesson, you've been introduced to a fundamentally new approach to 3D modeling. This procedural, non-destructive workflow is the backbone of hard-surface design in Blender and gives you incredible flexibility to experiment and refine your ideas.
Key Takeaways:
- Non-destructive modeling uses procedural operations (modifiers) that don't permanently alter your object's base geometry. This contrasts with destructive workflows like sculpting.
- The Modifier Stack is a list of instructions that Blender follows from top to bottom to generate the final shape of your object.
- The order of modifiers in the stack is crucial and can completely change the final result.
- Applying a modifier makes its effect permanent, converting the procedural result into real, editable geometry. This is a destructive action that cannot be easily undone.
Next Steps
Now that you understand the theory behind the modifier stack, we can start putting it into practice. In the next lesson, we'll dive into one of the most essential modifiers for hard-surface modeling: the Mirror modifier. You'll learn how to use it to efficiently model symmetrical objects, cutting your workload in half and ensuring perfect symmetry for your mechanical and architectural forms.