Introduction
Welcome to our next lesson! In our previous session, you learned about the core concept of non-destructive modeling and the modifier stack. You saw how modifiers act like a recipe, allowing you to build complex forms from simple objects without making permanent changes.
Today, we will apply that knowledge by exploring one of the most fundamental and powerful tools for creating hard-surface models: the Mirror modifier. The learning outcome for this lesson is to use the Mirror modifier to efficiently model symmetrical hard-surface base shapes.
Many objects you might want to create—whether mechanical parts, architectural elements, or even characters—are symmetrical. The Mirror modifier saves a tremendous amount of time and ensures perfect accuracy by letting you model only one half of an object while Blender automatically creates the other.
1. The Basics of Mirroring
The Mirror modifier, as its name suggests, creates a mirrored copy of your mesh across a specific axis. The key to understanding how it works lies in the concept of the object's origin point—that small orange dot that marks the object's center. By default, the modifier uses this origin point as the center of the mirror plane.
Let's begin with a video that demonstrates how to set this up.
Modifiers for Beginners (Blender Tutorial)
The video 'Modifiers for Beginners (Blender Tutorial)' by Ryan King Art provides an excellent introduction. This first segment will show you how to add the modifier and how it interacts with your mesh in Edit Mode.
Please watch the segment from 01:46 to 04:57. Focus on these key steps: How the mesh is prepared by deleting one half in Edit Mode. Where to find and add the Mirror modifier. How edits made to the original geometry are instantly reflected on the mirrored side. The importance of the object's origin point as the center of the mirror.
As you saw, the workflow is straightforward: you model one side, and the other side is created for you. This is the essence of efficient symmetrical modeling.

Mini-Challenge: Your First Mirror
Let's try this yourself.
- Open Blender and start with the default cube.
- Press
Tabto enter Edit Mode. - We need to cut the cube in half. Press
Ctrl + Rto add a loop cut. Hover your mouse over the cube until a yellow vertical loop appears in the middle, then left-click once, and right-click once to place it exactly in the center. - Make sure you are in X-Ray mode (top right of the viewport, or
Alt+Z) so you can select vertices on both the front and back of the cube. - Select all the vertices on one side (e.g., the left side).
- Press
Xand choose Vertices to delete them. You should now have half a cube. - Press
Tabto return to Object Mode. - Go to the Modifier Properties (blue wrench icon) and add a Mirror modifier.
The cube should now look whole again. Go back into Edit Mode, select a vertex or face on the side you kept, and move it with the G key. You'll see the mirrored side update in real-time.
2. Controlling the Mirror
Now that you understand the basic principle, let's explore the essential settings that give you precise control over the mirror effect.
Axis and Clipping
You can mirror your object on the X, Y, or Z axis, or even multiple axes at once. This is useful for creating objects with radial symmetry, not just bilateral symmetry.
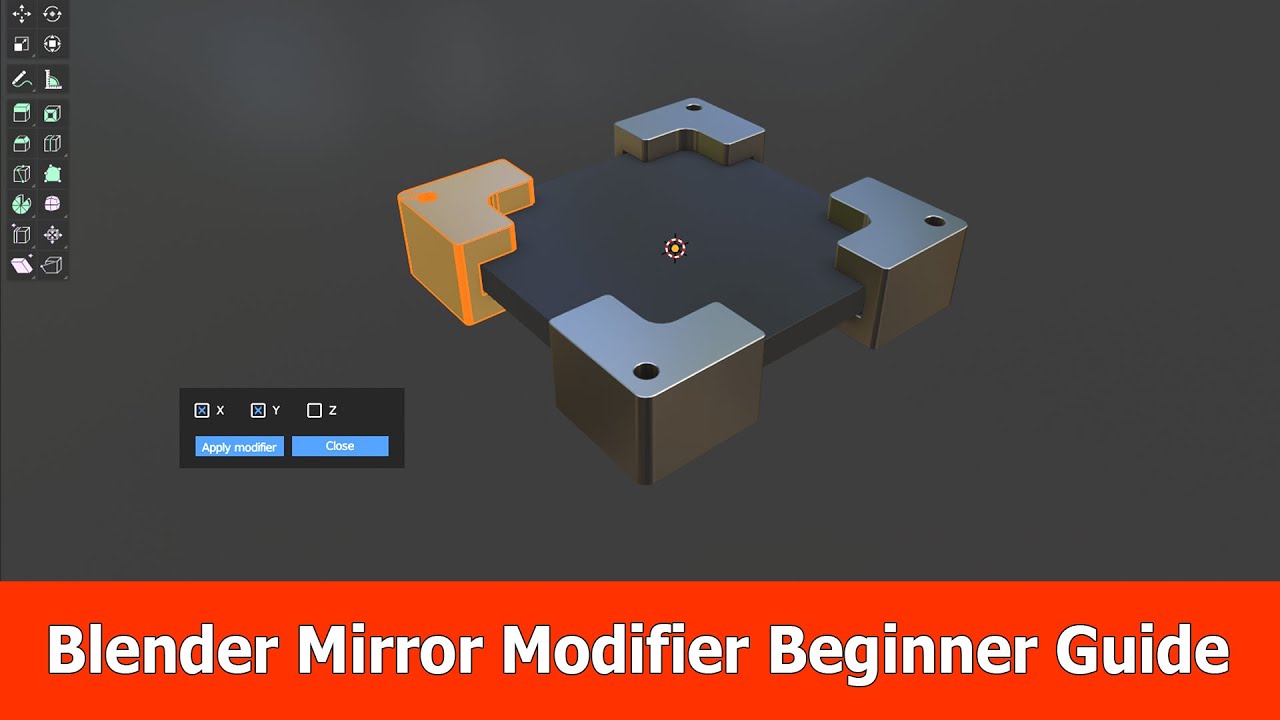
One of the most important settings is Clipping. When enabled, it prevents vertices from moving past the mirror plane. This effectively "glues" the two halves together at the center, creating a single, continuous surface.
Modifiers for Beginners (Blender Tutorial)
Let's return to the 'Modifiers for Beginners' video. This next clip explains how to use different axes and demonstrates the crucial 'Clipping' function.
Please watch these two clips: Axes (04:57 - 06:57): Observe how you can mirror across multiple axes to build a complex shape from just 1/8th of the original mesh. Clipping (11:23 - 12:03): Pay close attention to what happens when 'Clipping' is turned on versus off. This is a setting you will use constantly.
Using a Mirror Object
Sometimes, you don't want to mirror an object around its own center. For instance, you might be modeling a wheel on one side of a car and need to mirror it to the other side, using the car's body as the center. For this, you can specify a Mirror Object. Blender will then use the origin of that other object as the mirror plane. An "Empty" object is often used for this purpose, as it's an invisible object that serves only as a point of reference.
Blender Beginner Tutorial – Mirror Modifier
The video 'Blender Beginner Tutorial – Mirror Modifier' from Blender Academy provides a very clear explanation of using an external object to control the mirror plane.
Watch the segment from 07:30 to 11:30. The video demonstrates using both an 'Empty' and a 'Circle' as the Mirror Object. This gives you a powerful way to control symmetry in a larger scene without having to move your object's own origin point.
3. Practical Workflow: Modeling a Symmetrical Mesh
Let's combine these concepts in a practical exercise. A common workflow is to take an existing object, delete half of it, add a Mirror modifier, and then begin editing. This ensures your starting point is perfectly symmetrical.
The following exercise uses Blender's "Monkey" primitive (named Suzanne), which is a great subject for this because it has clear symmetrical features. While it's an organic form, the principles are identical for the hard-surface objects you're interested in.
Blender Beginner Tutorial – Mirror Modifier
This final video from Blender Academy will walk you through a complete, practical example from start to finish. I encourage you to follow along in Blender.
Watch and follow along from 13:50 to 19:43. The key steps are: Adding the Monkey mesh. Switching to an orthographic front view and wireframe mode to precisely select one half of the mesh. Deleting the selected faces. Adding the Mirror modifier and enabling Clipping. Making symmetrical edits in Edit Mode using Proportional Editing (a tool you may recall from our sculpting lessons).
This workflow—cut, mirror, then model—is a cornerstone of efficient 3D modeling for any symmetrical object.
Conclusion
You have now learned how to use one of the most essential modifiers in Blender. By modeling only half of an object, you not only work faster but also guarantee the perfect symmetry that is critical for hard-surface and mechanical designs.
Key Takeaways:
- The Mirror modifier creates a non-destructive, symmetrical copy of your mesh.
- Mirroring occurs across the object's origin point by default, but you can specify a different Mirror Object for more complex setups.
- You can mirror across the X, Y, and Z axes, either individually or simultaneously.
- Enabling Clipping is vital for merging the two halves into a seamless mesh at the center.
- A common workflow is to delete half of an object, add the Mirror modifier, and then begin editing the remaining half.
Next Steps
With the Mirror modifier, you can now efficiently create symmetrical base shapes. But what if you want to cut clean holes into those shapes or fuse them with other objects? In our next lesson, we will explore Boolean modifiers. You'll learn how to use objects to add to, subtract from, and intersect with each other, opening up a whole new world of hard-surface modeling possibilities.