In our previous lesson, we assembled the essential "skeleton" of a webpage using the five foundational tags. You now have a complete, albeit simple, index.html file. Today, we'll add a crucial detail to that structure: the language declaration.
This lesson focuses on the lang attribute and why it's one of the first things you should add to any HTML document. You will learn how to set your page's primary language and understand why this simple step is fundamental for accessibility and search engine optimization. It may seem like a small detail, but it has a significant impact on how machines—from screen readers to search crawlers—interpret your content.
Why Declaring a Language Matters: A Lesson in Accessibility
Before we dive into the code, it’s important to understand why we’re doing this. The primary reason is web accessibility, which is the practice of designing and building websites that can be used by everyone, regardless of disability.
To get a better sense of why this is so important, let's watch a short video that introduces the concept of web accessibility.
Web Accessibility Guidelines in About 7 Minutes
This video from GoDaddy Pro provides an excellent overview of web accessibility and its core principles.
Watch from the beginning to understand the challenges some users face, and pay special attention to the segment from this timestamp, where the presenter highlights the importance of identifying the document's primary language.
As the video explains, one of the key guidelines for an "understandable" website is to declare its language. But what does that mean in practice?
Imagine a screen reader, a type of assistive technology used by visually impaired individuals to have web content read aloud. If the screen reader doesn't know whether the page is in English, French, or Japanese, it has to guess the pronunciation. This can lead to a frustrating and confusing experience.
For example, the English word "resume" (to continue) is spelled identically to the French word "résumé" (a summary of work experience), but they are pronounced very differently. Without a language declaration, a screen reader might pronounce the sentence "Please submit your résumé" incorrectly, making it difficult to understand. By explicitly setting the language, you tell screen readers exactly which set of pronunciation rules to use, ensuring a clear and accurate experience for all users.
The lang Attribute: Syntax and Usage
The tool for declaring the language of your document is the lang attribute. An attribute, as we briefly touched on in a previous lesson, is a piece of extra information added to an HTML tag. The lang attribute is placed inside the opening <html> tag.
Its basic syntax is:<html lang="en">
Here, en is the standard two-letter code for English. These codes are defined by the ISO 639-1 standard.
You can also be more specific by adding a region or country code, separated by a hyphen. This is useful for specifying dialects, like American English vs. British English.
en-US: American Englishen-GB: British Englishes-ES: Spanish (from Spain)es-MX: Spanish (from Mexico)
The following image breaks down the structure of an <html> tag with a language and country code.
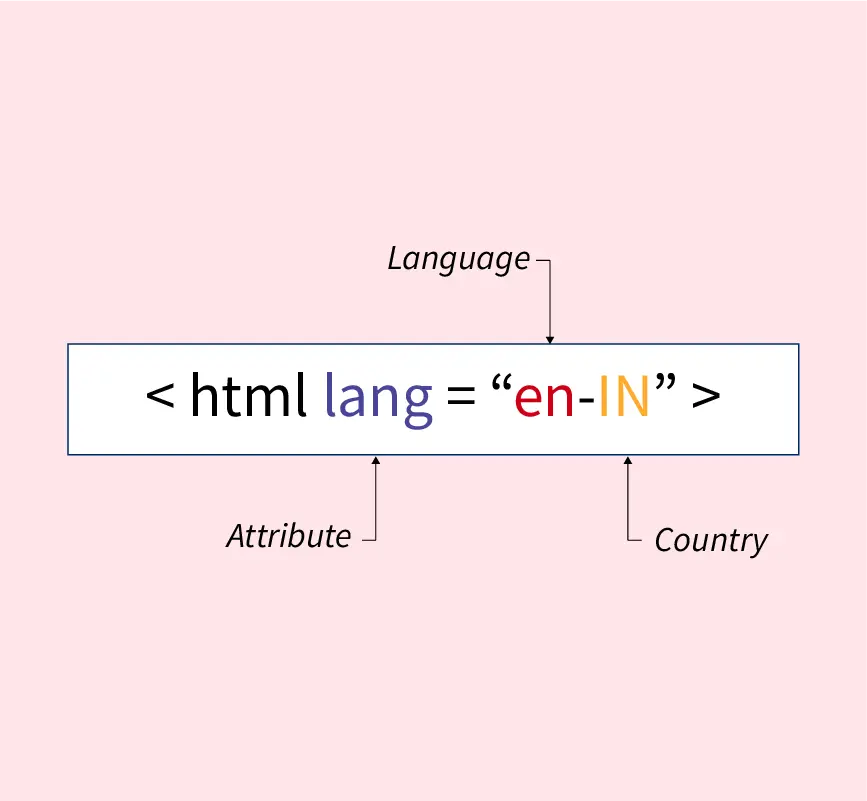
For a detailed look at the lang attribute, including more examples and its benefits, the following resource is very helpful.
HTML Lang Attribute: Syntax, Usage, and Examples
This article from Mimo provides a concise yet thorough guide to using the lang attribute effectively.
Please read the article, focusing on these parts: Start with the section "How to Use" to solidify your understanding of the syntax for both basic and regional codes. Next, read the sections on accessibility and search engines to see the two main benefits of using the attribute. Finally, review the best practices at the end of the article.
Your Turn: Update Your Webpage
Now it's time for a quick, practical exercise. You're going to apply what you've just learned to the index.html file you created in our last lesson.
- Open your
index.htmlfile in your code editor. - Find the opening
<html>tag at the top of the file. - Modify it by adding the
langattribute to declare the page's language as English.
Your file's structure should now look like this:
<!DOCTYPE html>
<html lang="en">
  <head>
    <title>My First Web Page</title>
  </head>
  <body>
    <h1>Hello, World!</h1>
    <p>This is my very first webpage, built from scratch.</p>
  </body>
</html>
Save the file. While this change won't produce any visible difference in your browser, it's a critical update under the hood that makes your page more robust and accessible. It's a professional habit you should adopt for every page you create.
Conclusion
In this lesson, you've added an essential piece of information to your HTML document's structure. By setting the lang attribute, you've made your page more accessible to users of assistive technologies and more understandable to search engines.
Key Takeaways:
- The
langattribute is added to the<html>tag to declare the primary language of the page content. - Its primary purpose is to improve web accessibility, particularly for screen readers that need to know how to pronounce words correctly.
- It also helps search engines categorize and serve content to users based on their language preferences.
- The standard format uses language codes (e.g.,
"en") and optional region codes (e.g.,"en-US"). - Setting the
langattribute is a fundamental best practice in modern web development.
Now that we've established the language of our document, our next step will be to define its character encoding. In the upcoming lesson, we'll explore the <meta charset="UTF-8"> tag, another crucial piece of metadata that ensures all text and symbols on your page display correctly across the globe.