Welcome to the second module of your journey to becoming a backend engineer. In the first module, we rebuilt your Python foundations, culminating in an introduction to Object-Oriented Programming. Before we dive into more advanced Python concepts, we need to master the primary environment where a backend developer lives and works: the Linux command line.
As a backend engineer, especially at a startup like Infilect, you won't always have a graphical user interface. You'll be connecting to cloud servers, deploying applications, automating scripts, and managing databases—all through a text-based terminal. Proficiency with the command line is not just a nice-to-have skill; it's a fundamental requirement for efficiency and control.
This lesson will equip you with the essential skills for this environment. We'll focus on the core learning outcome: navigating and manipulating the file system using the Linux command-line interface. You'll learn how to find your way around, create and organize files and directories, and perform the basic operations that form the building blocks of more complex tasks.
1. The Command Line: Your Development Cockpit
The command-line interface (CLI), or "terminal," is a powerful text-based program for interacting with your computer's operating system. It might seem intimidating compared to a visual desktop, but it offers far greater speed, precision, and automation capabilities.
When you open a terminal, you're greeted by a prompt. This is the system's way of saying it's ready for your command. The prompt typically shows your username, the computer's name (hostname), and your current location in the file system.
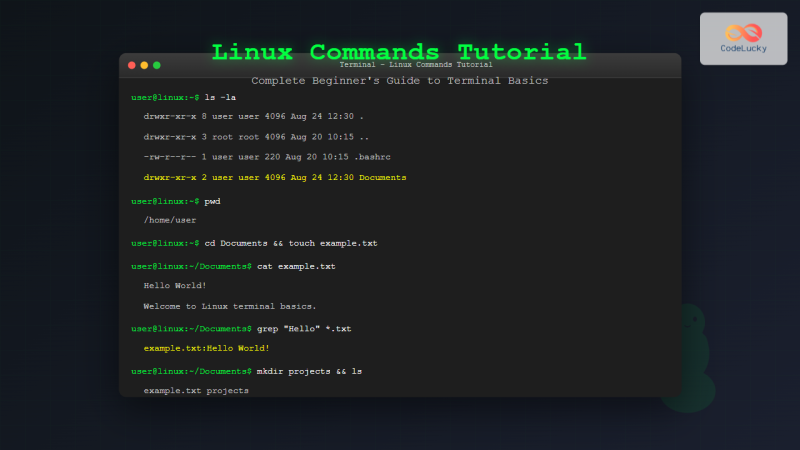
Your starting point is usually your home directory, represented by a tilde symbol (~). This is your personal workspace where you have full permission to create and manage your files.
To begin, let's learn the three most fundamental commands for navigation. The following video gives a quick, practical demonstration of the prompt, the home directory, and your first navigation commands.
This clip from Nathan Backman's "Basic Linux Navigation" video provides an excellent visual introduction to the terminal prompt, the concept of the home directory, and the essential commands for moving around.
Watch these key segments: The Prompt: This part explains what the different parts of the prompt mean, especially the tilde (~) for your home directory. Listing Contents: Here, you'll see the ls command in action. Changing Directories: This segment introduces the cd command to move into a directory and shows how the prompt updates to reflect your new location.
2. Finding Your Way: pwd, ls, and cd
Navigating the file system from the command line relies on three core commands:
pwd(print working directory): Tells you exactly where you are right now.ls(list): Shows you the contents (files and directories) of your current location.cd(change directory): Moves you to a different directory.
The following reading from an Ubuntu tutorial provides a more detailed, step-by-step guide through these commands and the foundational concepts of the file system structure.
The Linux command line for beginners
This guide provides a friendly and thorough introduction to the command line. We will focus on the sections that establish your sense of location and movement within the file system.
Please read the following parts of the tutorial: Start at section 3, "Opening a terminal". This will introduce your very first command, pwd. Continue with the subsection "A sense of location," which explains the concept of a working directory. Read the rest of that subsection to learn the cd command and the special .. syntax for moving to a parent directory. Stop just before the "Relative and absolute paths" heading.
3. Absolute vs. Relative Paths: Your File System's GPS
When you use cd, you need to tell it where to go. You can do this in two ways: using an absolute path or a relative path. This is one of the most critical concepts to master.
-
An Absolute Path specifies a location starting from the very top of the entire file system, known as the root directory (
/). An absolute path always begins with a/.- Example:
cd /home/your_username/projectswill take you to theprojectsdirectory regardless of where you currently are.
- Example:
-
A Relative Path specifies a location relative to your current working directory. It does not start with a
/.- Example: If you are in
/home/your_usernameand runcd projects, it will take you to/home/your_username/projects. If you run the same command from/etc, it will fail because there is noprojectsdirectory inside/etc.
- Example: If you are in
To make navigation easier, the shell provides a few essential shortcuts:
| Shortcut | Meaning | Example |
|---|---|---|
/ |
The root directory | cd / (Go to the top level) |
~ |
Your home directory | cd ~ or just cd (Go home) |
. |
The current directory | mv file.txt . (Move file here) |
.. |
The parent directory | cd .. (Go up one level) |
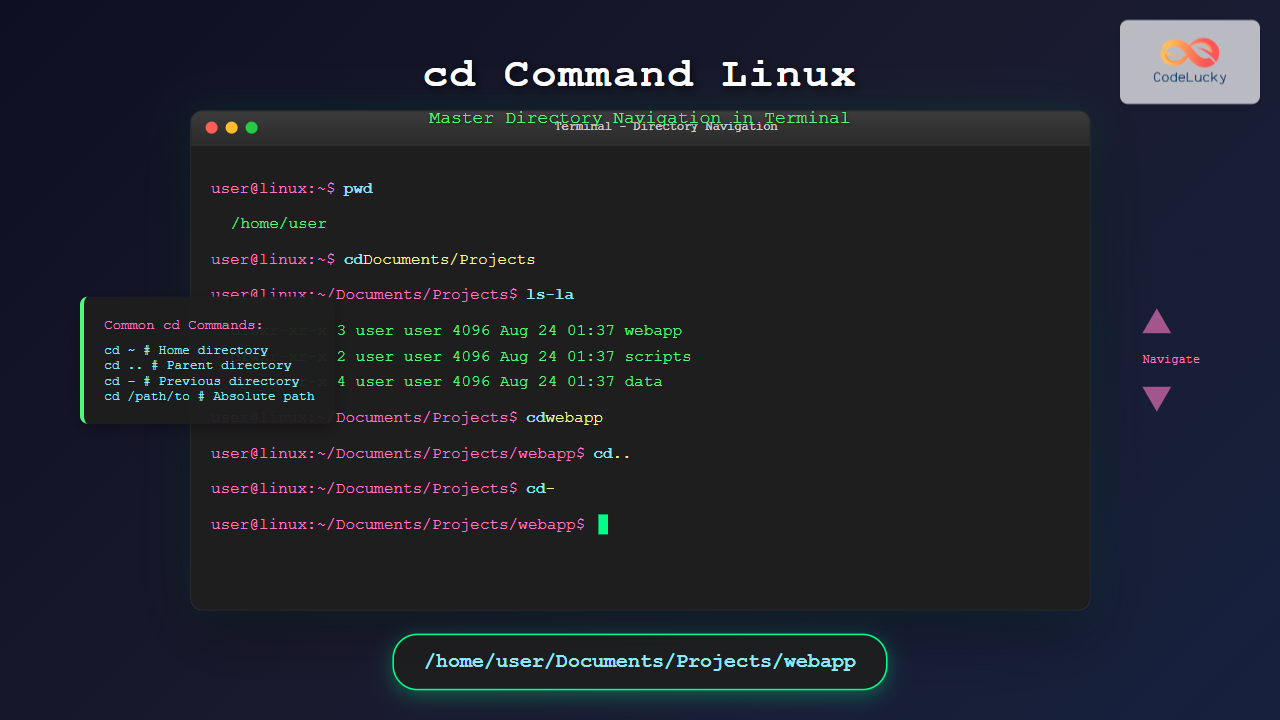
Let's return to the Ubuntu tutorial to solidify your understanding of these path types.
The Linux command line for beginners
This section of the tutorial clearly explains the distinction between relative and absolute paths and introduces the ~ shortcut.
Find the subsection titled "Relative and absolute paths" and read it carefully. Try running the example commands at the end to see how your prompt changes.
4. Creating and Manipulating Your Workspace
Now that you can navigate, it's time to start creating and managing your own files and directories.
Creating Directories and Files
mkdir(make directory): Creates a new directory.mkdir my_projectcreates a directory namedmy_project.- To create nested directories all at once, use the
-p(parents) flag:mkdir -p my_project/src/components.
touch: Creates a new, empty file. If the file already exists, it updates its modification timestamp without changing the content.touch README.mdcreates an empty file namedREADME.md.
Viewing File Content
cat(concatenate): Prints the entire content of a file to the terminal. It's useful for short files.less: A "pager" that lets you view large files one screen at a time. Use the arrow keys to scroll and pressqto quit.
Copying, Moving, and Renaming
cp(copy): Copies files or directories.cp source.txt destination.txtcreates a copy of a file.- To copy a directory and its contents, you must use the
-r(recursive) flag:cp -r project_a/ project_b/.
mv(move): Moves a file or directory to a new location. This same command is also used for renaming.- Moving:
mv report.txt documents/moves the file into thedocumentsdirectory. - Renaming:
mv old_name.txt new_name.txtrenames the file within the same directory.
- Moving:
Deleting Files and Directories
Warning: Commands that delete files on Linux are permanent. There is no "Recycle Bin" or "Trash". Use these commands with extreme caution.
rm(remove): Deletes a file.rm temporary_file.txt.
rmdir(remove directory): Deletes an empty directory. It will fail if the directory contains any files.rm -r: Deletes a directory and everything inside it, recursively. This is a very powerful and dangerous command. Double-check your path before using it.
The following reading provides concise examples for all these manipulation commands.
Linux Navigation and File Management
This tutorial from DigitalOcean offers a very clear and practical guide to file and directory manipulation.
Read the entire section titled "File and Directory Manipulation". It covers creating, moving, renaming, copying, and removing files and directories with easy-to-follow examples.
5. Hands-On Practice
Theory is one thing, but muscle memory is built by doing. Open your terminal and follow these steps to put everything you've learned into practice.
-
Navigate Home:
- Run
cdto ensure you are in your home directory (~).
- Run
-
Create a Project Structure:
- Create a new directory for this course:
mkdir infilect_course. - Now create a nested directory structure inside it in one command:
mkdir -p infilect_course/module_2/cli_practice.
- Create a new directory for this course:
-
Navigate and Create Files:
- Change your current directory to the
cli_practicefolder using a singlecdcommand with a relative path. - Verify your location with
pwd. - Create two empty files:
touch notes.txtandtouch script.py. - List the contents to see your new files:
ls.
- Change your current directory to the
-
Organize Your Files:
- Create a new directory for your notes:
mkdir text_files. - Move
notes.txtinto thetext_filesdirectory:mv notes.txt text_files/. - Check the contents of both the current directory and
text_filesto confirm the move:lsand thenls text_files.
- Create a new directory for your notes:
-
Copy and Rename:
- Copy
script.pyto a backup file:cp script.py script.py.bak. - Rename the original script to be more descriptive:
mv script.py setup_script.py. - List the contents again to see the changes:
ls. You should seesetup_script.pyandscript.py.bak.
- Copy
-
Clean Up:
- Delete the backup file:
rm script.py.bak. - Navigate back to your home directory:
cd ~. - Now, delete the entire
infilect_coursedirectory and all its contents. Be very careful with this command:rm -r infilect_course. - Run
lsone last time to confirm it's gone.
- Delete the backup file:
Conclusion
Congratulations on completing your first essential step into the backend developer's environment. You now have the foundational skills to navigate and manage files directly from the command line—a skill you will use every single day in your career.
Key Takeaways:
- The command line is a powerful and essential tool for server management and automation.
- Navigation is done with
pwd(where am I?),ls(what's here?), andcd(let's go somewhere). - Paths can be absolute (from the root
/) or relative (from your current location.or..). - File manipulation commands allow you to
mkdir,touch,cp,mv, andrmyour files and directories with precision. - Flags like
-r(recursive) and-p(parents) modify how commands behave, adding power and flexibility.
In our next lesson, we will build directly on this foundation. We'll explore Git, the version control system that allows developers to track changes to their code, collaborate with teams, and manage project history—all from the command line.