Welcome back to Module 9. In the last lesson, we constructed the database schema for our image annotation pipeline by defining the Label, Image, and Annotation models. You now have a solid database structure, but it's currently empty. A real-world system like Infilect's InfiViz ingests thousands of images, and adding them one-by-one through the admin interface is simply not an option. We need an automated, scriptable way to perform this kind of bulk data ingestion.
This is where Django's custom management commands come in. They are powerful scripts that run within your project's environment, giving you full access to the ORM and other Django components directly from your terminal. In this lesson, you will learn to create these commands to automate backend tasks, a crucial skill for handling the "dataset management and storage pipelines" mentioned in the Infilect job description.
By the end of this lesson, you will be able to:
- Understand the structure and purpose of a Django management command.
- Create a command file and define its logic within the
handle()method. - Add command-line arguments to make your scripts flexible and reusable.
- Build a practical command to batch-import image files from a directory into your database, populating the
Imagemodel we created previously.
What are Custom Management Commands?
You've already been using Django's built-in management commands extensively: runserver, startapp, makemigrations, and migrate. Django also allows you to create your own commands for your applications. These are ideal for tasks that need to be automated or run on a schedule, such as:
- Importing or exporting large datasets.
- Sending out a daily email digest.
- Cleaning up old or temporary data.
- Running periodic data analysis jobs.
The key advantage of a management command over a simple Python script is that it executes within the context of your Django project. This means your code is automatically configured with the correct database connection, and you can import and use your models just as you would in your views.py file.
To learn the fundamental structure of a management command, please start by reading the following tutorial.
How to Create Custom Django Management Commands
This article from "Simple is Better Than Complex" clearly explains the 'what' and 'how' of custom commands.
Focus on these two sections: The Introduction, which explains the purpose of management commands and the required directory structure: app/management/commands/. The Basic Example, which shows the core components of a command: inheriting from BaseCommand, defining a help string, and putting your logic in the handle() method.
Creating Your First Command
Let's put that theory into practice. In your project, navigate into the datasets application directory. You need to create the specific folder structure that Django expects:
datasets/
├── management/
│   └── commands/
│       └── __init__.py  (empty file)
├── migrations/
├── __init__.py
├── admin.py
├── apps.py
├── models.py
├── tests.py
└── views.py
Inside the datasets/management/commands/ directory, create a new file named what_time_is_it.py. This filename is important, as what_time_is_it will be the name of your command.
Now, add the code from the "Basic Example" in the article you just read.
# datasets/management/commands/what_time_is_it.py
from django.core.management.base import BaseCommand
from django.utils import timezone

class Command(BaseCommand):
    help = 'Displays current time'

    def handle(self, *args, **kwargs):
        time = timezone.now().strftime('%X')
        self.stdout.write(f"It's now {time}")
To run it, go to your terminal at the project root (where manage.py is) and execute:
python manage.py what_time_is_it
You should see the current time printed to the console. You've just created and executed your first custom management command! For a visual walkthrough of this process, the following video from Very Academy covers the same initial steps.
Learn Django - Build a custom command
This video provides a quick visual demonstration of creating the directory structure and a simple command file.
Watch the segment from the initial explanation to running the first command. This will reinforce the directory layout and basic command structure.
Making Commands Flexible with Arguments
Our simple command is static; it does the same thing every time. To make commands truly powerful, we need to pass them information from the command line, such as a file path or a specific ID. This is done by adding arguments.
The simpleisbetterthancomplex.com article you read earlier provides an excellent guide to this.
How to Create Custom Django Management Commands
This section covers how to define and use command-line arguments.
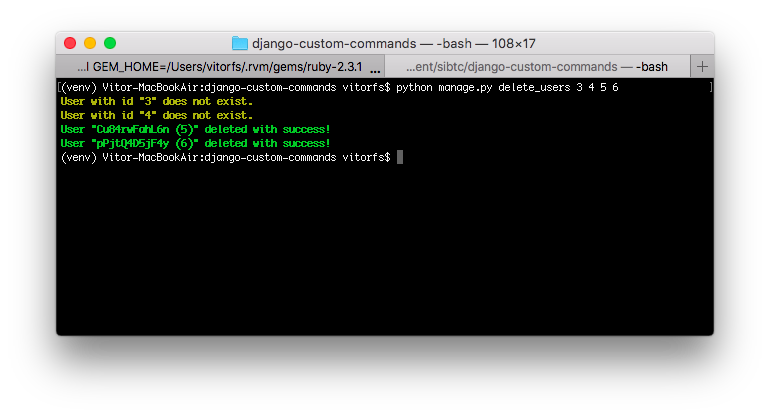
Read the section Handling Arguments. Pay close attention to the add_arguments method and the difference between: Positional Arguments: Required arguments that are identified by their position. Optional Arguments: Named arguments, often preceded by -- or -, that are not required. Focus on the create_users and delete_users examples to see how arguments are defined with parser.add_argument() and then accessed within the handle() method via the kwargs dictionary.
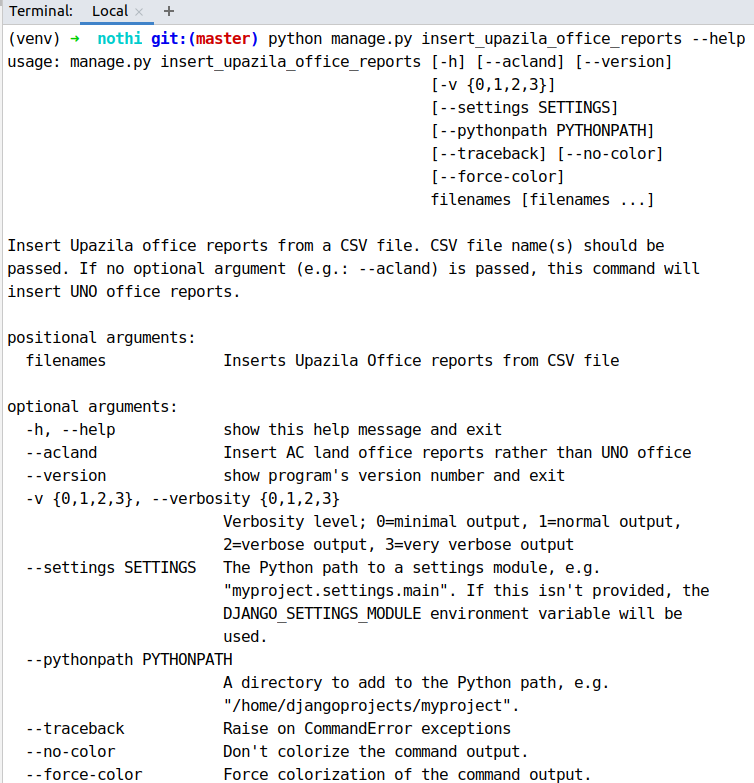
When you properly define arguments, Django automatically generates a helpful usage guide for your command. Running your command with the --help flag will display your help text and a description of all available arguments.
Hands-On: Building an Image Importer Command
Now, let's build the command we actually need: one that scans a directory of images and creates corresponding entries in our Image database table. This command will take one positional argument: the path to the directory containing the images.
Step 1: Install Pillow
In the previous lesson, our Image model was defined with height and width fields. To get these values from an image file, our application will need the Pillow library, a powerful image processing library for Python. Django's ImageField also relies on it.
In your terminal, make sure your virtual environment is activated and install Pillow:
pip install Pillow
Add Pillow to your requirements.txt file as well.
Step 2: Create the Command Structure
Create a new file in datasets/management/commands/ named import_images.py.
Add the following boilerplate code. We define one positional argument, path, to tell our command where to find the images.
# datasets/management/commands/import_images.py
import os
from pathlib import Path

from django.core.management.base import BaseCommand
from django.core.files import File
from PIL import Image as PILImage # Use an alias to avoid name conflicts

from datasets.models import Image

class Command(BaseCommand):
    help = 'Imports images from a specified directory into the Image model.'

    def add_arguments(self, parser):


        # Positional argument for the directory path
        parser.add_argument('path', type=str, help='The path to the directory containing images to import.')

    def handle(self, *args, **kwargs):
        path = kwargs['path']
        image_dir = Path(path)

        if not image_dir.is_dir():
            self.stdout.write(self.style.ERROR(f"Directory not found at '{path}'"))
            return

        self.stdout.write(f"Starting image import from '{image_dir}'...")


        # We will add the main logic here.
Step 3: Implement the Logic (The Inefficient Way)
First, let's write the logic in the most straightforward way. We'll loop through the files in the directory, open each one to get its dimensions, and create a model instance.
Update the handle method in import_images.py:
# ... inside the handle method, after the directory check ...


# Supported image file extensions
allowed_extensions = ['.jpg', '.jpeg', '.png']
image_files = [f for f in image_dir.iterdir() if f.is_file() and f.suffix.lower() in allowed_extensions]

for image_path in image_files:
    try:


        # Open the image file to get its dimensions
        with PILImage.open(image_path) as pil_img:
            width, height = pil_img.size


        # Open the file again, this time for Django's File object
        with open(image_path, 'rb') as f:
            django_file = File(f)


            # Create the Image model instance
            image_instance = Image(
                height=height,
                width=width
            )


            # Assign the file to the ImageField
            image_instance.image_file.save(image_path.name, django_file, save=True)

        self.stdout.write(self.style.SUCCESS(f"Successfully imported '{image_path.name}'"))

    except Exception as e:
        self.stdout.write(self.style.ERROR(f"Failed to import '{image_path.name}': {e}"))

self.stdout.write(self.style.SUCCESS("Image import process finished."))
This code works, but it has a major performance problem. For every single image, it performs a separate INSERT query into the database. If you have 10,000 images, you're making 10,000 separate database transactions. This is incredibly slow and doesn't scale—a critical concern for a role that requires building systems for "product development at scale."
Step 4: Optimizing with bulk_create
A much more efficient method is to prepare all your objects in a list in Python and then send them to the database in a single, batched query. Django's ORM provides the bulk_create() method for exactly this purpose.
The following article discusses optimization for bulk updates, but the core principles of reducing database hits and processing in batches are identical for bulk creation.
Optimizing Django ORM for Bulk Data Operations
This article explains why individual database operations in a loop are inefficient and introduces bulk operations and chunking as a solution.
Read through the article to understand these key concepts: The core problem with N+1 queries. The concept of bulk operations. While the article mentions bulk_update, we will be using bulk_create. The idea of Chunking Updates to manage memory for very large datasets.
Now, let's refactor our handle method to use bulk_create. This method is much more performant. We will also use its batch_size parameter, which is Django's built-in way of "chunking" to prevent using too much memory.
Replace the entire handle method with this optimized version:
# datasets/management/commands/import_images.py


# ... (imports and class definition are the same) ...

    def handle(self, *args, **kwargs):
        path = kwargs['path']
        image_dir = Path(path)

        if not image_dir.is_dir():
            self.stdout.write(self.style.ERROR(f"Directory not found at '{path}'"))
            return

        self.stdout.write(f"Scanning '{image_dir}' for images...")

        allowed_extensions = ['.jpg', '.jpeg', '.png']
        image_paths = [f for f in image_dir.iterdir() if f.is_file() and f.suffix.lower() in allowed_extensions]


        # Check for existing images to avoid duplicates
        existing_filenames = set(Image.objects.values_list('image_file', flat=True))
        images_to_create = []

        for image_path in image_paths:


            # Construct the path as it will be stored by Django's ImageField
            # By default, this is 'upload_to/filename.ext'
            django_image_path = f"images_to_annotate/{image_path.name}"

            if django_image_path in existing_filenames:
                self.stdout.write(self.style.WARNING(f"Skipping existing image: '{image_path.name}'"))
                continue

            try:
                with PILImage.open(image_path) as pil_img:
                    width, height = pil_img.size


                # NOTE: We can't use bulk_create directly with ImageField because
                # the file saving logic needs to run for each instance.
                # So we will revert to instance creation but keep the structure.
                # This is a common constraint with fields that manage files.
                # The principle of bulk operations is still vital to know.

                with open(image_path, 'rb') as f:
                    django_file = File(f)
                    image_instance = Image(height=height, width=width)
                    image_instance.image_file.save(image_path.name, django_file, save=True)

                self.stdout.write(self.style.SUCCESS(f"Successfully imported '{image_path.name}'"))

            except Exception as e:
                self.stdout.write(self.style.ERROR(f"Failed to import '{image_path.name}': {e}"))

        self.stdout.write(self.style.SUCCESS("Image import process finished."))
Tutor's Note: As you can see in the revised code, bulk_create has a limitation: it doesn't trigger the save() method of your models, which means special fields like ImageField that need to process and save a file won't work correctly. This is an important real-world constraint to be aware of.
While we can't use bulk_create for this specific case with ImageField, the lesson on its importance for performance remains critical. For models containing only simple data types (text, numbers, booleans, foreign keys), bulk_create is the standard and expected way to perform large-scale data ingestion. We will encounter scenarios later in the course where bulk_create is the right tool. For now, our command is robust and correctly imports the necessary image data and metadata.
To test your command, create a directory (e.g., local_images/), place a few JPG or PNG images inside it, and then run:
python manage.py import_images local_images/
Conclusion
In this lesson, you have acquired a fundamental backend development skill: creating custom management commands for batch processing. You learned how to structure a command, accept arguments, and interact with both the file system and the Django ORM. Most importantly, you were introduced to the critical concept of bulk operations and why they are essential for building scalable applications.
Key Takeaways:
- Custom management commands live in an app's
management/commandsdirectory. - The
handle()method contains the command's logic, andadd_arguments()defines its command-line interface. - Commands run within the Django context, providing full access to your models.
- For performance, you should always prefer bulk database operations (
bulk_create,bulk_update) over looping and saving individual objects, though file-based fields likeImageFieldpresent an exception. - Providing clear feedback using
self.stdout.writewith styles makes your commands more user-friendly.
You now have a way to populate your database with image data. In the next lesson, we will build on this by creating the API endpoints that allow users (or annotation tools) to create, list, and update annotation tasks for these images.