Welcome to the next lesson in our journey to build a robust dataset management pipeline. In our previous session, you built your first custom management command, import_images, which scanned a directory and ingested image files into your database. This was a crucial first step in automating data ingestion. You also learned about the performance implications of database operations within a loop and why bulk_create is generally preferred, even though it wasn't suitable for our ImageField use case.
Today, we'll tackle a more structured and common data ingestion scenario: importing metadata from a CSV file. Real-world data often arrives in manifest files that describe a large set of items. Learning to parse these files and efficiently load their contents into your database is a core skill for a backend engineer, directly addressing the "dataset management" and "system development at scale" requirements from the Infilect job description.
This lesson will show you how to build a production-ready import script. We will finally get to use bulk_create correctly, and you'll also learn to wrap your database operations in a transaction to guarantee data integrity.
By the end of this lesson, you will be able to:
- Read and parse data from a CSV file using Python's built-in
csvmodule. - Implement a Django management command that accepts a file path as an argument.
- Ensure data integrity during bulk operations using
transaction.atomic. - Use
bulk_createto efficiently import thousands of records from a CSV file into a Django model. - Update your Django models to accommodate new data fields and apply the changes to your database.
The Anatomy of a Data Import Script
A robust data import command generally follows a clear pattern:
- Get Inputs: It needs to know where to find the data. This is typically passed as a command-line argument (e.g., the path to a CSV file).
- Ensure Safety: Any script that modifies data in bulk must be wrapped in a database transaction. This ensures that if any part of the import fails, the entire operation is rolled back, leaving the database in its original, clean state. This "all-or-nothing" principle is fundamental to data integrity.
- Process Data: The script reads the source file (our CSV), parses it row by row, and converts each row into a format suitable for the database—in our case, an instance of a Django model.
- Load Data Efficiently: Instead of saving each object one by one, the script collects all the new objects into a list and uses a single, optimized database command (
bulk_create) to insert them all at once.
We'll follow these exact steps to build our metadata importer.
Pre-computation and Data Enrichment
In the last lesson, our command calculated the width and height of each image on-the-fly. While this works, it can be slow if you're importing tens of thousands of images. A common optimization is to pre-process this information. Often, you'll receive a data file that already contains this metadata, along with other relevant details.
Let's enrich our Image model to store more structured information that might come from such a file.
Task: Update the Image Model
First, open your datasets/models.py file and add two new fields to the Image model: source_id and camera_type.
# datasets/models.py

from django.db import models

# ... other models ...

class Image(models.Model):
    # ... existing fields (id, image_file, height, width) ...

    # New fields for metadata
    source_id = models.CharField(max_length=100, blank=True, null=True, db_index=True)
    camera_type = models.CharField(max_length=50, blank=True, null=True)

    created_at = models.DateTimeField(auto_now_add=True)
    updated_at = models.DateTimeField(auto_now=True)

    def __str__(self):
        return f"Image {self.id}: {self.image_file.name}"
source_id: Could be an identifier from an external system, likestore_A_cam_1, linking the image back to its physical origin. We add adb_index=Truebecause we might want to search or filter by this field frequently.camera_type: Could be categorical data, likefront_facingortop_down.
After adding these fields, apply the changes to your database by running migrations:
python manage.py makemigrations datasets
python manage.py migrate
Your database is now ready to store this new metadata.
Hands-On: Building the Metadata Importer
Now, let's create the management command.
1. Prepare Sample Data
First, create a directory named data in the root of your project (at the same level as manage.py). Inside this data directory, create a file named sample_metadata.csv and add the following content. This file simulates the manifest you might receive.
data/sample_metadata.csv:
filename,source_id,camera_type,width,height
img_shelf_001.jpg,store_A_cam_1,front_facing,1920,1080
img_shelf_002.jpg,store_A_cam_2,top_down,1024,768
img_shelf_003.png,store_B_cam_1,front_facing,1920,1080
img_shelf_004.jpg,store_B_cam_1,front_facing,1280,720
img_shelf_005.jpg,store_C_cam_3,aisle_end,1920,1080
Notice this CSV contains not only the new metadata but also the width and height, meaning we don't have to calculate them ourselves.
2. Create the Command File
Just as you did in the previous lesson, create the necessary file structure. In your datasets app, create a new command file:
datasets/management/commands/import_metadata.py

The correct directory structure for a custom management command, customcommand.py, located inside an app's management/commands folder.
3. Implement the Command Logic
Now, let's add the code to this new file. We will build it up piece by piece, explaining the purpose of each part.
# datasets/management/commands/import_metadata.py
import csv
from django.core.management.base import BaseCommand, CommandError
from django.db import transaction
from datasets.models import Image

class Command(BaseCommand):
    help = 'Imports image metadata from a CSV file into the Image model.'

    def add_arguments(self, parser):
        parser.add_argument('csv_file_path', type=str, help='The path to the CSV file containing image metadata.')

    @transaction.atomic
    def handle(self, *args, **kwargs):
        csv_file_path = kwargs['csv_file_path']
        self.stdout.write(f"Starting metadata import from '{csv_file_path}'...")

        try:
            with open(csv_file_path, mode='r', encoding='utf-8') as csvfile:
                reader = csv.DictReader(csvfile)

                images_to_create = []
                for row in reader:
                    # Construct the path as it will be stored by ImageField's upload_to
                    django_image_path = f"images_to_annotate/{row['filename']}"

                    image_instance = Image(
                        image_file=django_image_path,
                        source_id=row['source_id'],
                        camera_type=row['camera_type'],
                        width=int(row['width']),
                        height=int(row['height'])
                    )
                    images_to_create.append(image_instance)

                # Use bulk_create for efficient batch insertion
                Image.objects.bulk_create(images_to_create, batch_size=500, ignore_conflicts=True)

        except FileNotFoundError:
            raise CommandError(f"File not found at '{csv_file_path}'")
        except Exception as e:
            raise CommandError(f"An error occurred: {e}")

        self.stdout.write(self.style.SUCCESS(f"Successfully imported metadata for {len(images_to_create)} images."))
Let's break down the key components of this script.
Database Transactions
Writing a Custom Management Script in Django | Reintech media
This article from Reintech media explains several advanced features of management commands. We'll focus on database transactions.
Read the section on transactions. It explains how the transaction.atomic() context manager ensures that all operations inside it either complete successfully or are all rolled back if an error occurs.
In our code, we've used @transaction.atomic as a decorator on the handle method. This wraps the entire import process in a single transaction. If your CSV has 10,000 rows and an error occurs on row 9,999, the database will roll back the previous 9,998 inserts. This prevents a partial, corrupted import and is essential for data integrity.
Reading the CSV
We use csv.DictReader, which is a powerful part of Python's standard library. Instead of treating each row as a list of values, it treats each row as a dictionary, where the keys are the column headers from the CSV file (filename, source_id, etc.). This makes the code much more readable and robust, as you can access data by name (row['source_id']) rather than by index (row[1]).
Efficient Bulk Insertion
This is the moment we've been waiting for. We are not dealing with file uploads here, just pure data insertion, which makes bulk_create the perfect tool.
The Fastest Way to Load Data Into Your Django Project using ...
This article by Peter Baumgartner provides an excellent analysis of different data loading strategies.
First, read Method 3: bulk_create to understand what this method does. Then, jump to the Performance Comparison section and look at the dramatic speedup bulk_create (Method 3) provides over a simple loop (Method 1). This is why we use it.
Our script iterates through the CSV, creates Image model instances in memory (without hitting the database), and appends them to the images_to_create list. Only after the entire file is processed does it make a single, highly-optimized call to Image.objects.bulk_create(). This single call inserts all the records.
batch_size=500: For very large files (e.g., millions of rows), this tells Django to perform the inserts in batches of 500, preventing the creation of a single enormous SQL query.ignore_conflicts=True: This is a useful flag (supported by PostgreSQL and SQLite). If you try to insert a row that violates a uniqueness constraint (e.g., you run the script twice with the same data and have auniquefield), it will simply skip that row instead of crashing the whole command.
4. Run and Verify
You are now ready to run your command. From your project's root directory in the terminal, execute:
python manage.py import_metadata data/sample_metadata.csv
You should see the success message.
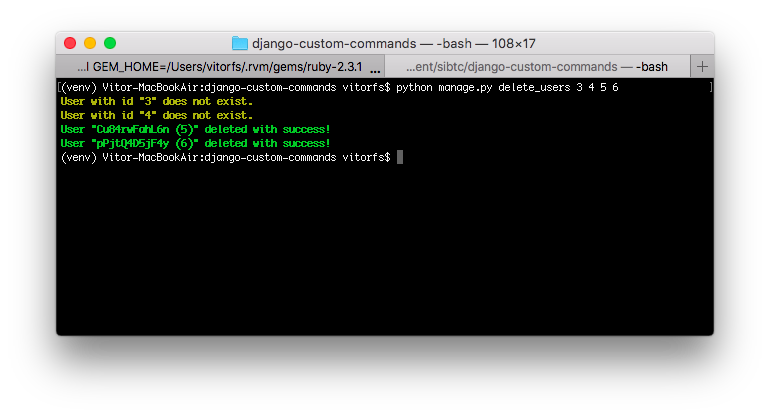
An example of a management command being executed in the terminal. Your import_metadata command will provide similar feedback.
To verify the data was imported, use the Django shell:
python manage.py shell
Then, query your model:
>>> from datasets.models import Image
>>> Image.objects.count()
5
>>> first_image = Image.objects.first()
>>> first_image.source_id
'store_A_cam_1'
>>> first_image.camera_type
'front_facing'
>>> first_image.width
1920
>>> first_image.image_file.name
'images_to_annotate/img_shelf_001.jpg'
As you can see, all the metadata from the CSV has been successfully loaded into your database records.
Conclusion
In this lesson, you've built a production-grade data import script, a task that lies at the heart of many backend systems. You've gone beyond simple loops and learned to write code that is not only correct but also efficient and safe.
Key Takeaways:
- CSV Parsing:
csv.DictReaderis the preferred way to read structured data from CSV files in Python. - Data Integrity: Always wrap bulk data modification operations in
transaction.atomicto prevent partial updates and ensure your database remains in a consistent state. - Performance is Key: For data ingestion,
bulk_createis vastly more performant than creating objects in a loop. It's the standard tool for this job. - Model Evolution: Backend systems evolve. You've seen how to add new fields to your models and create migrations to update your database schema accordingly.
You now have a powerful and scalable way to populate your database with large datasets. In the upcoming lessons, we will shift our focus from data ingestion to data interaction by building the API endpoints that will allow clients to work with this data. Next up, you'll create the DRF endpoints to manage the lifecycle of annotation tasks for these images.