Welcome back! In our last lesson, you successfully created a management command to bulk-import image metadata from a CSV file. You now have a database populated with Image records, each waiting to be part of our dataset pipeline. This was a crucial step in automating data ingestion, a common task for a backend engineer.
Today, we transition from getting data into our system to building the interface for working with that data. We will create the API endpoints that allow users and services to manage annotation tasks. This directly addresses the core requirement from the Infilect job description: "Designs and develops REST APIs" and "experience in dataset annotation pipelines." You will build the API backbone for creating, listing, and updating the status of annotation tasks associated with the images we just imported.
By the end of this lesson, you will be able to:
- Design and implement a Django model to represent an annotation task, including status tracking.
- Create a DRF
ModelSerializerto convert your annotation task data to and from JSON. - Build a complete set of CRUD API endpoints with minimal code using a DRF
ModelViewSet. - Connect your ViewSet to your application's URLs using a
DefaultRouter. - Test and interact with your new API endpoints using DRF's browsable API.
Let's start building the core of our annotation system.
The Magic of ViewSets and Routers
Before we write any code, let's understand a key concept in Django REST Framework that enables rapid API development: ViewSets and Routers. In the past, you might have created separate views for listing items, creating a new item, retrieving a single item, updating it, and deleting it. A ViewSet consolidates all this related logic for a single resource (like our "Annotation Task") into one class. A Router then automatically generates the URL patterns for all those actions. This combination saves you from writing a lot of repetitive boilerplate code.
Viewsets & Routers in Django REST Framework
The "BugBytes" channel has a great conceptual video on this topic. Watch the first couple of sections to understand the "why" behind this powerful pattern.
Focus on these two key ideas: What is a ViewSet? — It explains how a ViewSet is a single class that provides actions like list and create instead of traditional get and post methods. The advantages — This part highlights the two main benefits: combining repeated logic and automating URL configuration with routers.
With that conceptual foundation, let's apply it to our project.
Step 1: Modeling the Annotation Task
First, we need a way to represent an annotation task in our database. This means creating a new Django model. An annotation task needs to be linked to an image, have a status, and hold the actual annotation data.
Open your datasets/models.py file and add the following AnnotationTask model.
# datasets/models.py

from django.db import models
from django.conf import settings # We'll need this for the user


# ... your existing Image model ...
class Image(models.Model):


    # ...
    pass


class AnnotationTask(models.Model):
    """
    Represents a single annotation task for an image.
    """
    class Status(models.TextChoices):
        PENDING = 'pending', 'Pending'
        IN_PROGRESS = 'in_progress', 'In Progress'
        COMPLETED = 'completed', 'Completed'
        REJECTED = 'rejected', 'Rejected'

    image = models.ForeignKey(Image, on_delete=models.CASCADE, related_name='annotation_tasks')
    annotator = models.ForeignKey(settings.AUTH_USER_MODEL, on_delete=models.SET_NULL, null=True, blank=True, related_name='tasks')

    status = models.CharField(
        max_length=20,
        choices=Status.choices,
        default=Status.PENDING,
        db_index=True
    )


    # JSONField is great for storing flexible, unstructured annotation data (e.g., bounding boxes, polygons)
    annotation_data = models.JSONField(null=True, blank=True)

    created_at = models.DateTimeField(auto_now_add=True)
    updated_at = models.DateTimeField(auto_now=True)

    class Meta:
        ordering = ['-created_at']

    def __str__(self):
        return f"Task for Image {self.image.id} ({self.status})"
This model introduces a few important concepts.
Build a Django REST API in 30 Minutes [2026]
The "Tech Insider" tutorial provides a modern and practical guide to building DRF APIs. We'll borrow a clean pattern for defining choices from their example.
In the section Step 4: Define Your Data Models, focus on how they define Status and Priority using TextChoices. This is a built-in Django feature that makes defining and using choices for fields like our status much cleaner and more readable than using tuples. We've used the exact same pattern.
After adding the model, create and apply the database migrations:
python manage.py makemigrations datasets
python manage.py migrate
Step 2: Serializers - The Data Bridge
Now that we have our model, we need a serializer to translate AnnotationTask instances into JSON and vice-versa. Serializers handle both converting your data for output (read operations) and validating incoming data for creation/updates (write operations).

Create a new file, datasets/serializers.py, and add the following code:
# datasets/serializers.py
from rest_framework import serializers
from .models import AnnotationTask, Image

class AnnotationTaskSerializer(serializers.ModelSerializer):
    class Meta:
        model = AnnotationTask
        fields = [
            'id', 'image', 'annotator', 'status',
            'annotation_data', 'created_at', 'updated_at'
        ]
        read_only_fields = ['id', 'annotator', 'created_at', 'updated_at']

    def create(self, validated_data):


        # Automatically assign the logged-in user as the annotator when creating a task
        validated_data['annotator'] = self.context['request'].user
        return super().create(validated_data)
This AnnotationTaskSerializer is a ModelSerializer, which automatically generates fields and validators based on our AnnotationTask model.
fields: Specifies which model fields to include.read_only_fields: Prevents clients from writing to fields that should be set by the server, like theidor timestamps.- We've also overridden the
createmethod slightly to automatically associate the currently authenticated user with any new annotation they create.
Step 3: ViewSets - The API Logic
With the serializer ready, we can create the ViewSet. This class will contain the logic for handling API requests for our AnnotationTask resource.
Open datasets/views.py and add the AnnotationTaskViewSet:
# datasets/views.py
from rest_framework import viewsets, permissions
from .models import AnnotationTask
from .serializers import AnnotationTaskSerializer

class AnnotationTaskViewSet(viewsets.ModelViewSet):
    """
    API endpoint that allows annotation tasks to be viewed or edited.
    """
    queryset = AnnotationTask.objects.all().select_related('image', 'annotator')
    serializer_class = AnnotationTaskSerializer
    permission_classes = [permissions.IsAuthenticated]

    def get_queryset(self):


        # Users should only see their own tasks, unless they are staff
        user = self.request.user
        if user.is_staff:
            return AnnotationTask.objects.all()
        return AnnotationTask.objects.filter(annotator=user)
This is incredibly concise yet powerful. Let's break it down:
viewsets.ModelViewSet: This is the magic class. It automatically provides thecreate(),retrieve(),update(),partial_update(),destroy(), andlist()actions. We get a full CRUD API for free.queryset: The default set of objects for the view. We useselect_relatedto optimize database queries by fetching relatedimageandannotatorobjects in a single trip.serializer_class: Tells the viewset which serializer to use.permission_classes:IsAuthenticatedensures that only logged-in users can access this endpoint.get_queryset(): We override this method to implement business logic. It filters the tasks so that a regular user only sees their own tasks, while a staff user can see all tasks. This is a fundamental security practice.
Step 4: Routers - Configuring the URLs
The final step is to wire our new ViewSet into our project's URL configuration.
First, create a datasets/urls.py file to hold the app-specific routes.
# datasets/urls.py
from django.urls import path, include
from rest_framework.routers import DefaultRouter
from . import views

router = DefaultRouter()
router.register(r'annotation-tasks', views.AnnotationTaskViewSet, basename='annotationtask')

urlpatterns = [
    path('', include(router.urls)),
]
The DefaultRouter will generate the necessary URLs for our AnnotationTaskViewSet:
GET /api/datasets/annotation-tasks/: List all tasks.POST /api/datasets/annotation-tasks/: Create a new task.GET /api/datasets/annotation-tasks/{id}/: Retrieve a specific task.PUT /api/datasets/annotation-tasks/{id}/: Update a specific task.- ...and so on.
Now, include this new URL file in your main project's config/urls.py:
# config/urls.py


# ... other imports
from django.urls import path, include # make sure include is imported

urlpatterns = [
    path('admin/', admin.site.urls),


    # Add this line
    path('api/datasets/', include('datasets.urls')),
]
Step 5: Testing Your API
Let's see our work in action. Start the development server:
python manage.py runserver
Before you test, make sure you have a user account. If you don't, create one:
python manage.py createsuperuser
Now, open your web browser and navigate to http://127.0.0.1:8000/api/datasets/annotation-tasks/. You will be prompted to log in. Use the superuser account you just created.
Once logged in, you will see the Django REST Framework's browsable API.
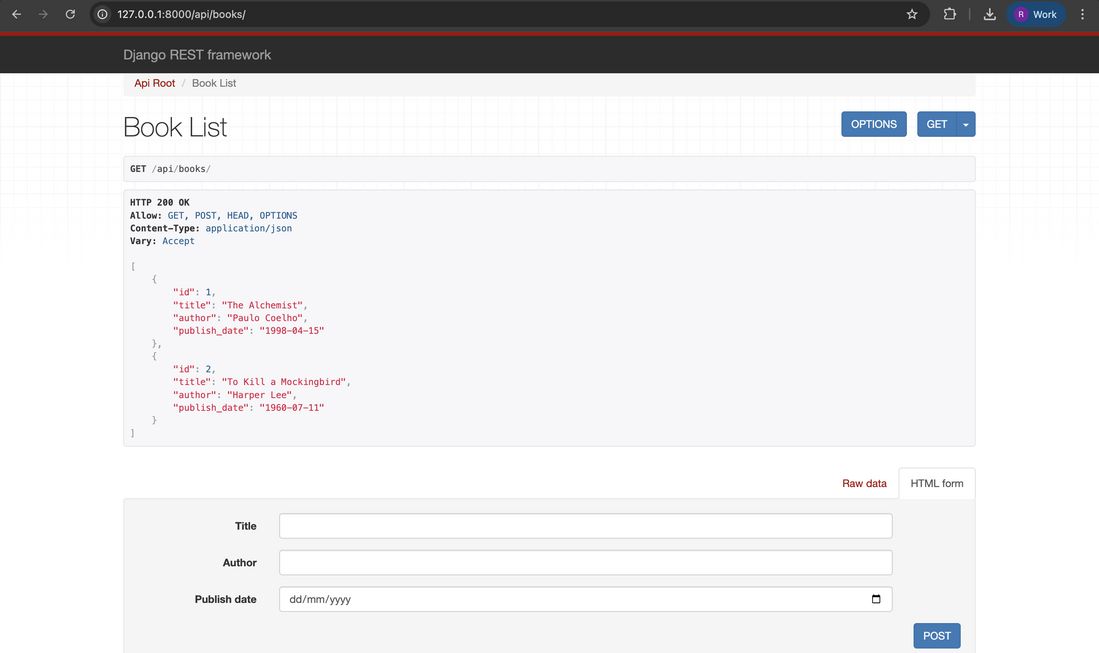
You can now interact with your API:
- List (GET): The page initially shows a list of annotation tasks, which will be empty.
- Create (POST): Scroll down to the HTML form. You only need to provide an
imageID (use one from the images you imported). The other fields will be handled automatically or have defaults. Click "POST". You should see your new task appear in the list. - Retrieve (GET): Click the hyperlink on the
idof the task you just created. This will take you to its detail page (.../annotation-tasks/1/). - Update (PUT/PATCH): On the detail page, scroll down to the form. Change the
statusfrom "pending" to "completed" and click "PUT". The page will refresh showing the updated status.
Conclusion
Congratulations! In just one lesson, you've designed a data model, built a serializer, and created a complete, secure, multi-user CRUD API for managing annotation tasks. You used the powerful abstractions of ModelViewSet and DefaultRouter to achieve this with remarkable efficiency. This Model -> Serializer -> ViewSet -> Router pattern is the backbone of professional DRF development.
Key Takeaways:
models.TextChoicesprovides a clean way to manage field choices like statuses.ModelSerializerbridges the gap between your database models and JSON API representations.ModelViewSetgives you a full set of CRUD operations for a resource with just a few lines of code.DefaultRouterautomatically generates standard, RESTful URL patterns for your viewsets.- Overriding
get_querysetin a viewset is the standard way to enforce per-user data permissions.
Our API is functional, but it's still basic. In the next lesson, we will enhance it by adding powerful features like filtering, searching, and pagination, making it easier for clients to work with large numbers of tasks.